
| NASA/DFRC
Photo No. |
Description | Small | Medium | Large | |
|---|---|---|---|---|---|
 |
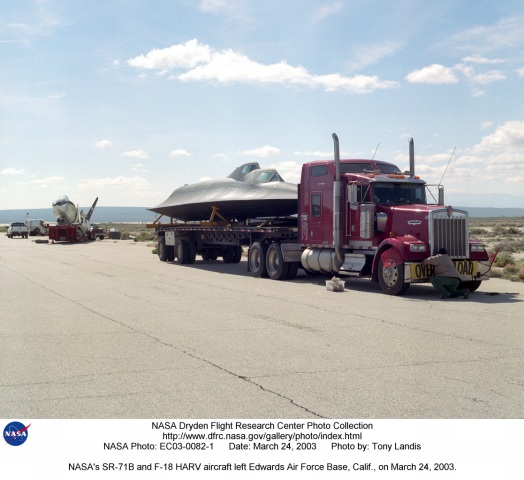
EC03-0082-1 | NASA's SR-71B and F-18 HARV aircraft left Edwards Air Force Base, Calif., on March 24, 2003 - photo by Tony Landis | alternate |
1117x1023
alternate |
alternate |
 |
EC99-45065-1 | SR-71A #844(980) taking off with test fixture mounted atop the aft section of the aircraft and F-18 chase aircraft - photo by Tom Tschida | alternate |
1190x1024
alternate |
alternate |
 |
EC99-45065-6 | SR-71A #844(980) in flight with test fixture mounted atop the aft section of the aircraft - photo by Jim Ross | alternate |
alternate |
alternate |
 |
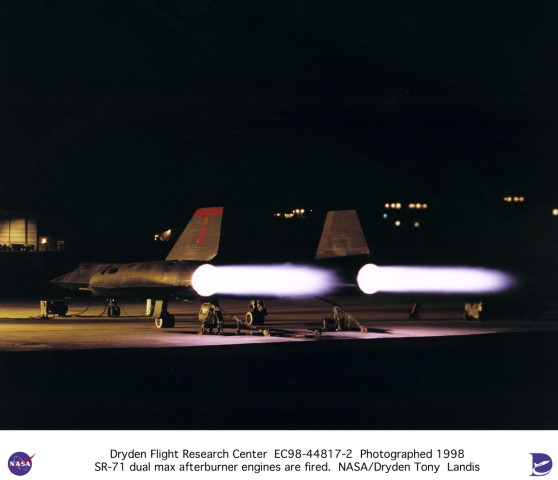
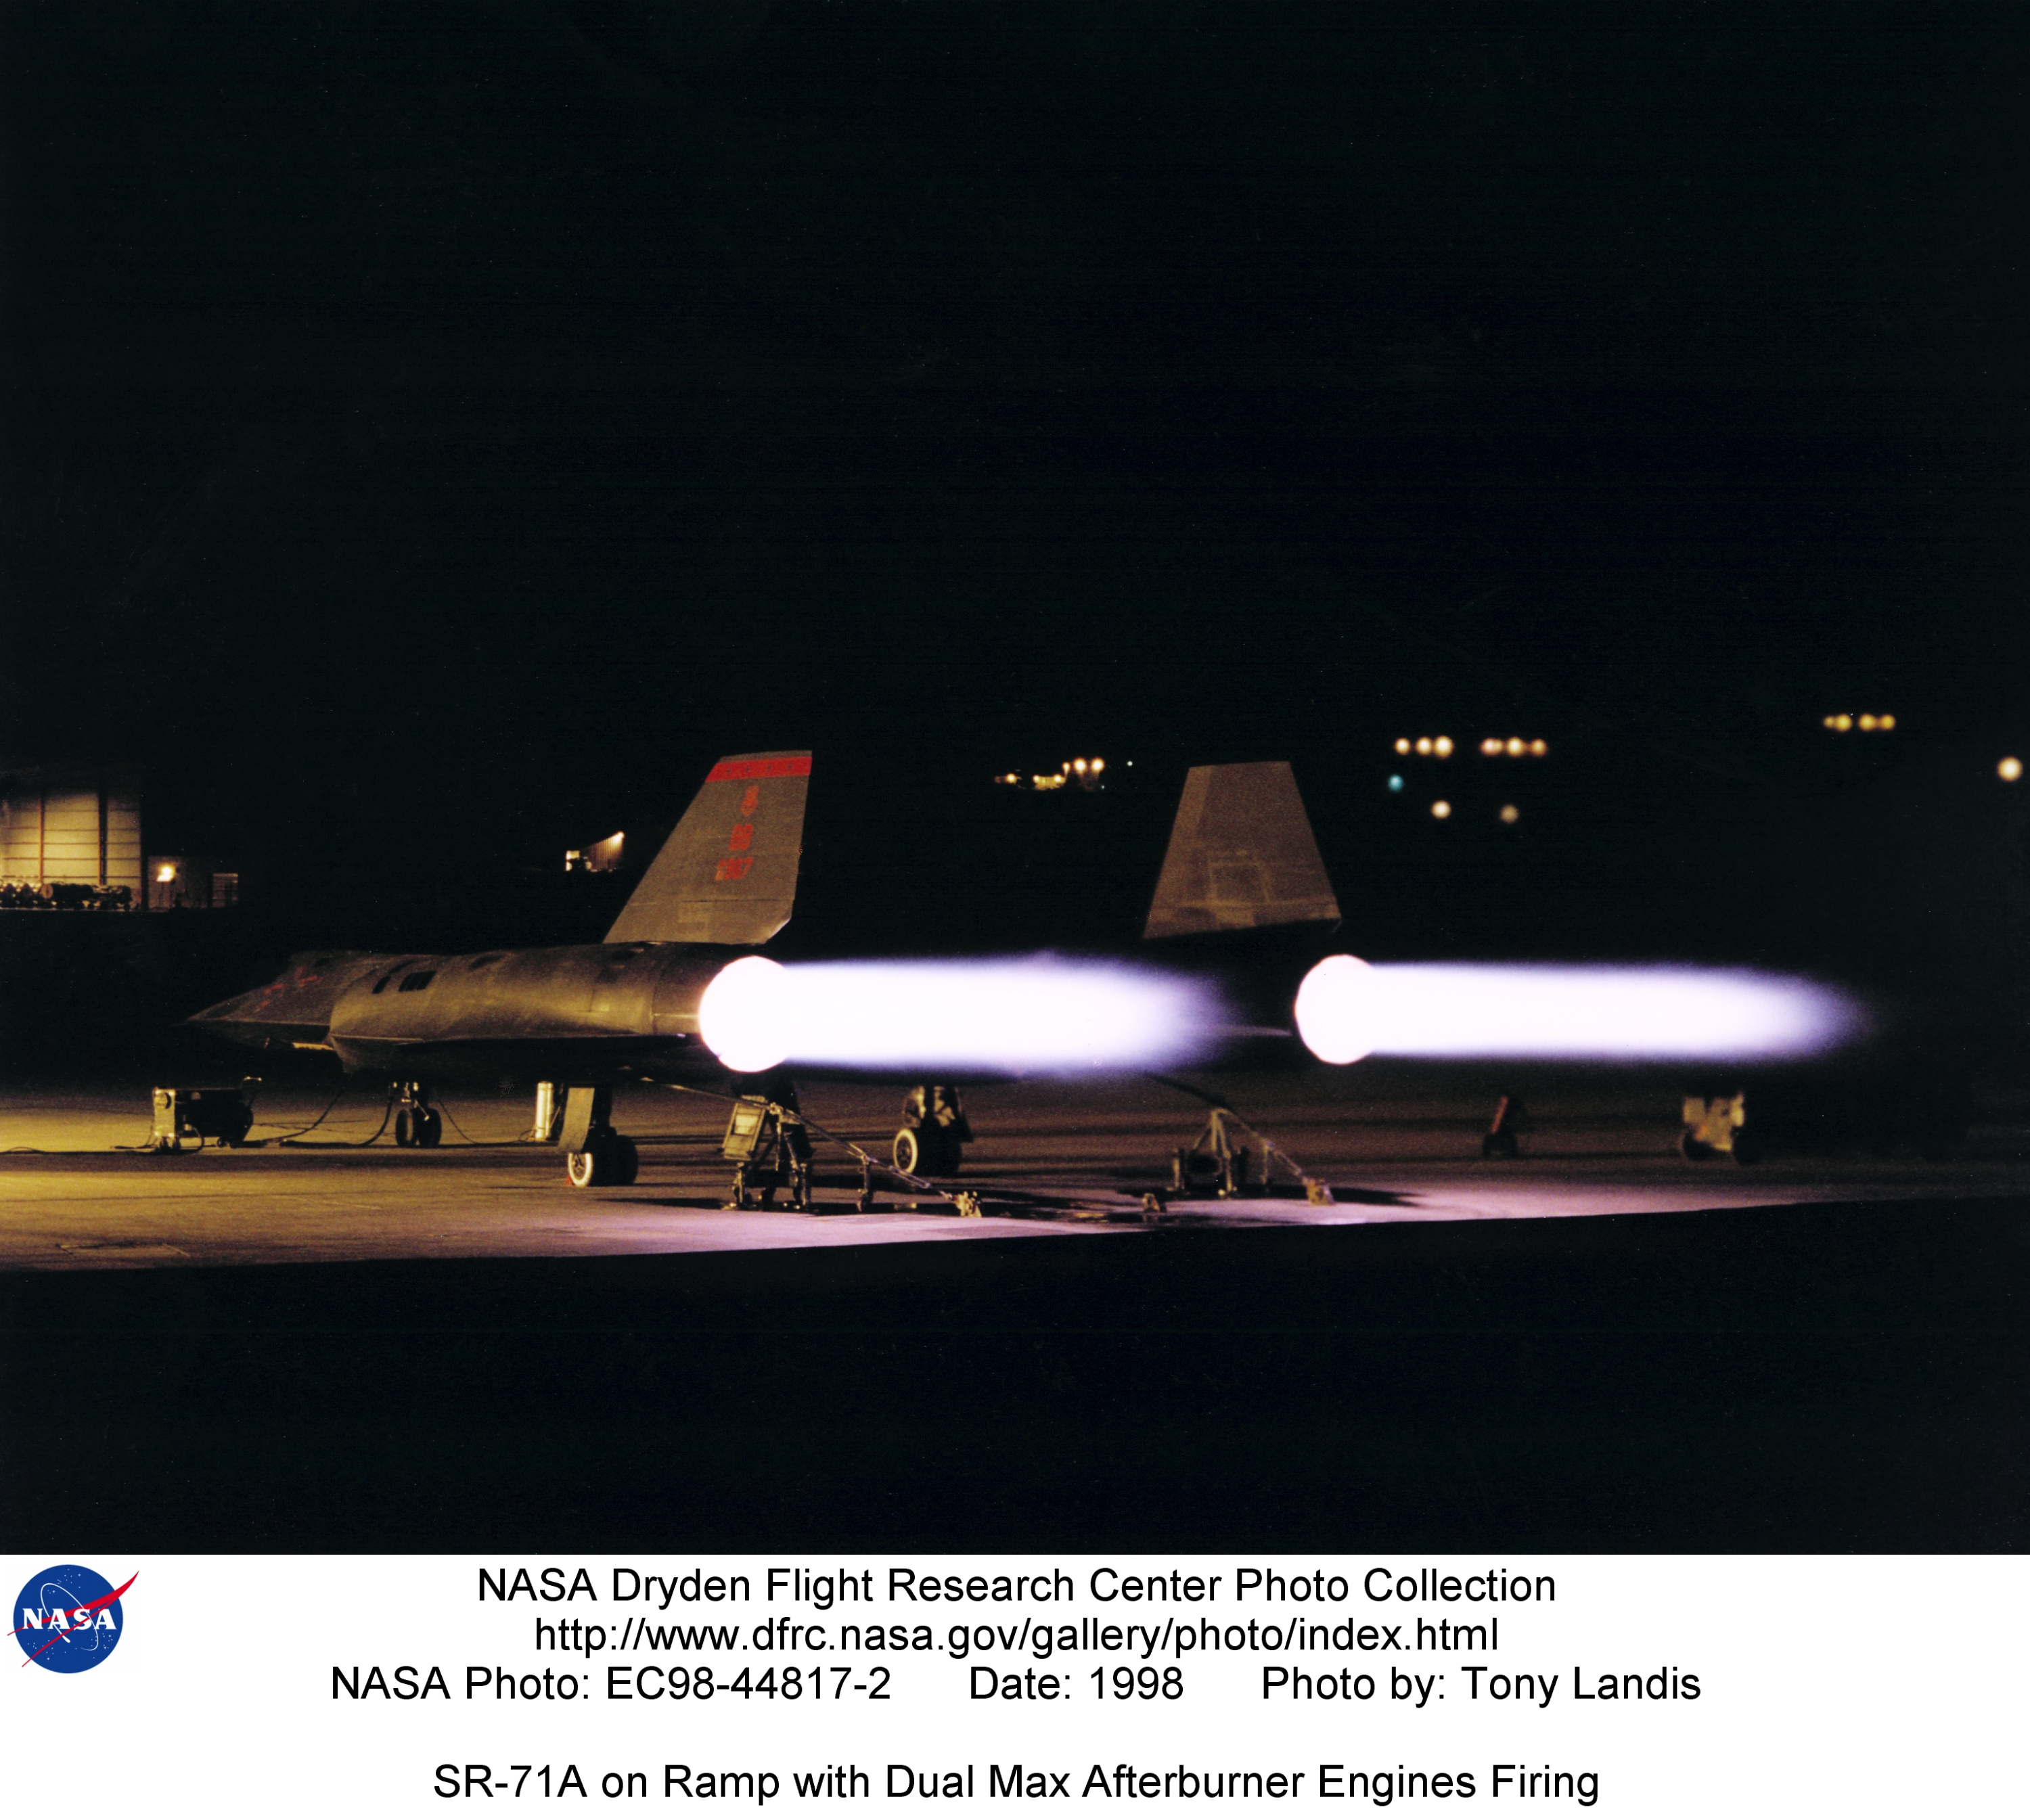
EC98-44817-2 | SR-71A #967 on ramp with dual max afterburner engines firing - photo by Tony Landis | alternate |
1142x1024
alternate |
alternate |
 |
EC98-44817-4 | SR-71A #967 on ramp for unofficial retirement ceremony - photo by Tony Landis | 558x480
alternate |
1190x1024
alternate |
3030x2606
alternate |
 |
EC97-43933-1 | SR-71A #844(980) in flight from below at takeoff - photo by Jim Ross | alternate |
alternate |
alternate |
 |
EC97-43933-2 | SR-71A #844(980) in flight over southern Sierra Nevada mountains - photo by Jim Ross | alternate |
alternate |
alternate |
 |
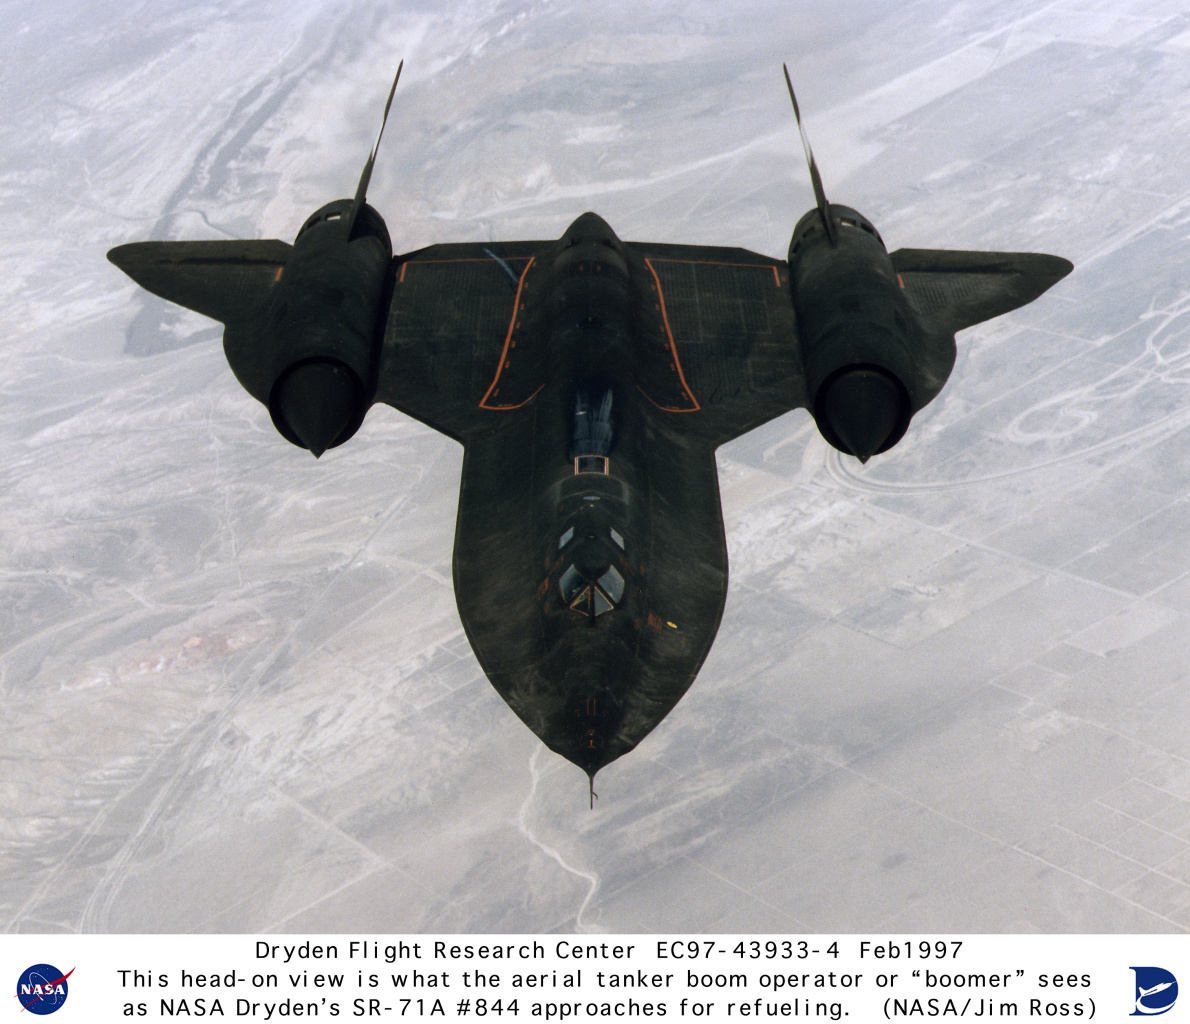
EC97-43933-4 | SR-71A #844(980) in flight view from tanker during an airborne refeuling - photo by Jim Ross | alternate |
alternate |
alternate |
 |
EC95-42883-4 | SR-71B #831(956) in flight over snow-capped mountains - photo by Judson Brohmer | alternate |
alternate |
alternate |
 |
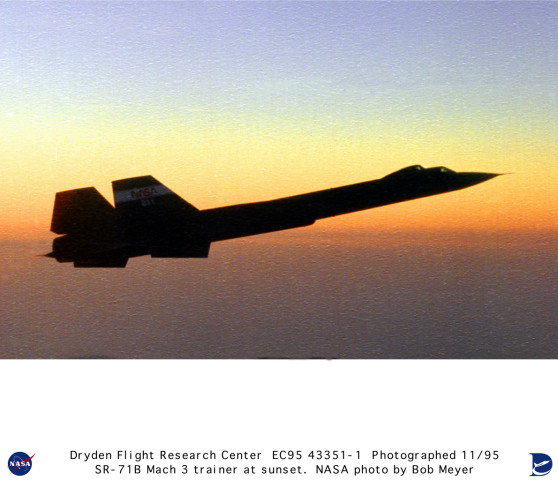
EC95-43351-1 | SR-71B #831(956) - Mach 3 trainer in flight at sunset - photo by Bob Meyer | alternate |
alternate |
alternate |
 |
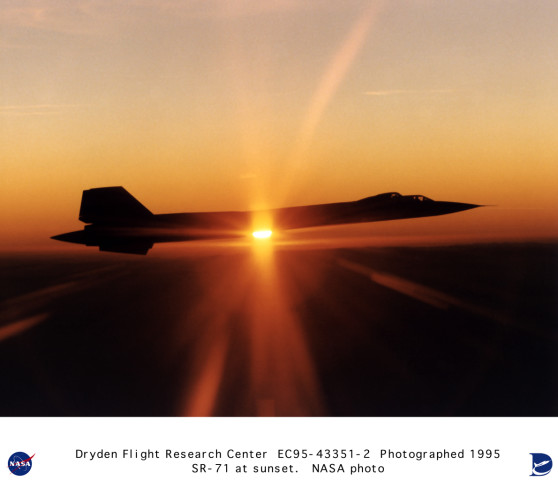
EC95-43351-2 | SR-71B #831(956) - Mach 3 trainer in flight at sunset - photo by Bob Meyer | alternate |
alternate |
alternate |
 |
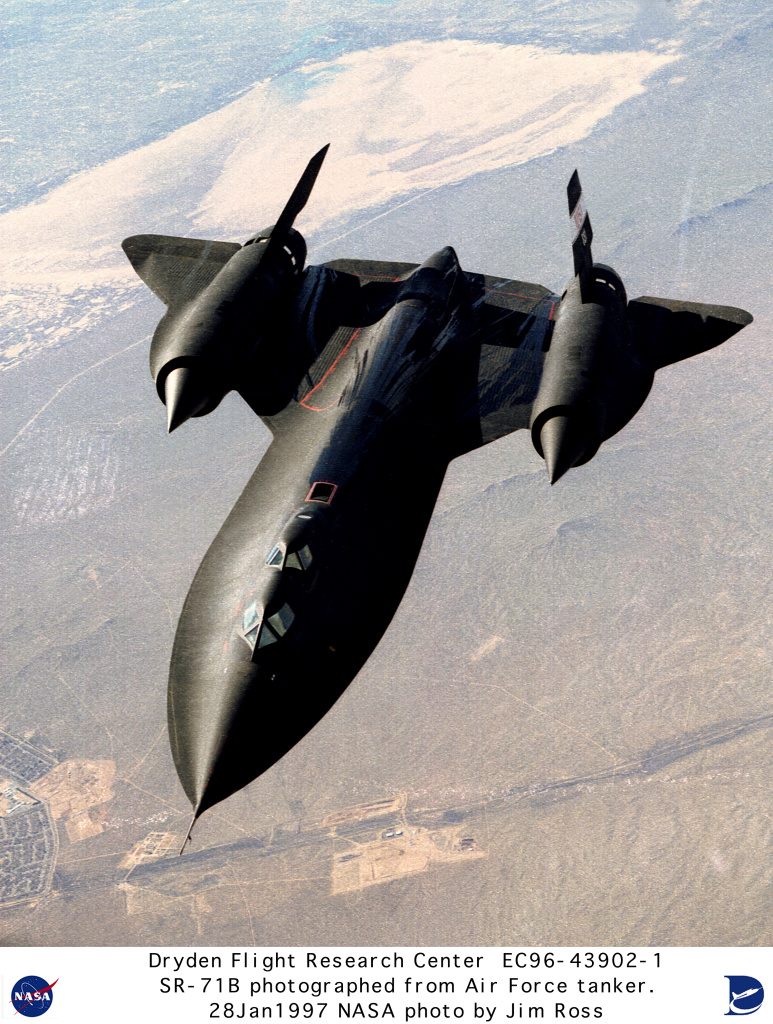
EC97-43902-1 | SR-71B #831(956) - in flight - view from Air Force tanker - photo by Jim Ross | alternate |
alternate |
alternate |
 |
EC96-43862-4 | SR-71B #831(956) - in flight with F-18 chase aircraft - view from Air Force tanker - photo by Jim Ross | alternate |
alternate |
alternate |
 |
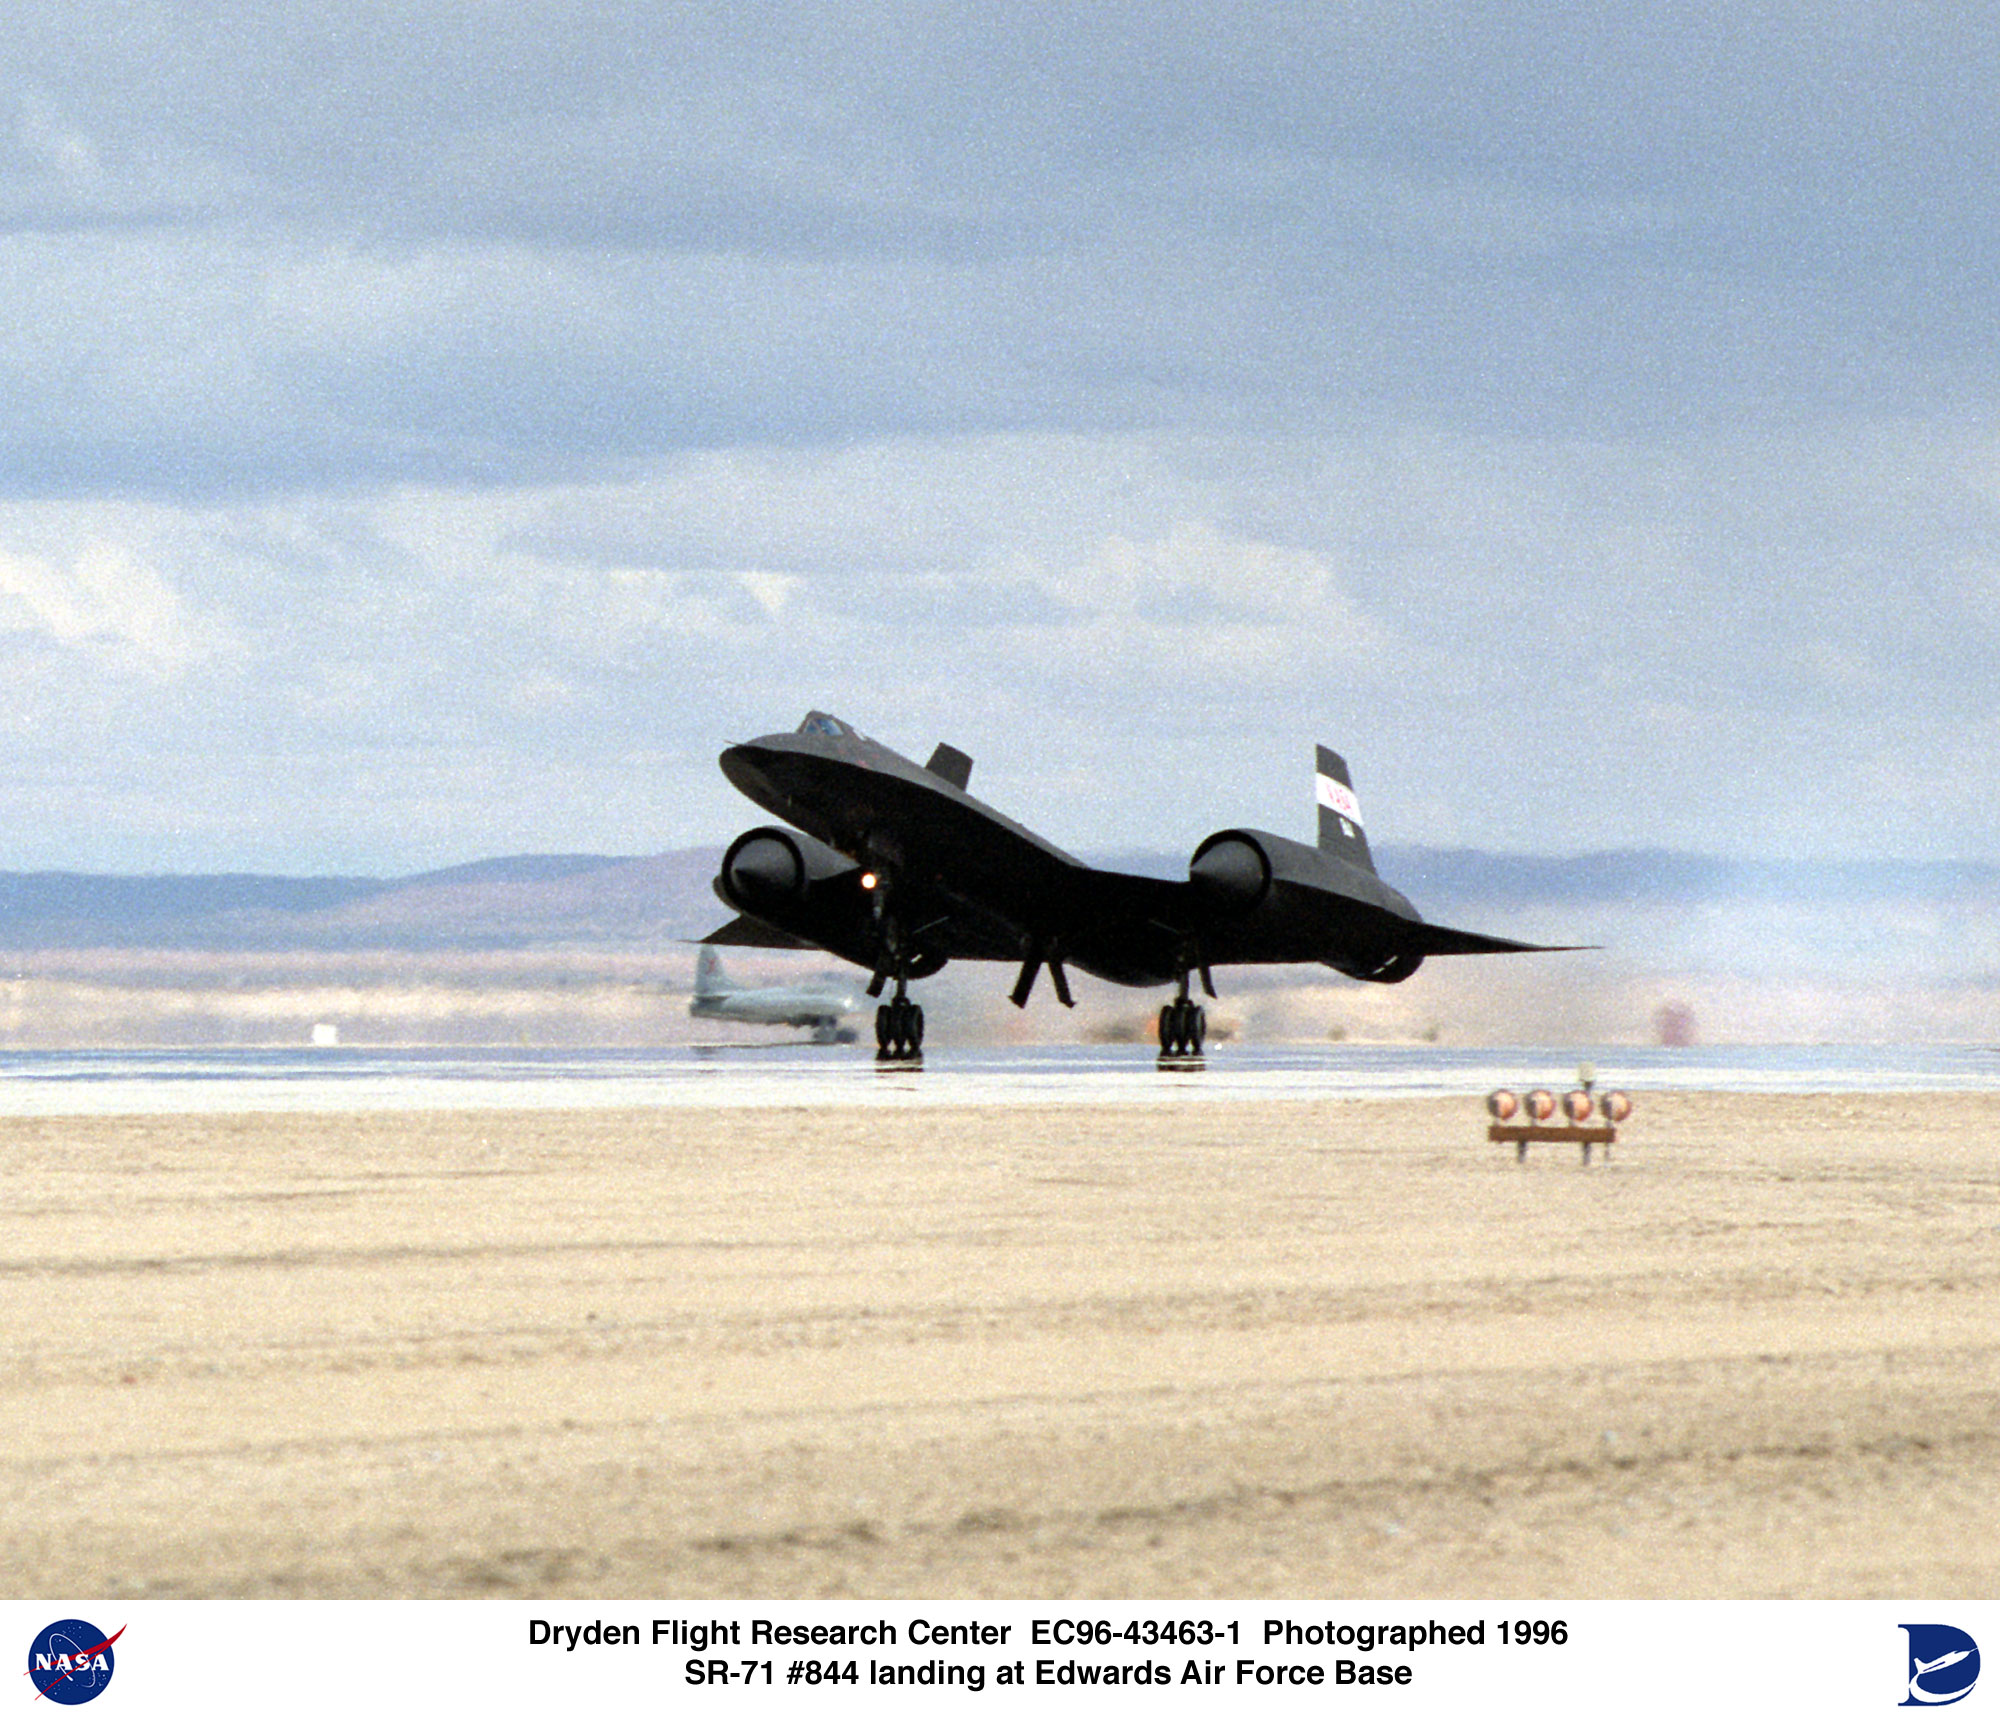
EC96-43463-1 | SR-71 #844(980) landing at Edwards Air Force Base - photo by Tony Landis | alternate |
alternate |
alternate |
 |
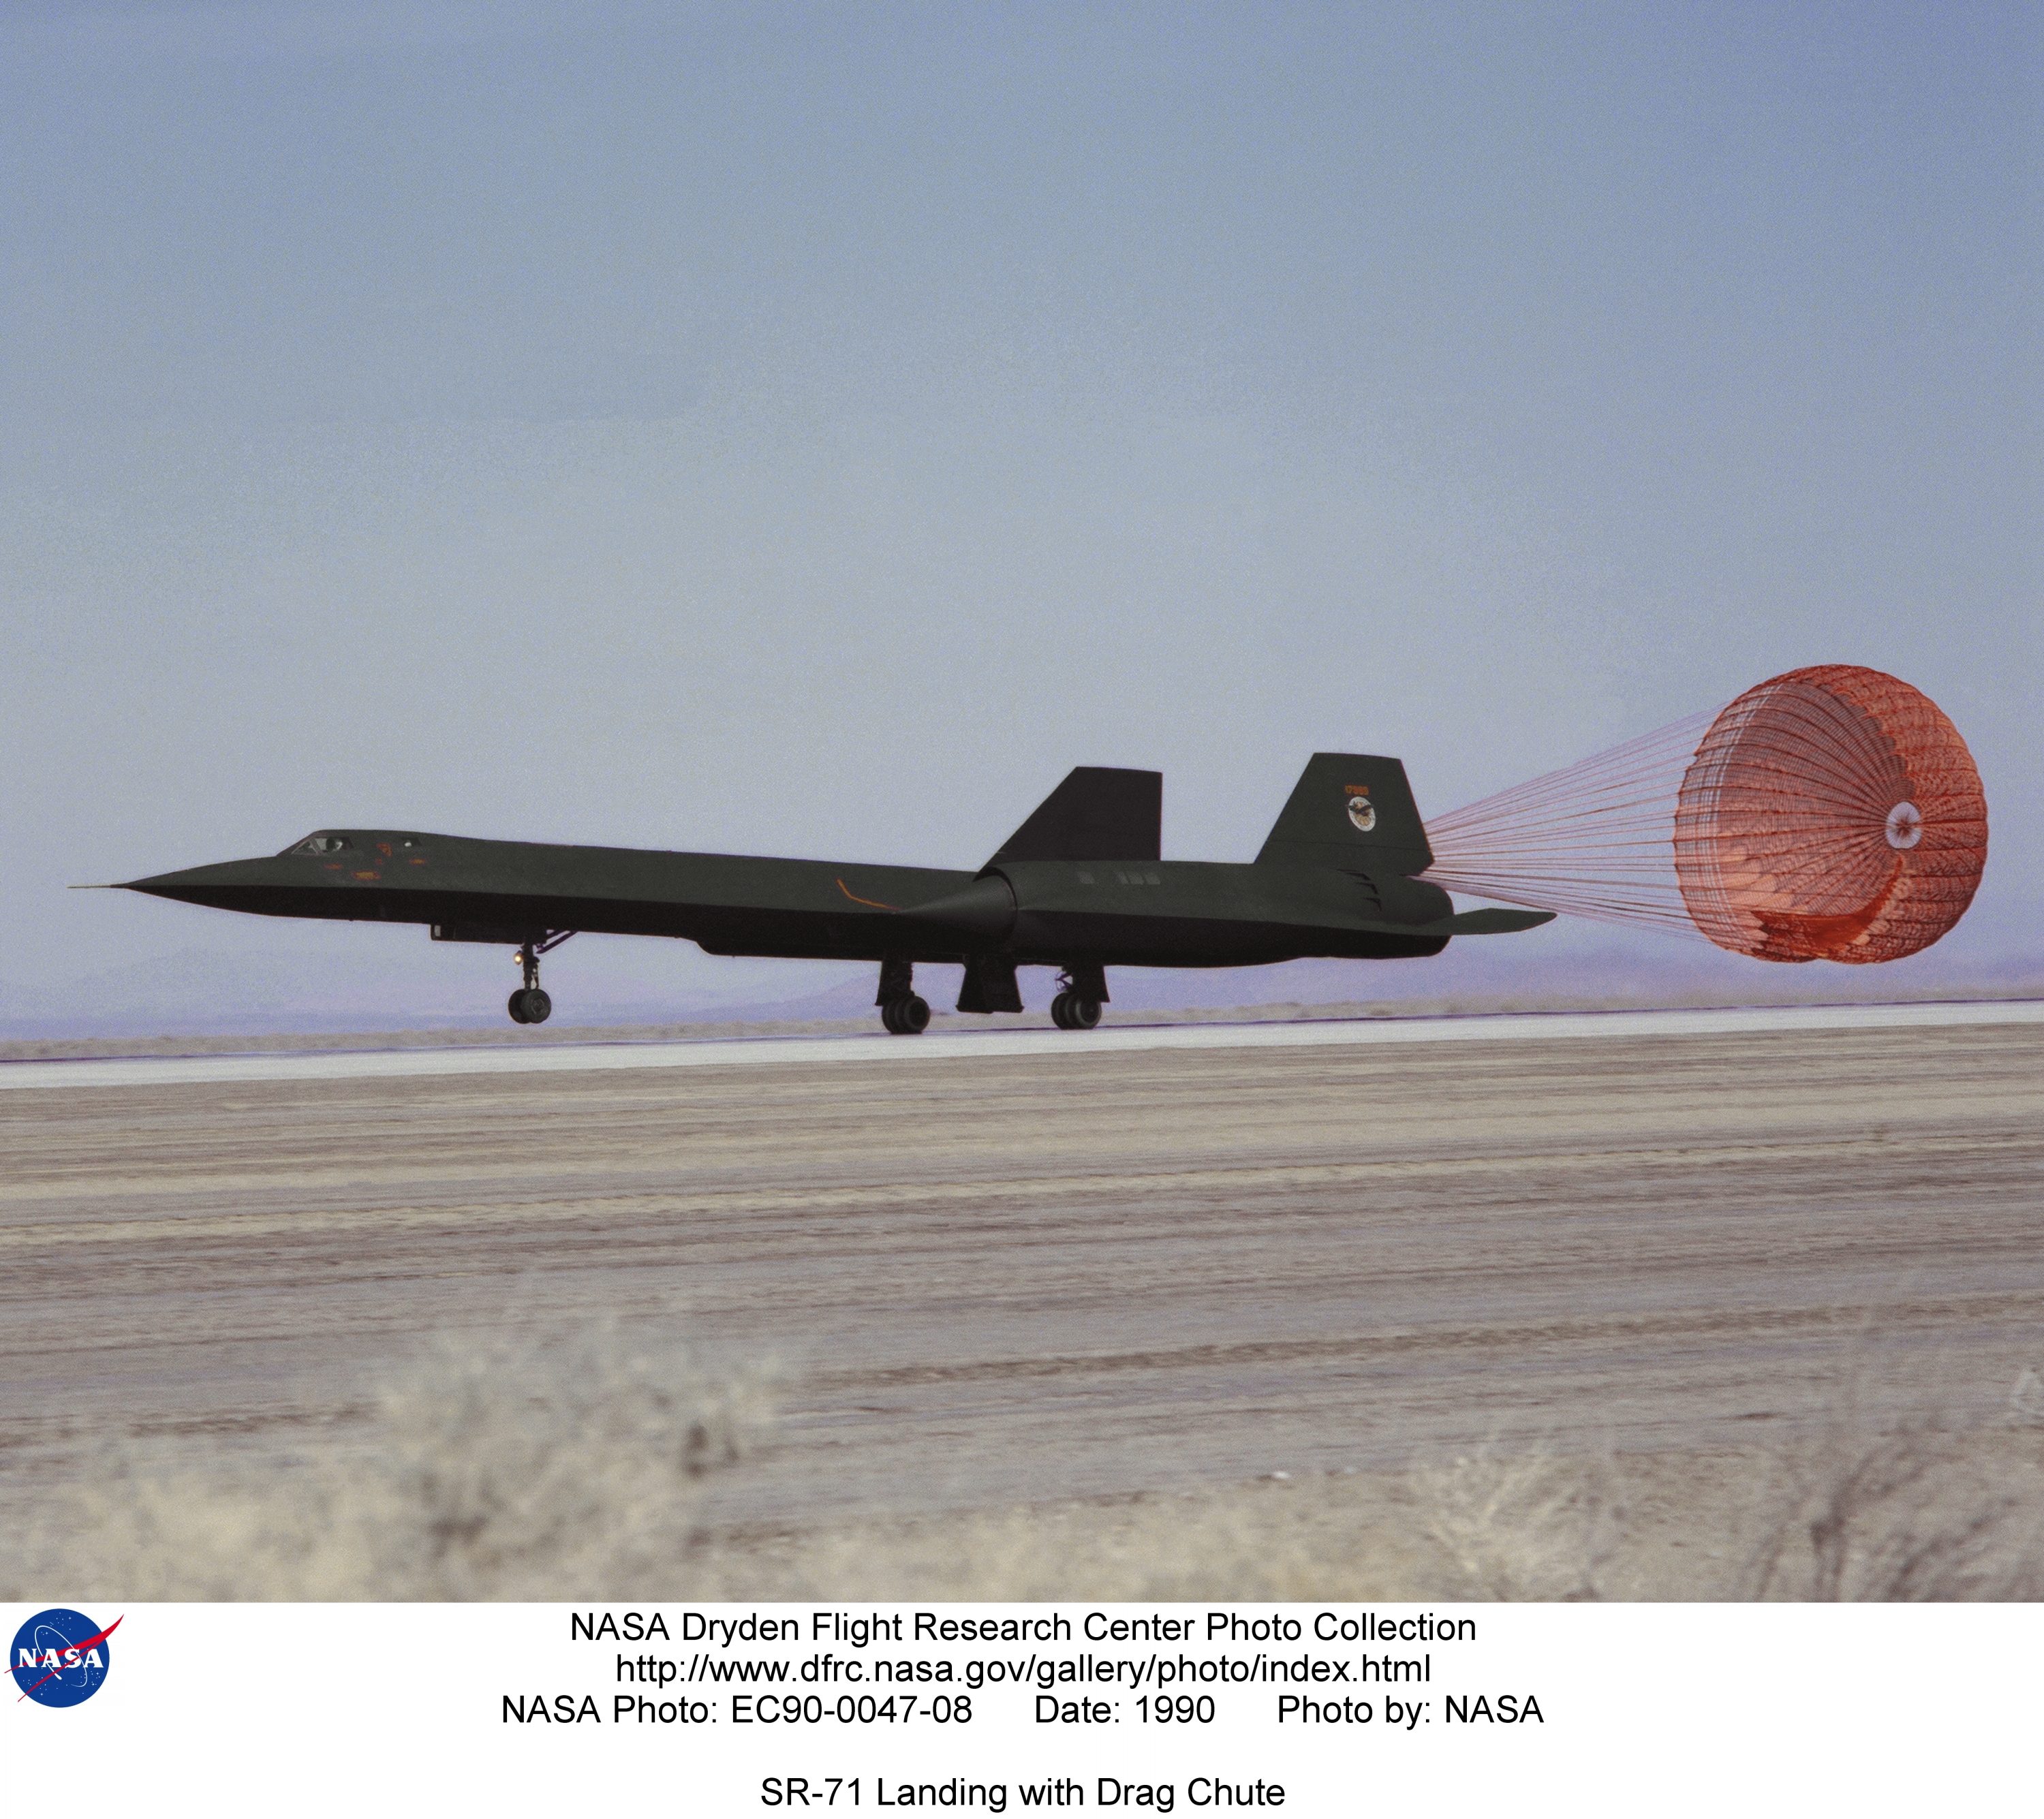
EC90-0047-08 | SR-71 #980 landing with drag chute - photo by Jim Ross | alternate |
alternate |
alternate |
 |
EC90-0047-11 | SR-71 #980 taking off - photo by Bob Brown | alternate |
alternate |
alternate |
 |
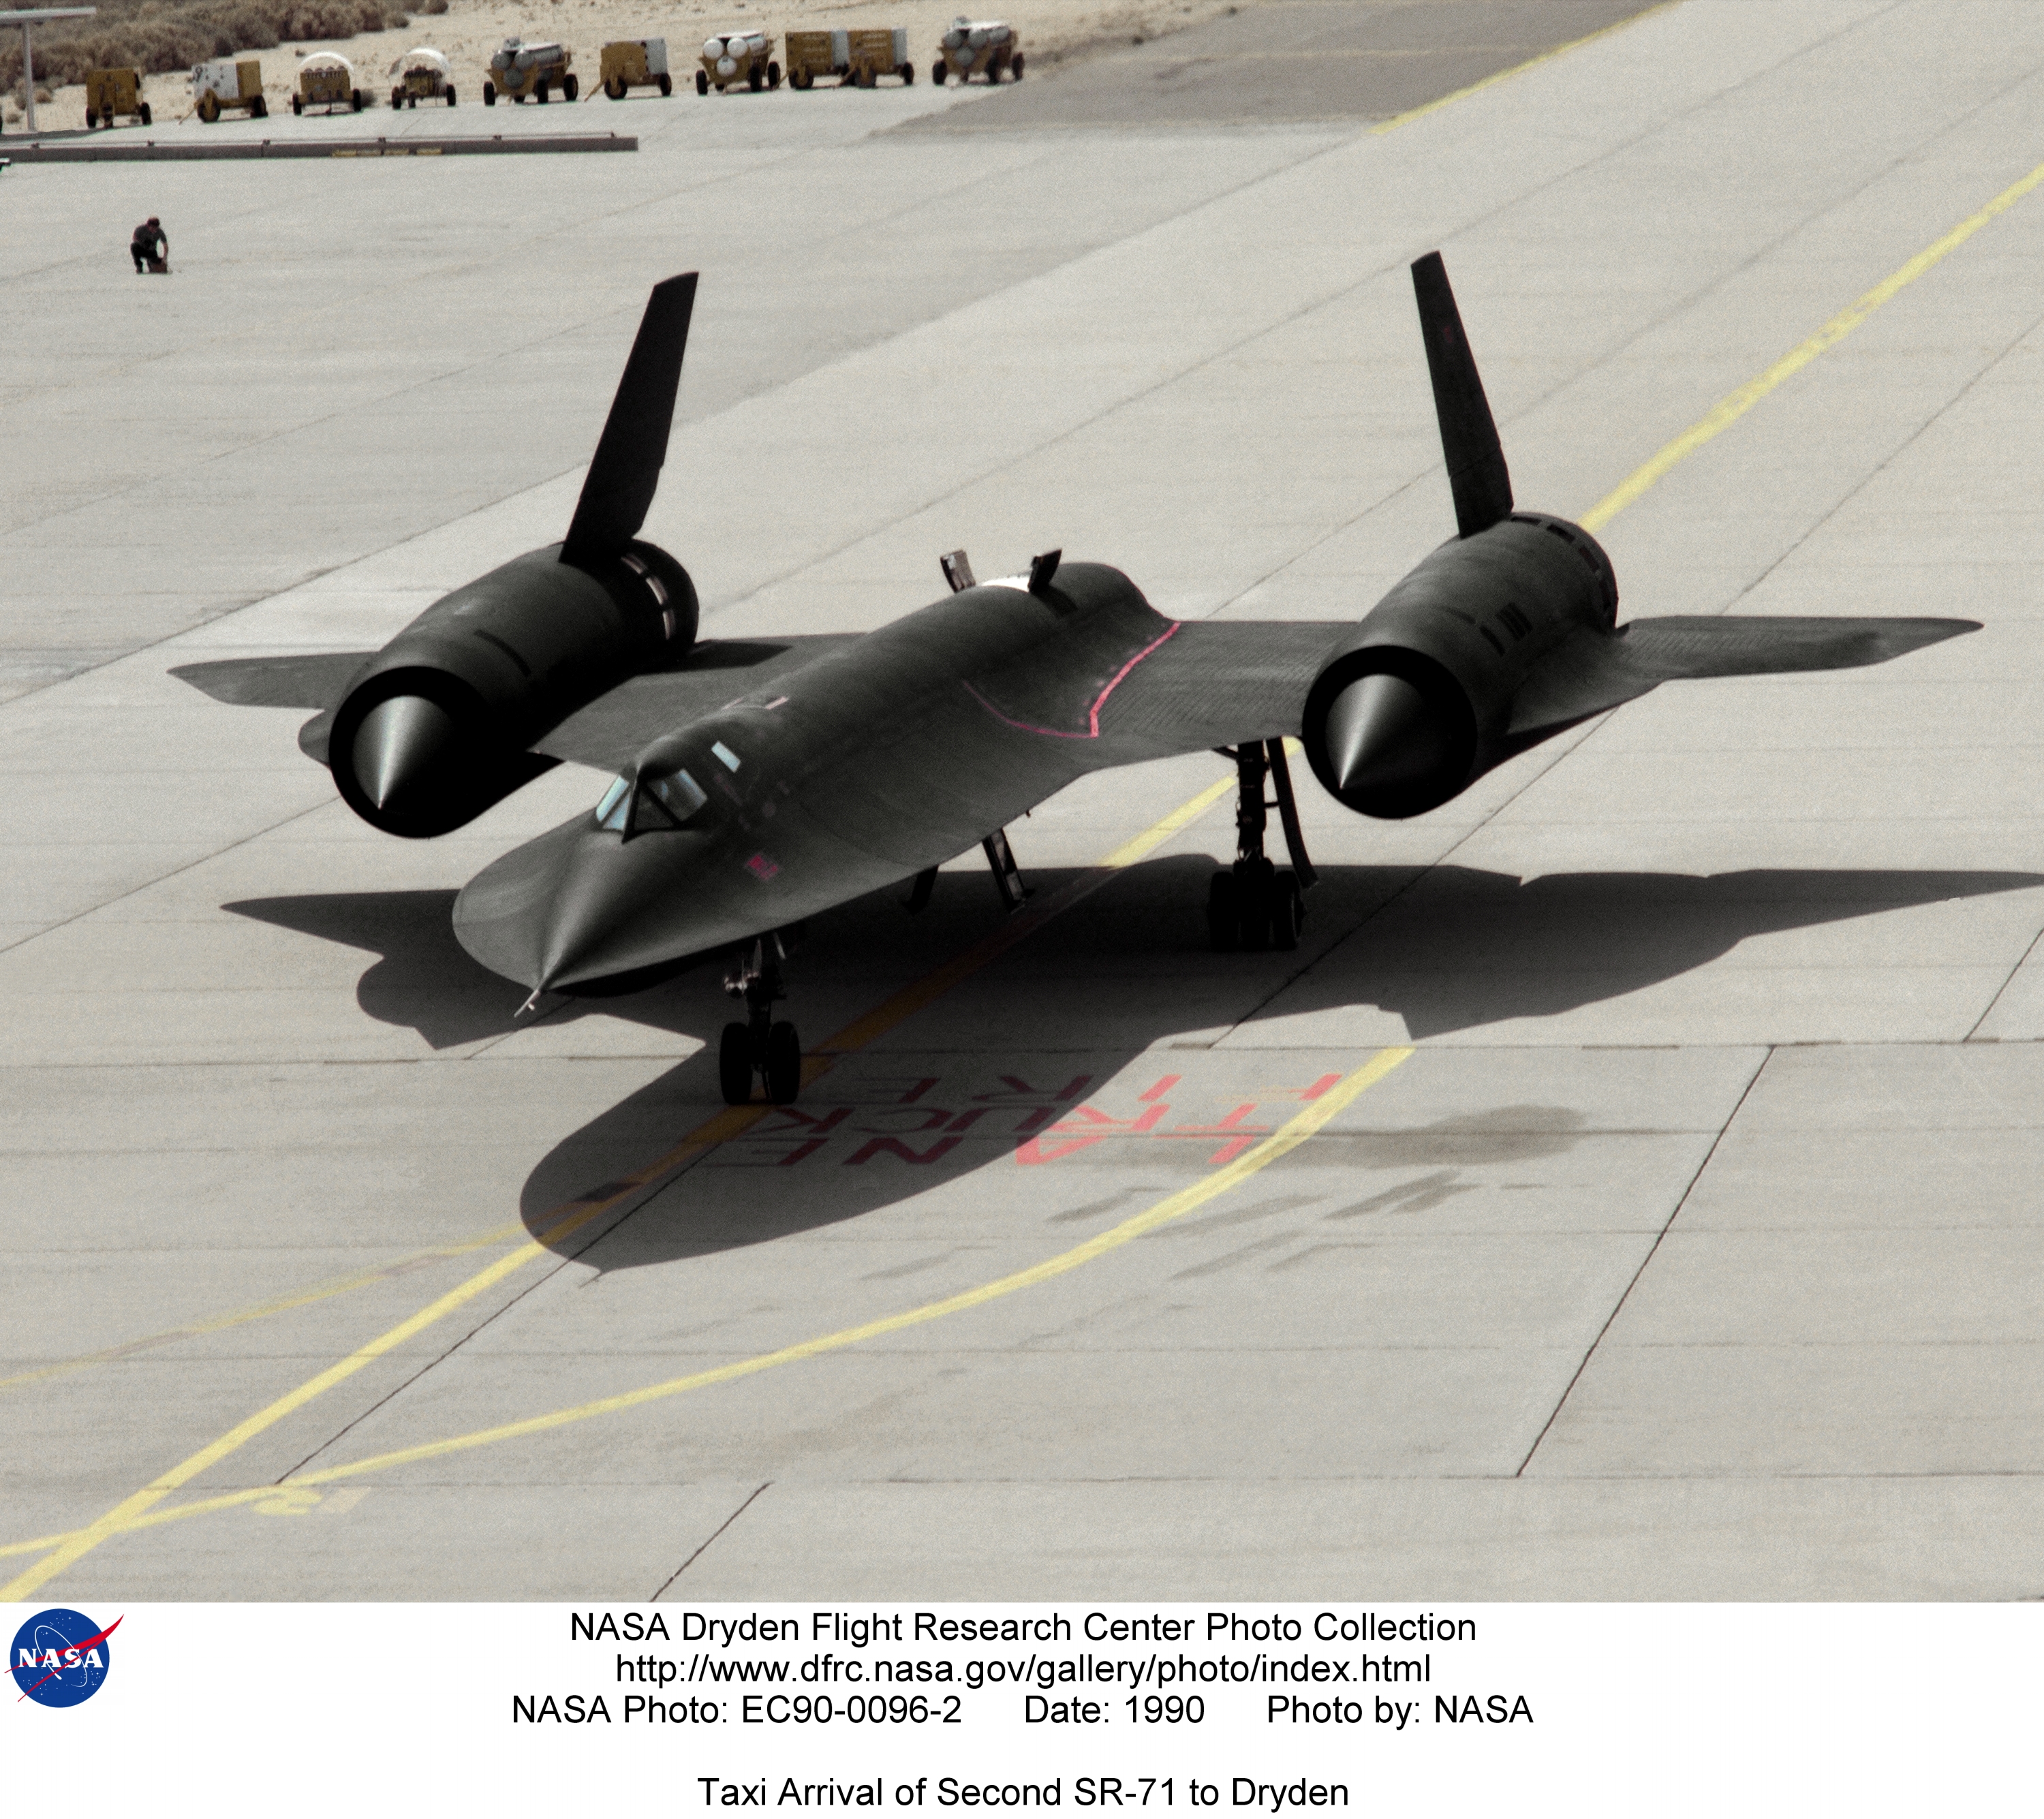
EC90-0096-2 | Taxi arrival of second SR-71 (#971) to Dryden - photo by Tammy Gill | alternate |
alternate |
alternate |
 |
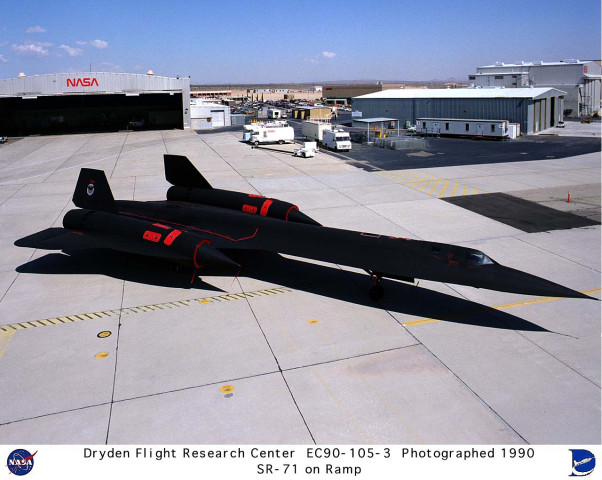
EC90-105-3 | SR-71 #980 on ramp - photo by Jim Ross | alternate |
alternate |
|
 |
EC91-372-13 | SR-71B #831(956) - photo by Jim Ross | alternate |
alternate |
alternate |
 |
EC91-0365-7 | SR-71 #831(956) on the ramp at the Air Force's Plant 42 in Palmdale, California, shortly before delivery to DFRC - photo by Jim Bean | alternate |
alternate |
alternate |
 |
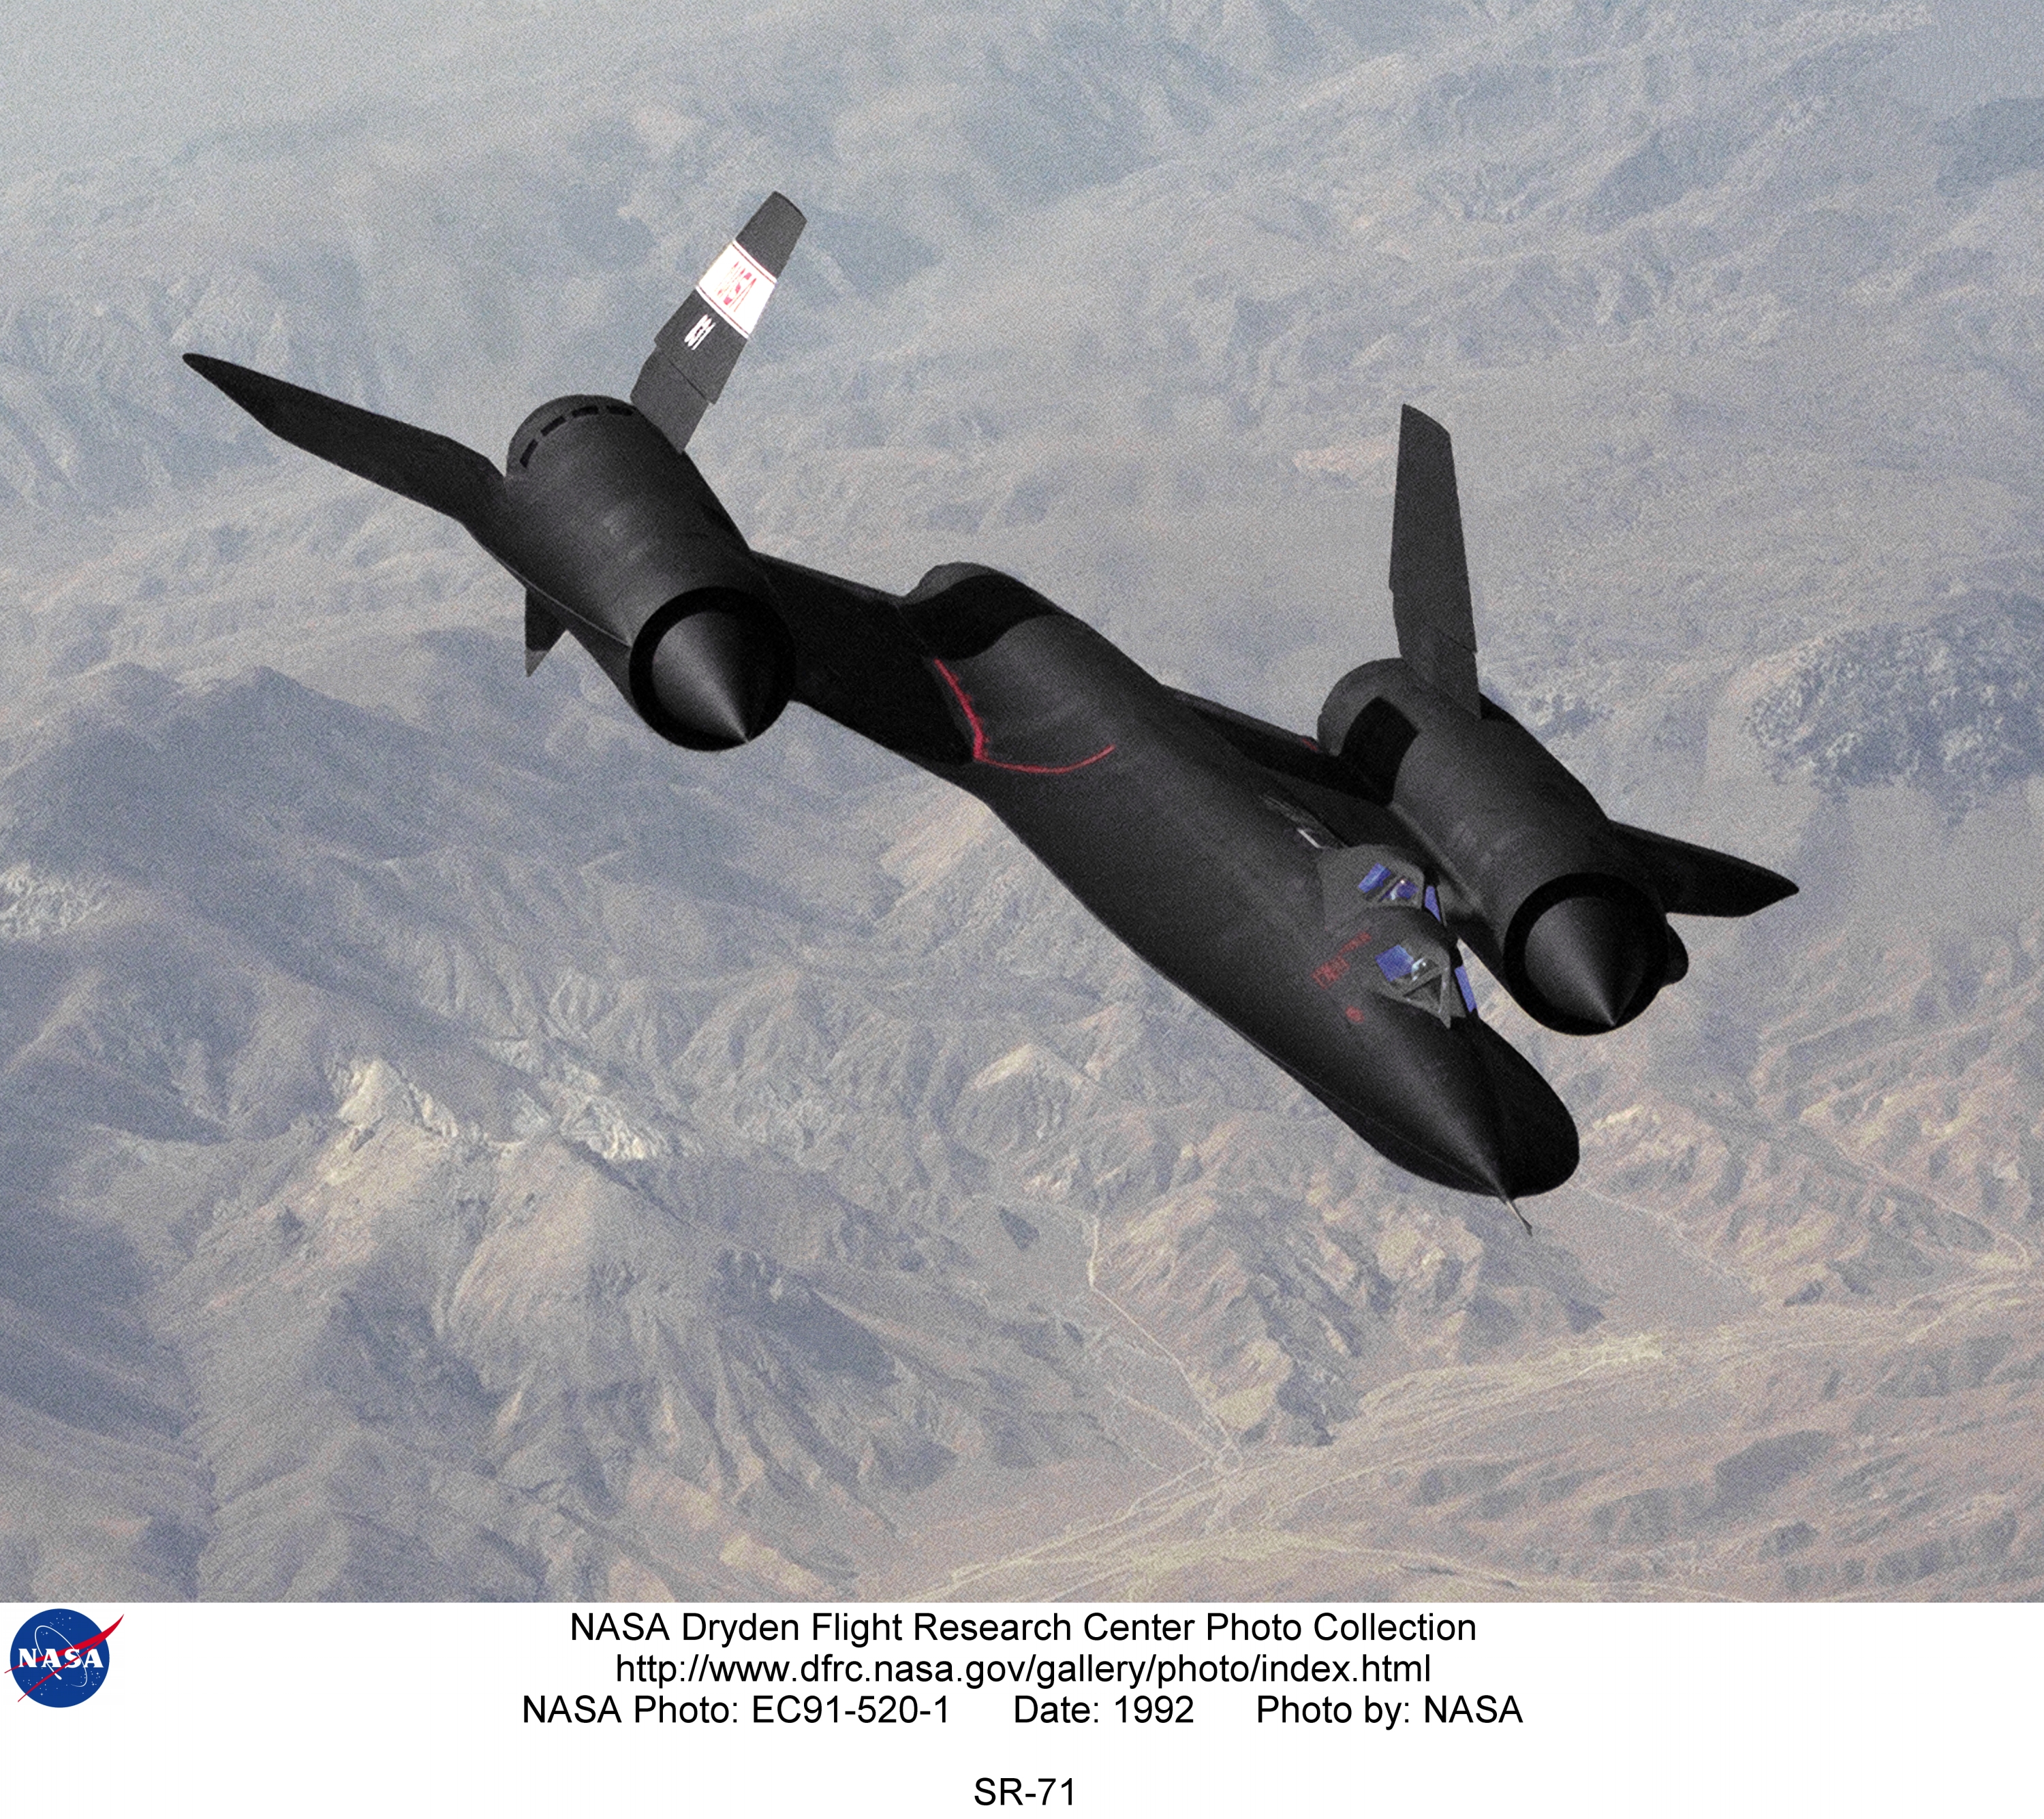
EC91-520-1 | SR-71 #831(956) - photo by Jim Ross | alternate |
alternate |
alternate |
 |
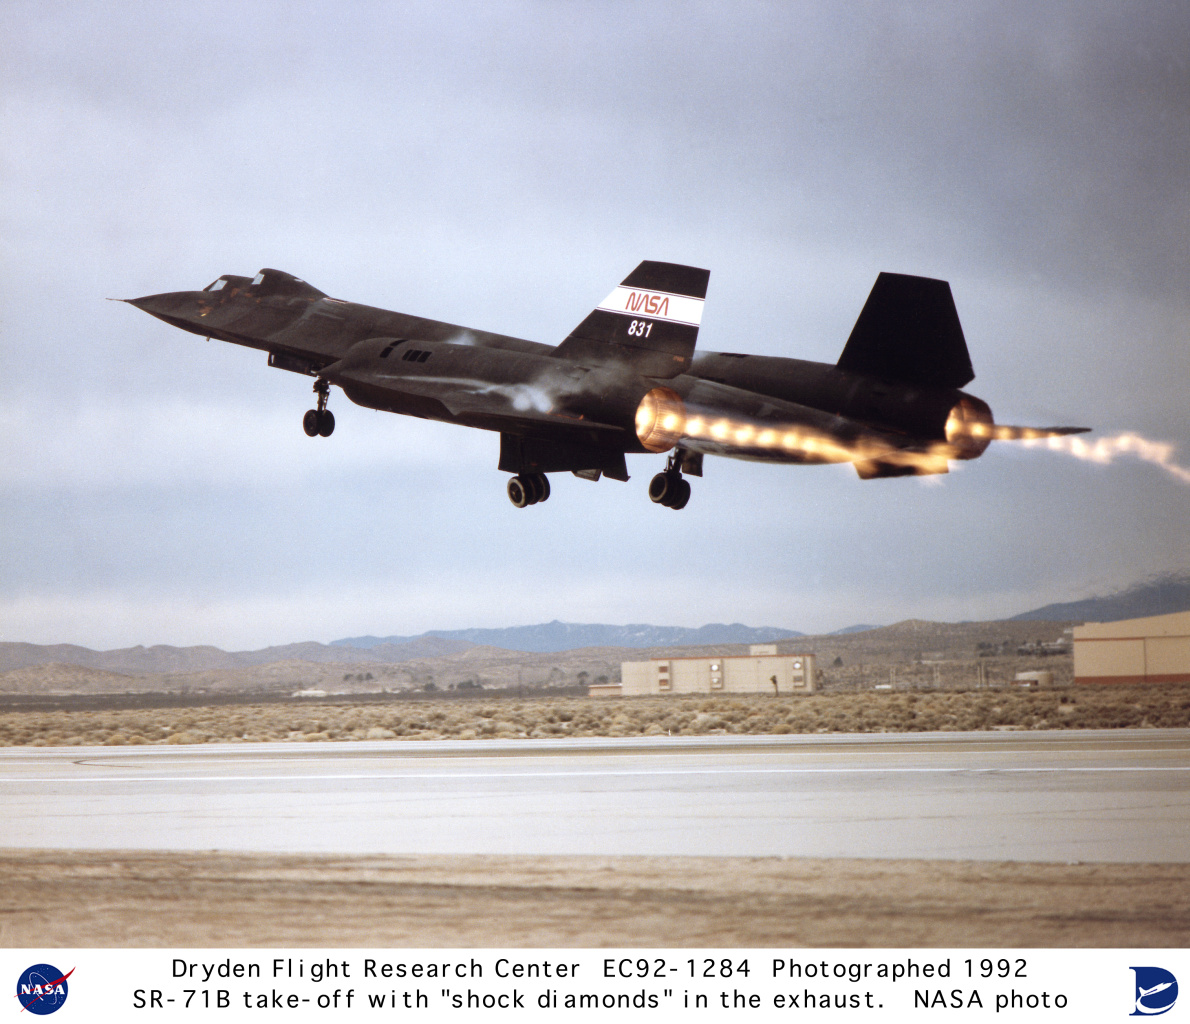
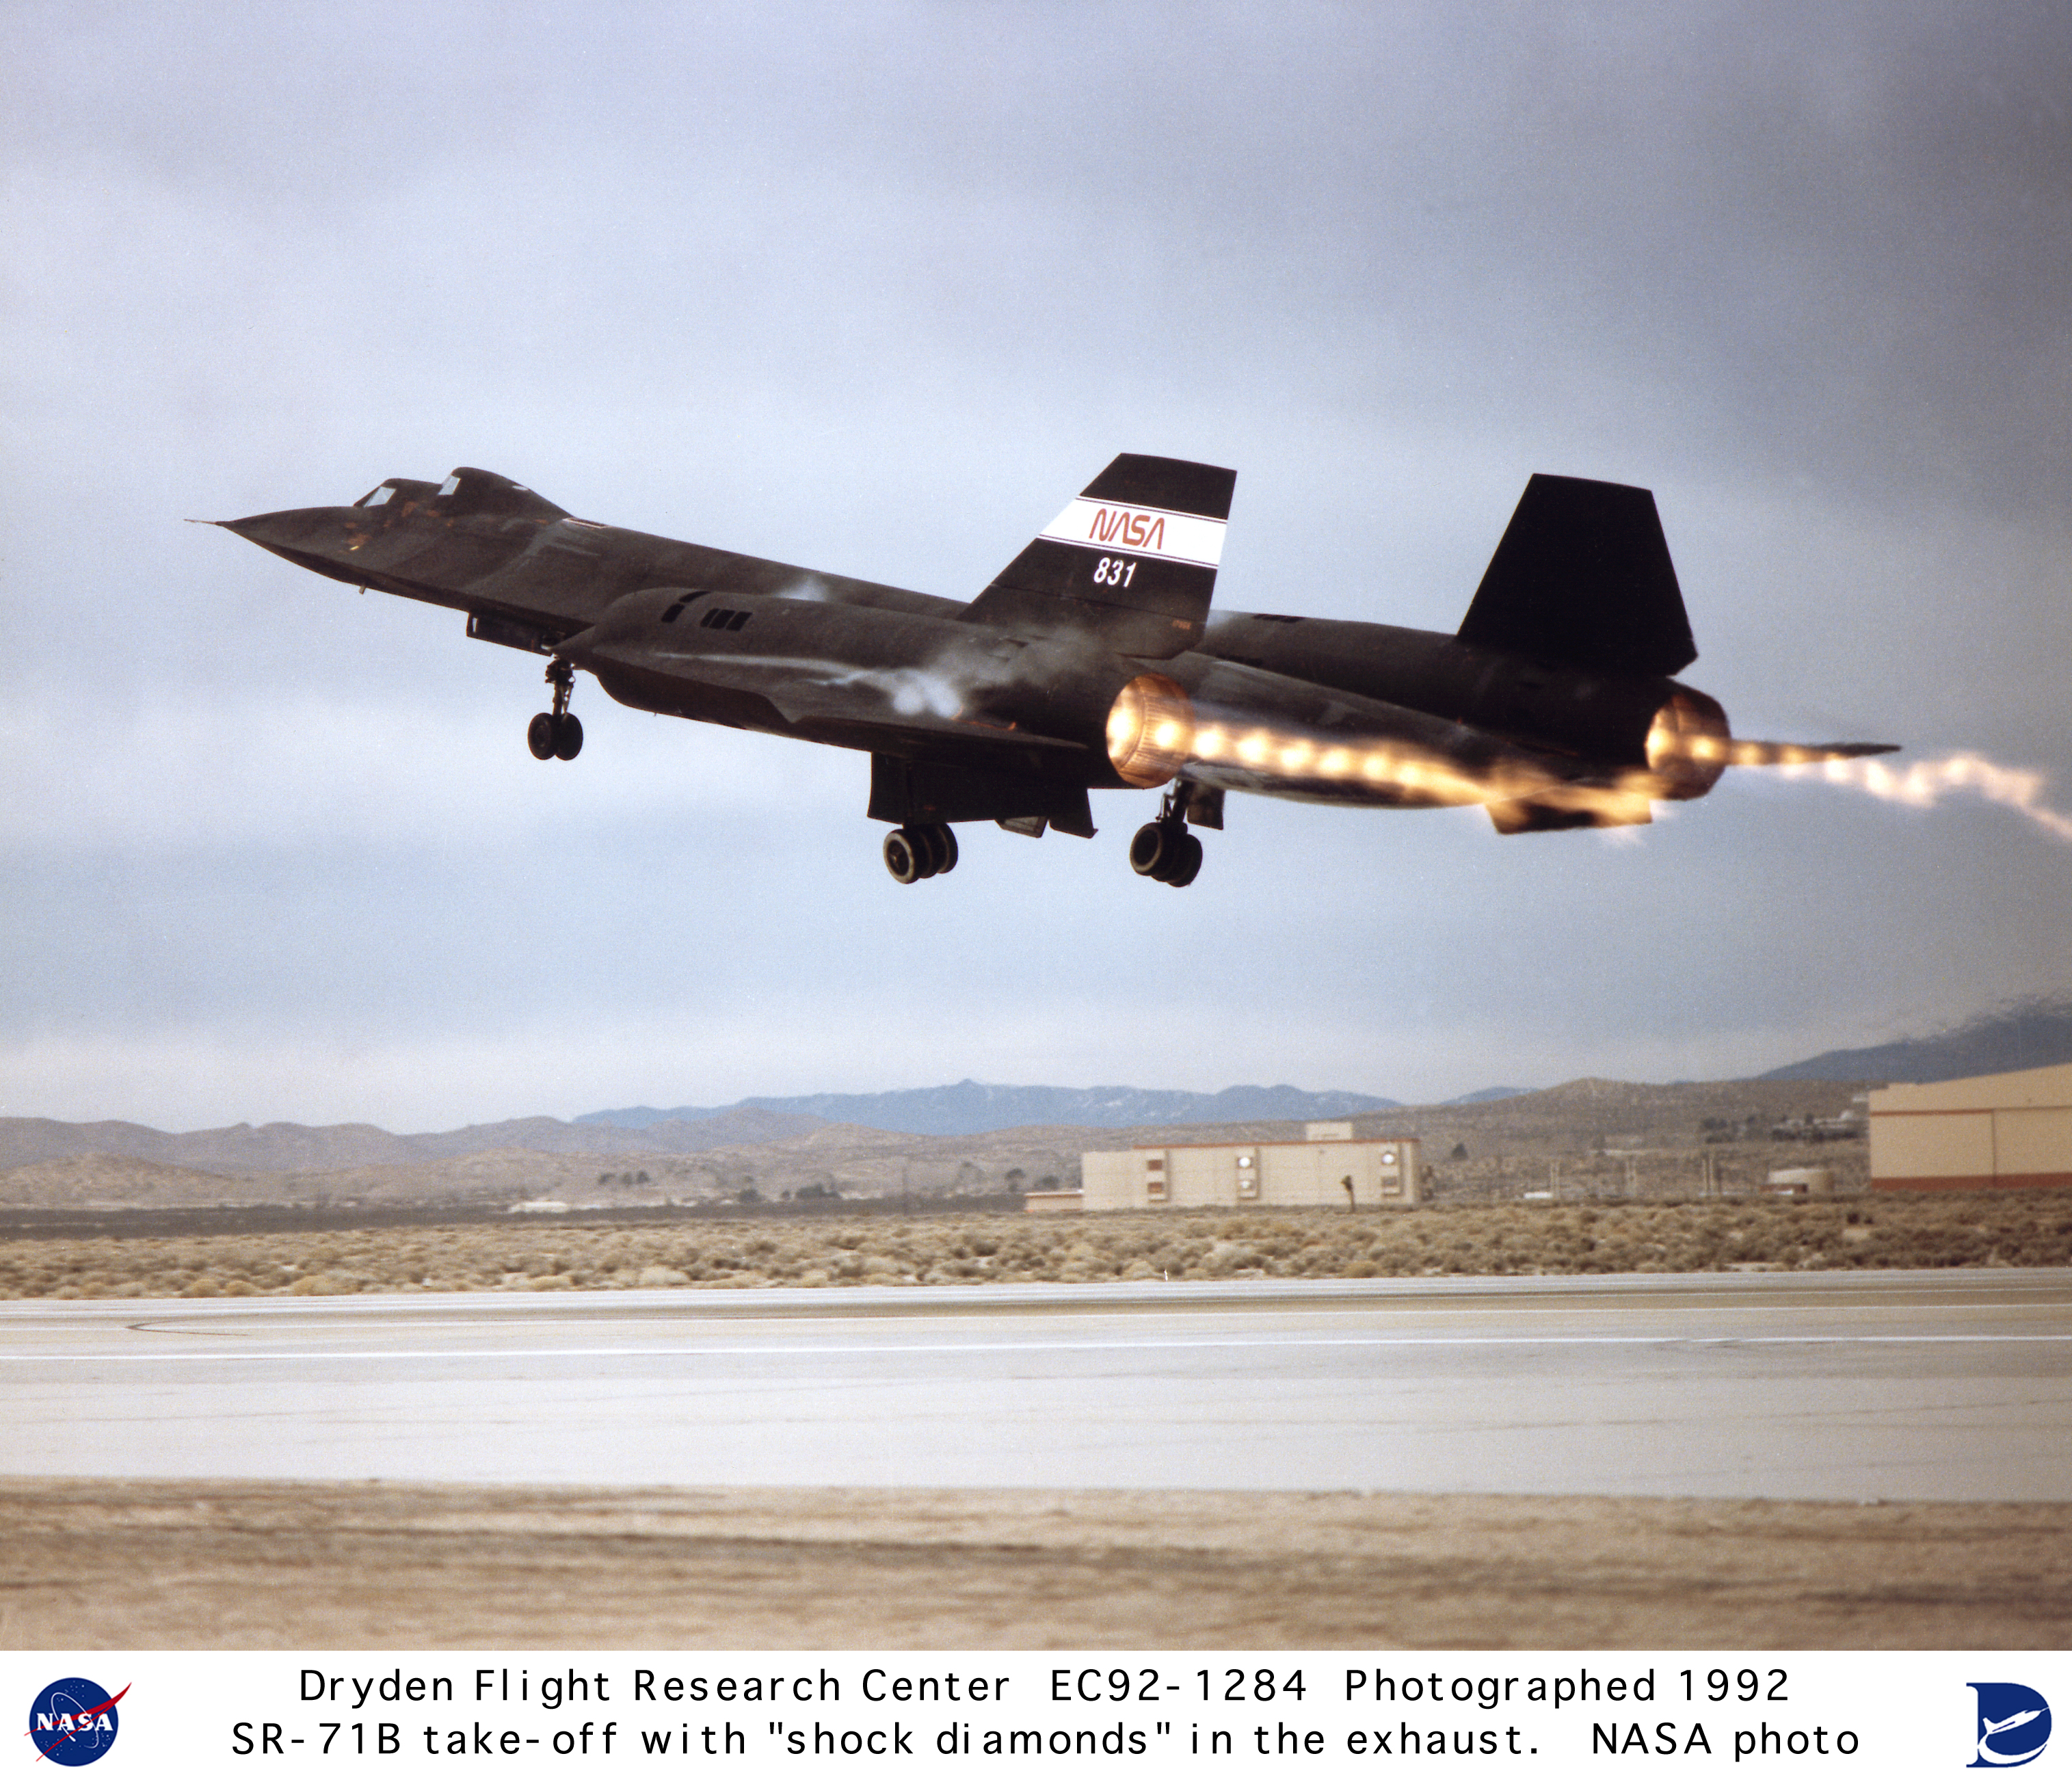
EC92-1284-1 | SR-71 #831(956) takeoff with afterburner showing shock diamonds in exhaust - photo by Jim Ross | alternate |
alternate |
alternate |
 |
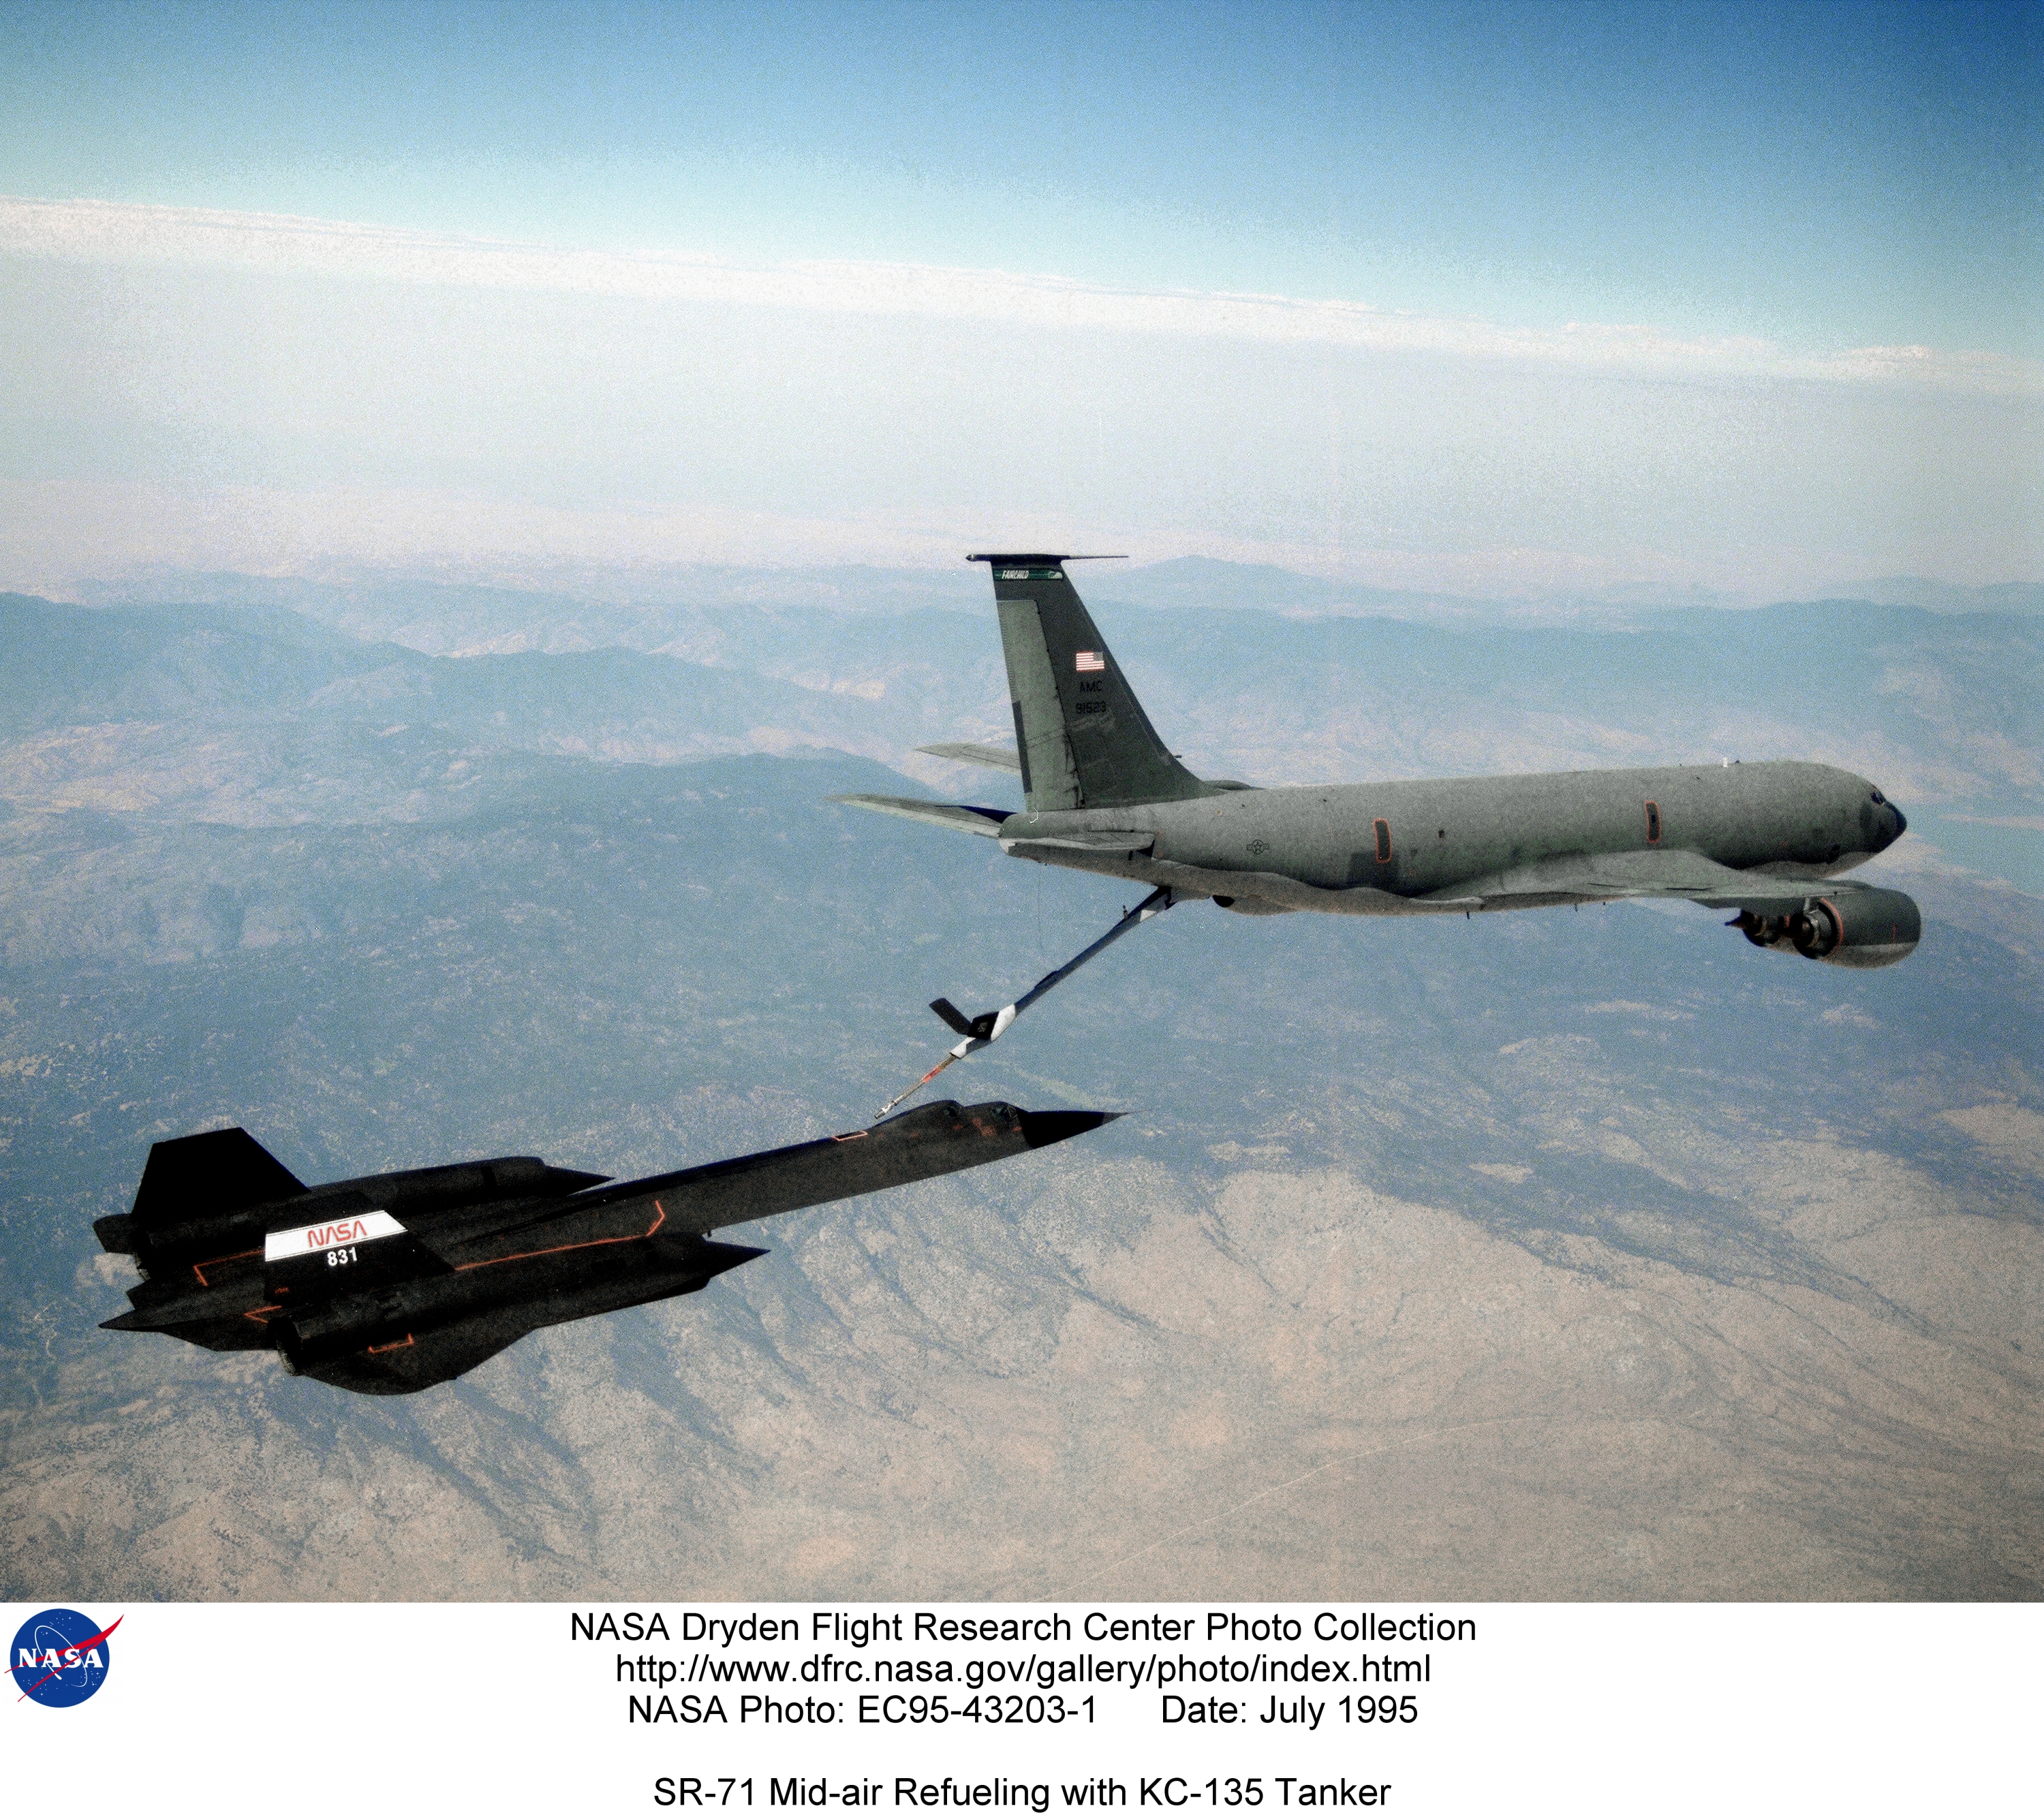
EC95-43203-1 | SR-71 #831(956) mid-air refueling with KC-135 tanker - photo by Jim Ross | alternate |
alternate |
alternate |
 |
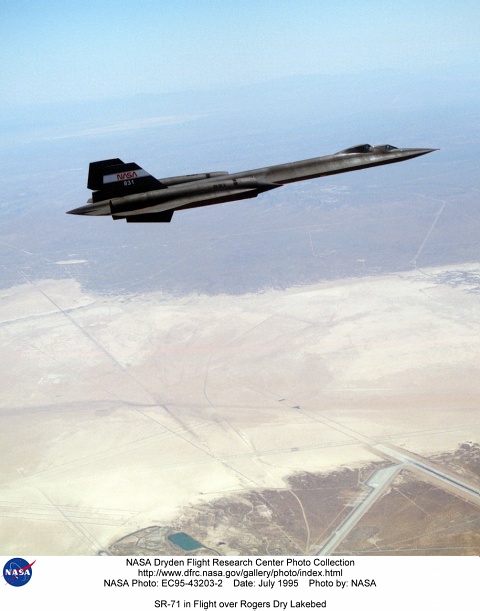
EC95-43203-2 | SR-71 #831(956) in flight over Rogers Dry Lakebed - photo by Jim Ross | alternate |
alternate |
alternate |
 |
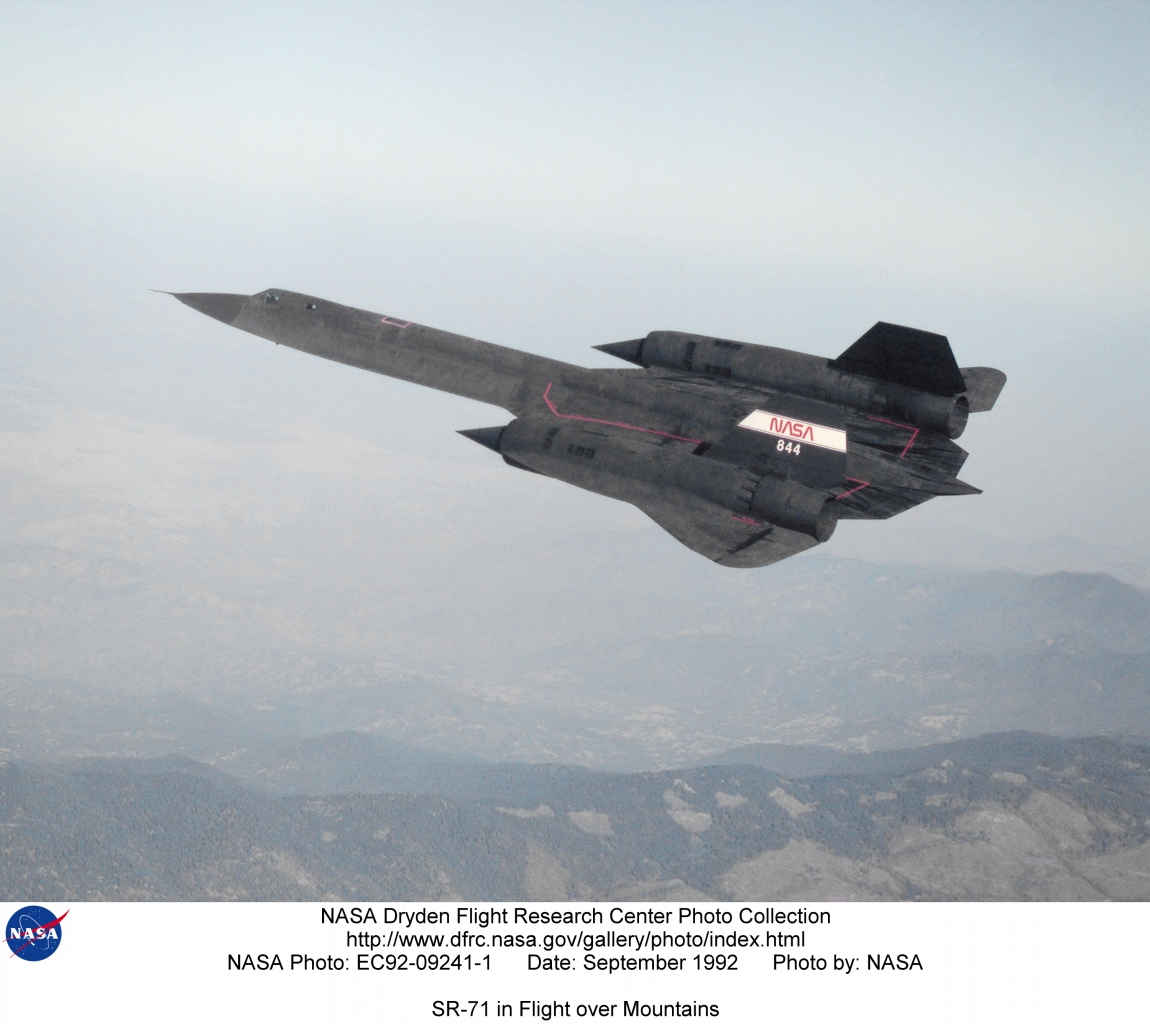
EC92-09241-1 | SR-71 #844(980) in flight over mountains - photo by Jim Ross | alternate |
alternate |
alternate |
 |
EC92-09241-2 | SR-71 #844(980) in flight over mountains - photo by Jim Ross | alternate |
alternate |
alternate |
 |
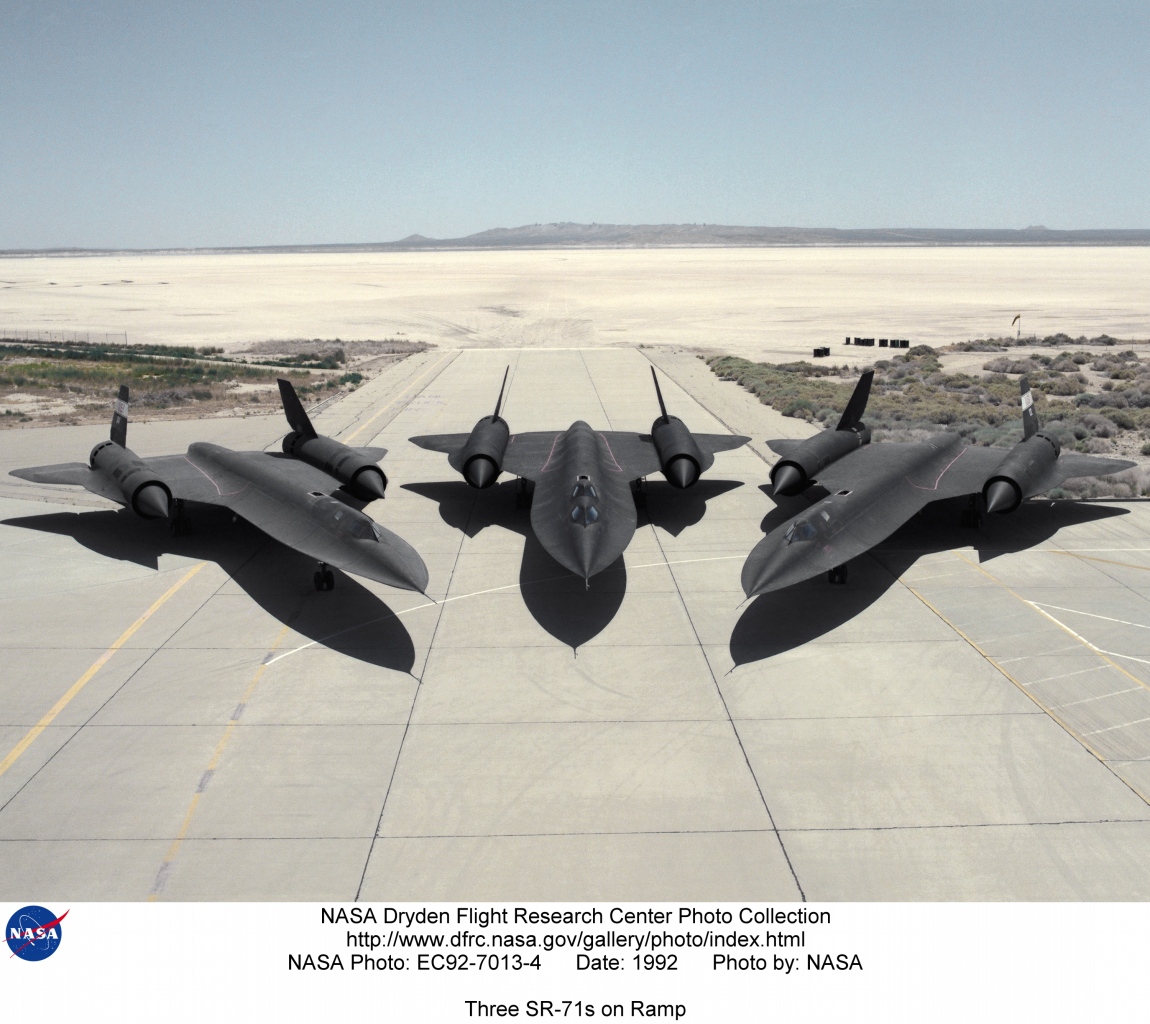
EC92-7013-4 | Three SR-71s (844, 831, and 832) on ramp - photo by Carla Thomas | alternate |
alternate |
alternate |
 |
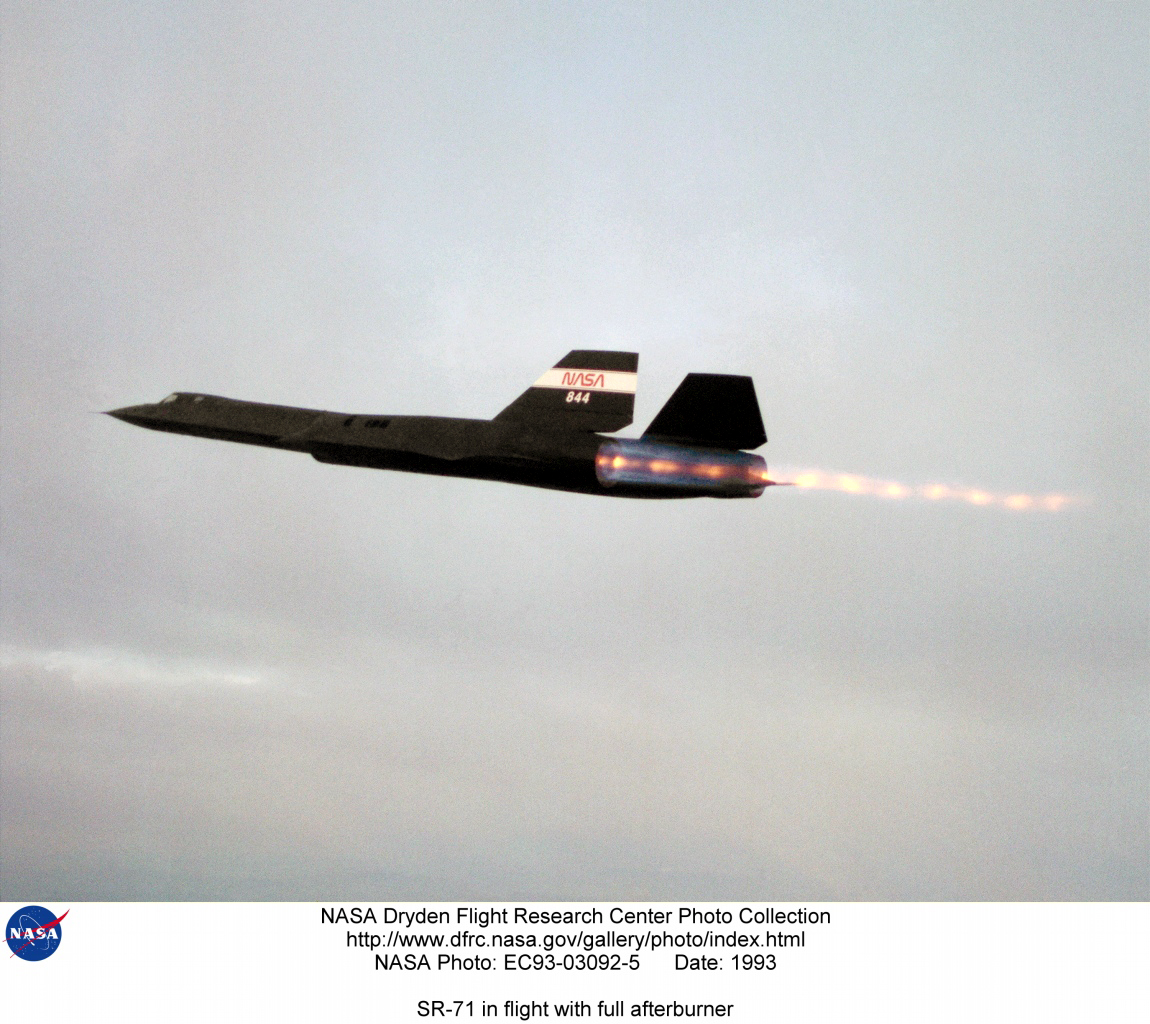
EC93-03092-5 | SR-71 #844(980) in flight with full afterburner - photo by Jim Ross | alternate |
alternate |
alternate |
 |
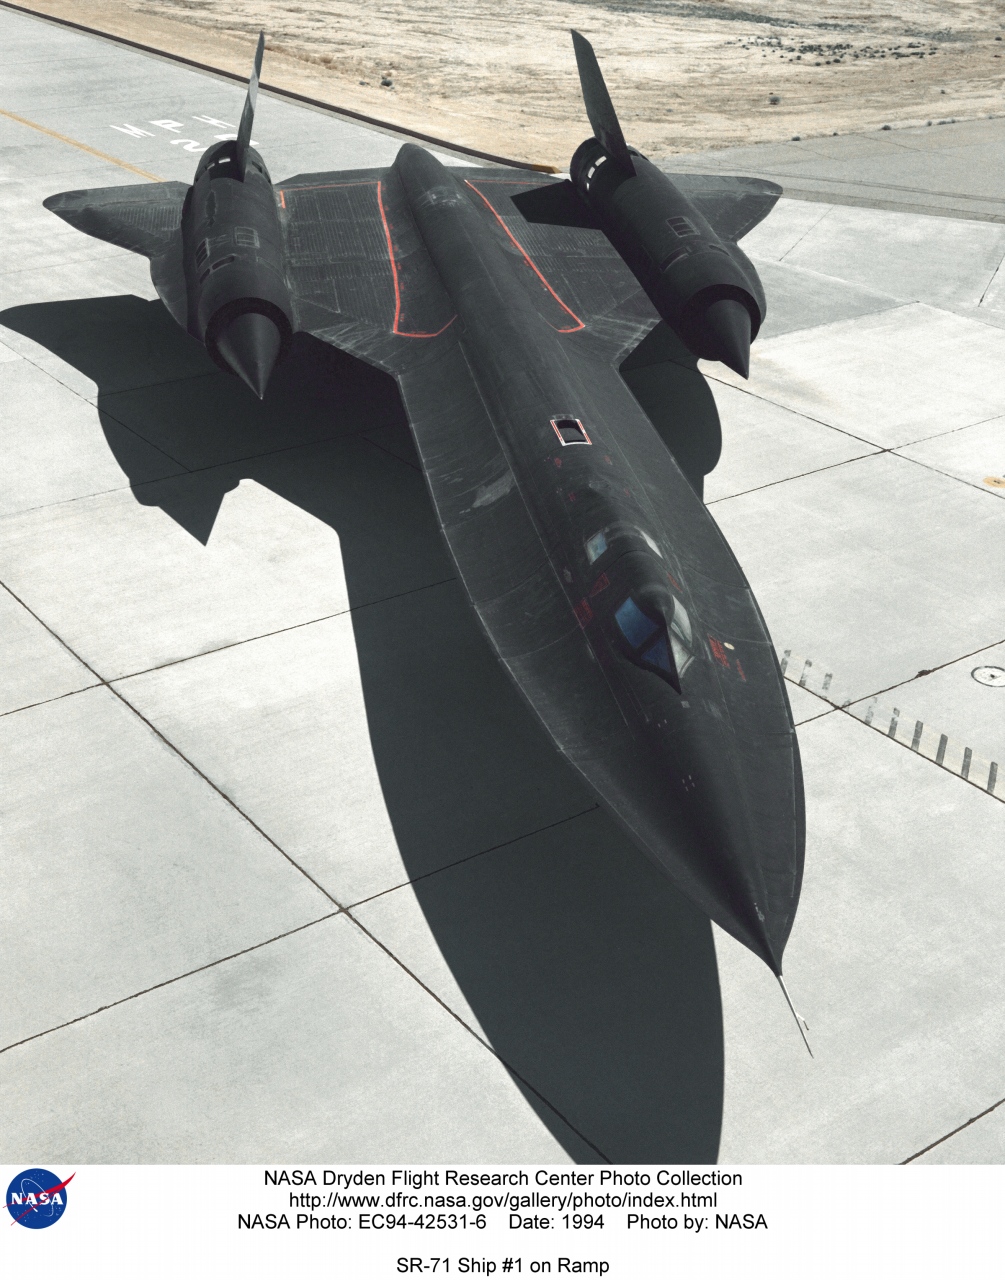
EC94-42531-3 | SR-71 ship #1(#832(971)) on ramp - photo by Brent Wood | alternate |
alternate |
alternate |
 |
EC94-42531-4 | SR-71 ship #1(#832(971)) on ramp - photo by Brent Wood | alternate |
alternate |
alternate |
 |
EC94-42531-6 | SR-71 ship #1(#832(971)) on ramp - photo by Brent Wood | alternate |
alternate |
alternate |
 |
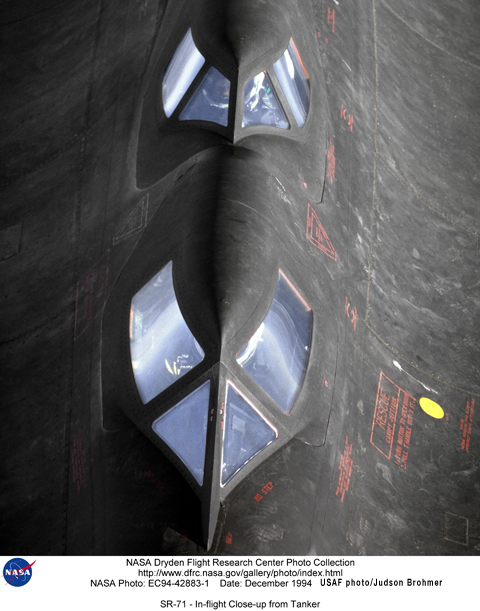
EC94-42883-1 | SR-71 #831(956) - In-flight close-up from tanker - photo by Judson Brohmer | alternate |
alternate |
alternate |
 |
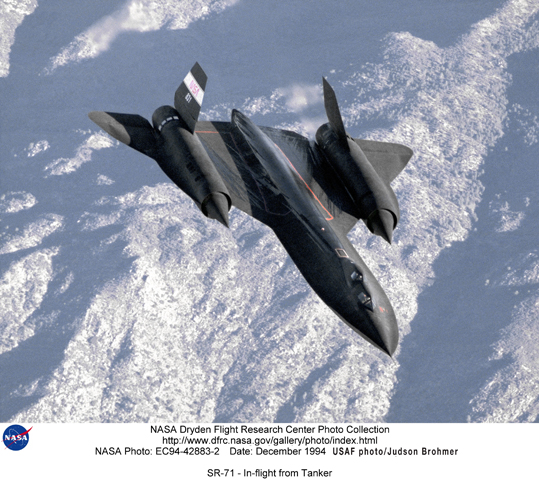
EC94-42883-2 | SR-71 #831(956) - In-flight from tanker - photo by Judson Brohmer | alternate |
alternate |
alternate |
|
|
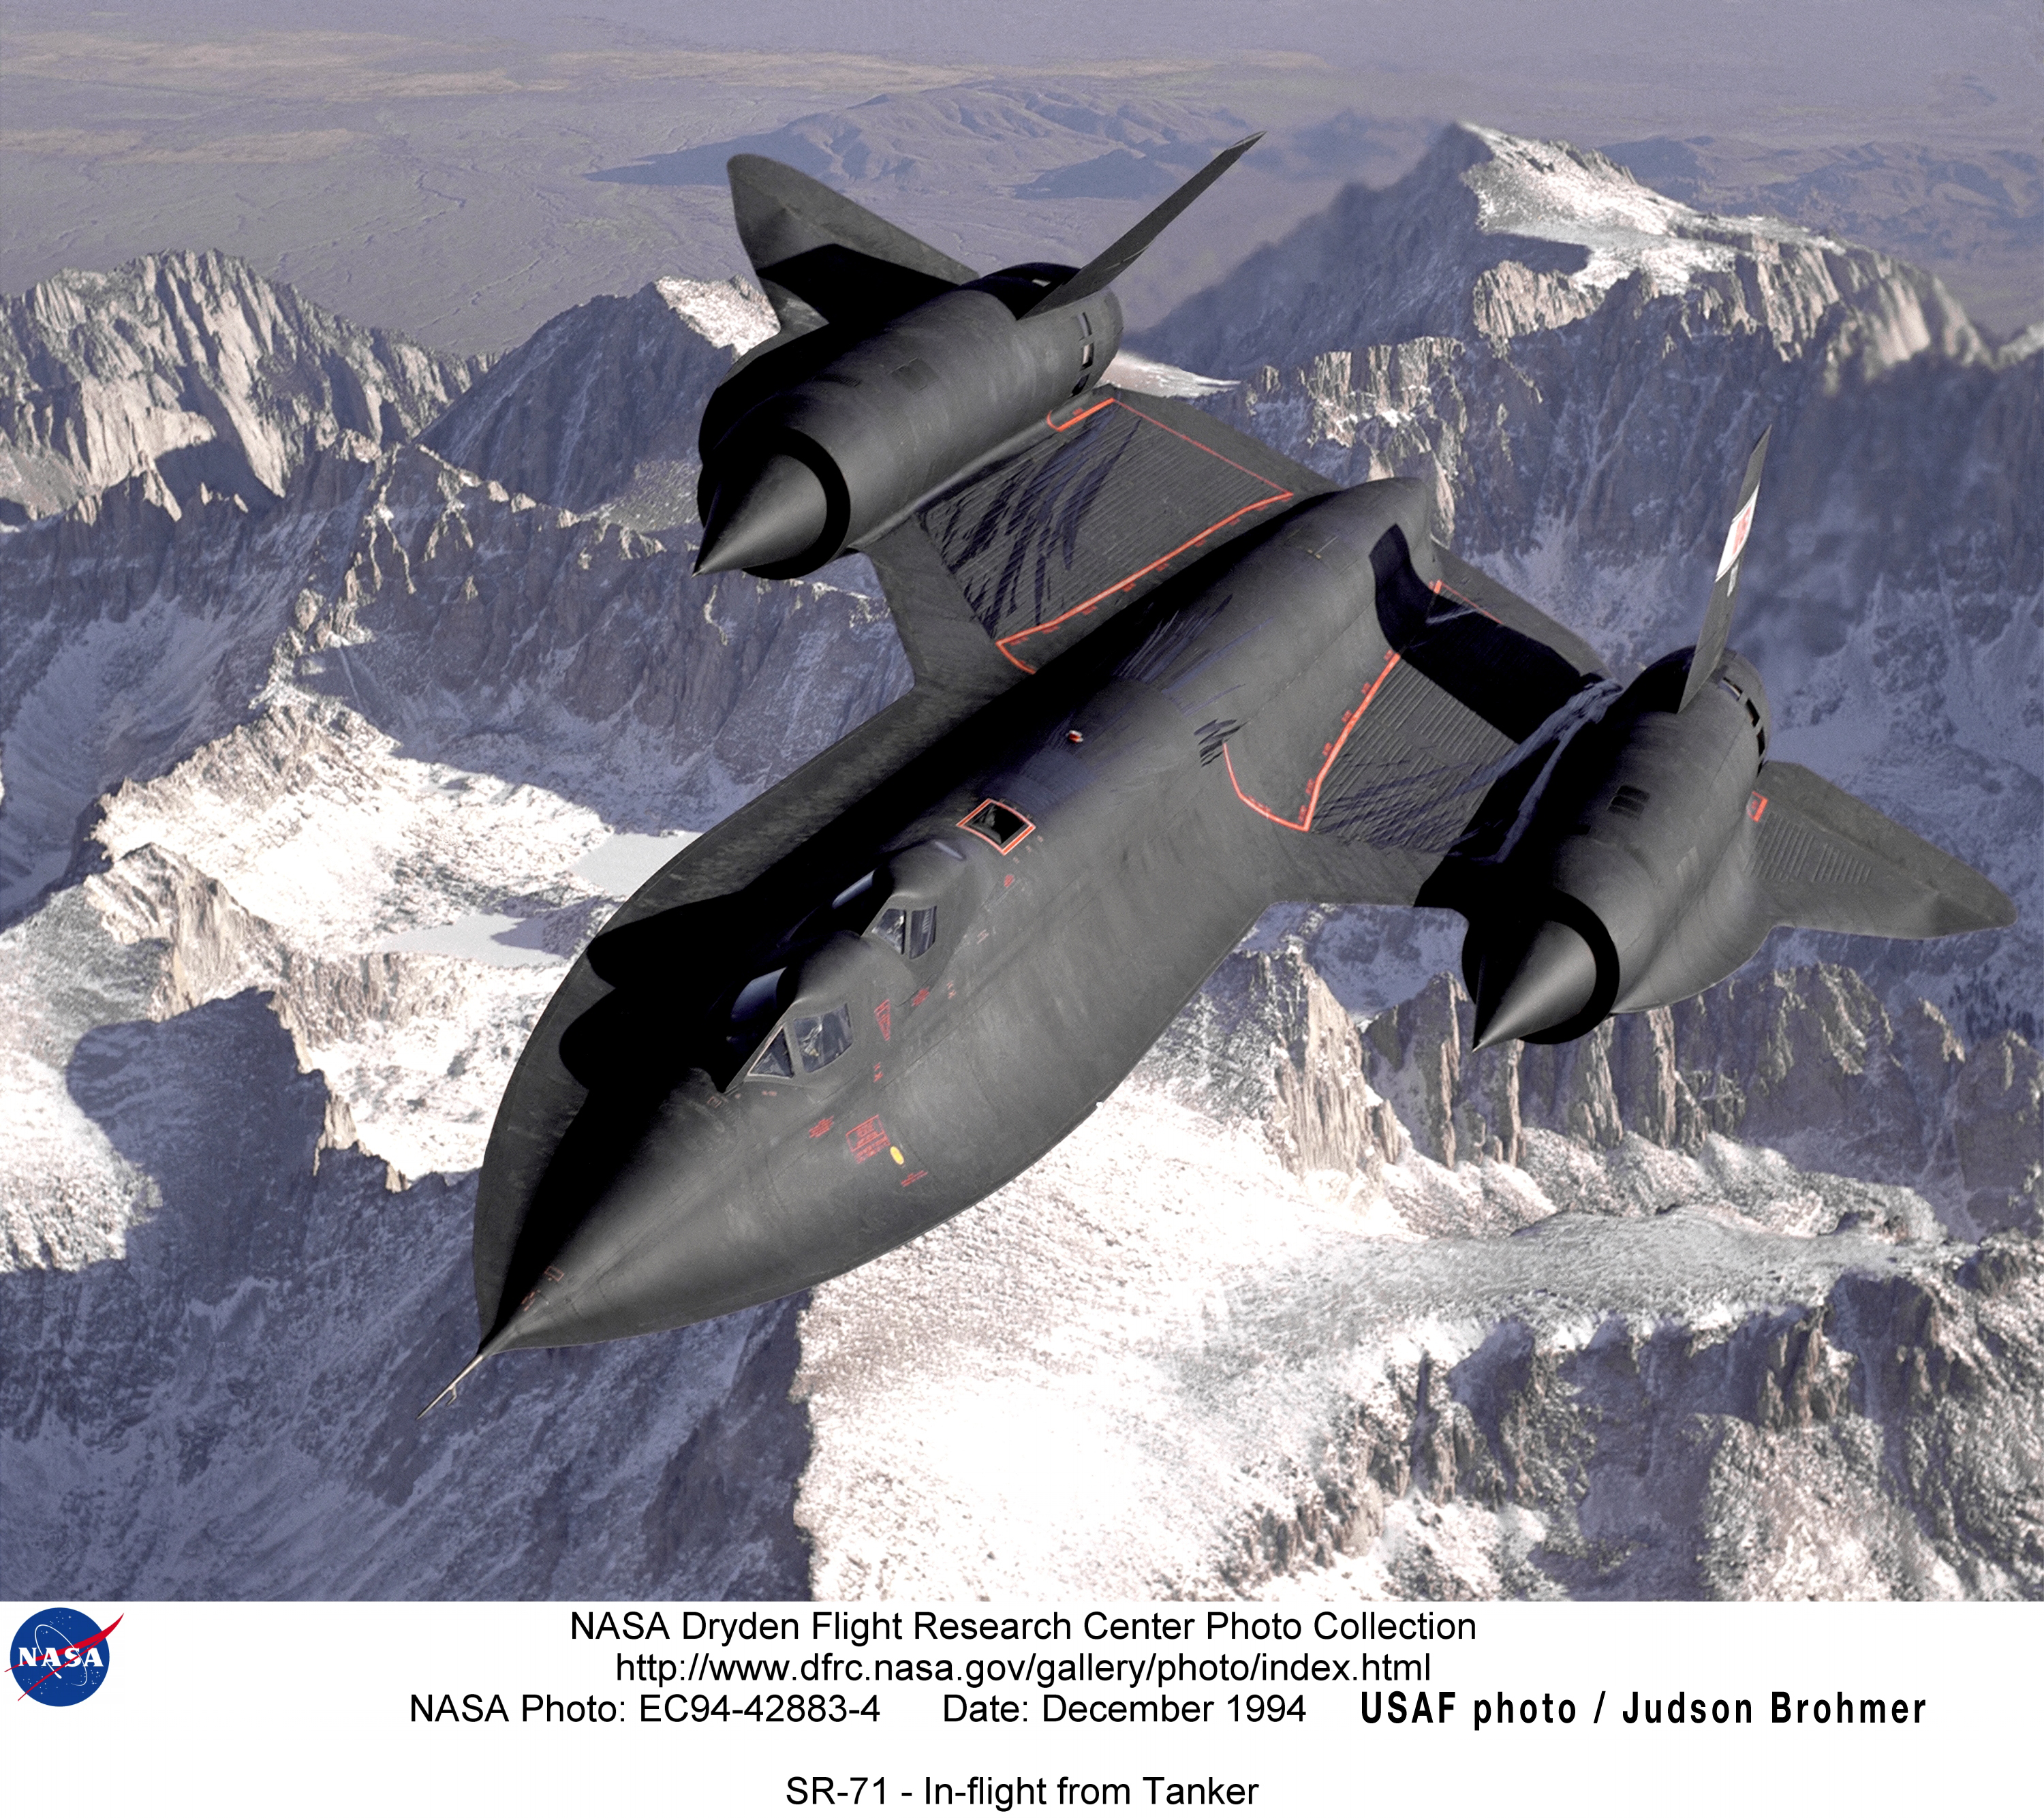
EC94-42883-4 | SR-71 #831(956) - In-flight from tanker - photo by Judson Brohmer | alternate |
alternate |
alternate |
 |
EC95-43075-2 | SR-71 #844(980) - Taxi on ramp with engines - photo by Tony Landis | alternate |
alternate |
alternate |
 |
EC95-43075-4 | SR-71 #844(980) - Taxi on ramp with engines - photo by Tony Landis | alternate |
alternate |
alternate |
 |
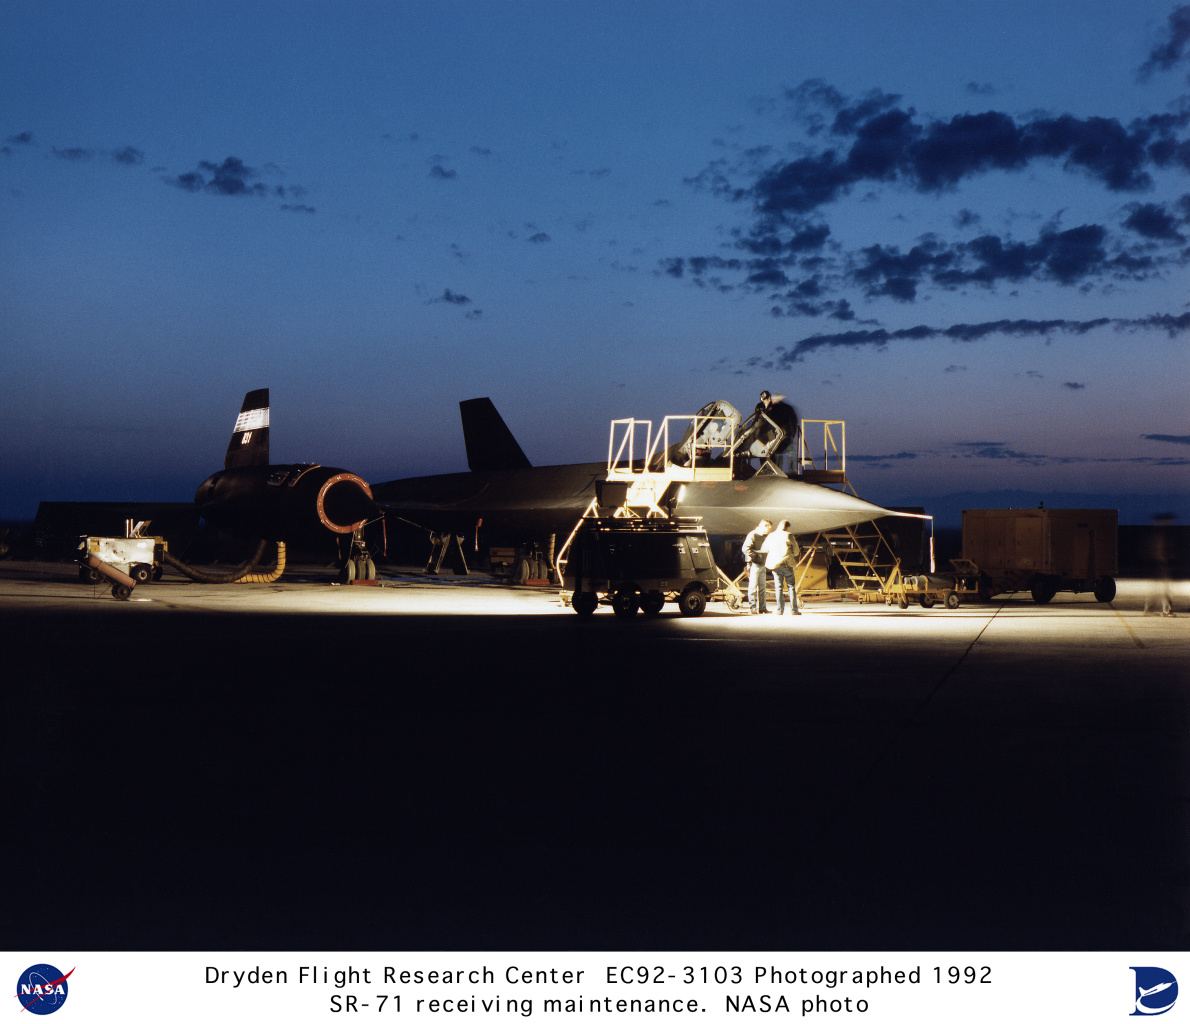
EC92-3103-8 | SR-71 #831(956) receiving flight prep maintenance pre-dawn - photo by Jim Ross | alternate |
alternate |
alternate |
 |
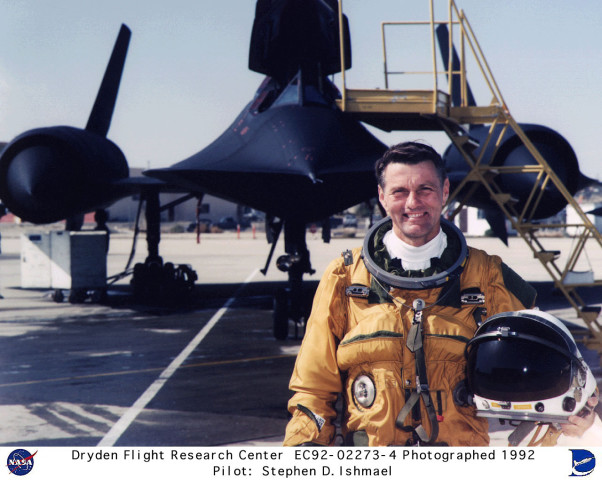
E92-02273-4 | SR-71 #831(956) with pilot Stephen (Steve) D. Ishmael - photo by Jim Ross | alternate |
alternate |
|
 |
EC92-02273 | SR-71 #831(956) with pilot Rogers E. Smith - photo by Jim Ross | alternate |
alternate |
|
 |
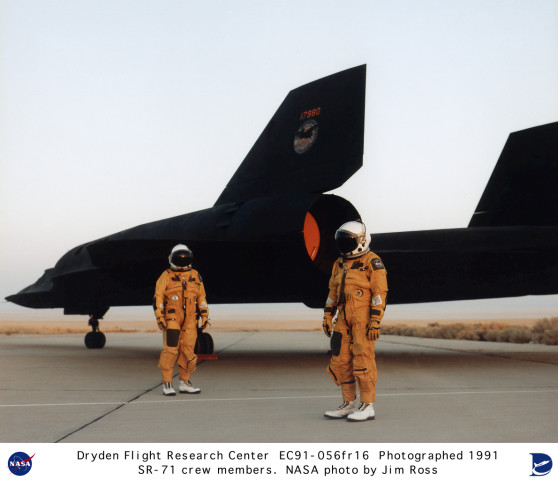
EC91-056FR16 | SR-71 #980 on ramp with flight crew - photo by Jim Ross | alternate |
alternate |
alternate |
 |
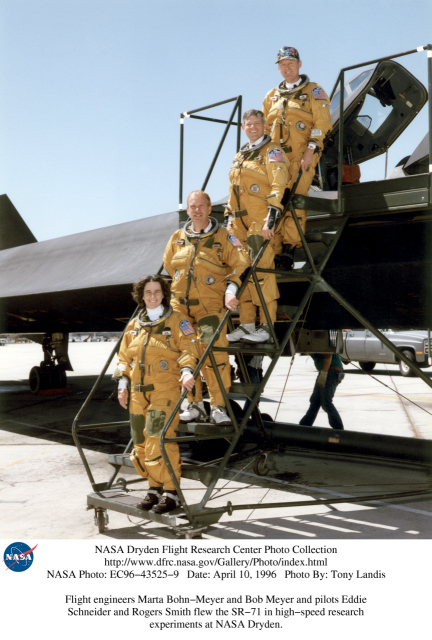
EC96-43525-9 | SR-71 pilots and crew (Bohn-Meyer, Meyer, Schneider, Smith) with SR-71B #831(956) - photo by Tony Landis | alternate |
alternate |
alternate |
 |
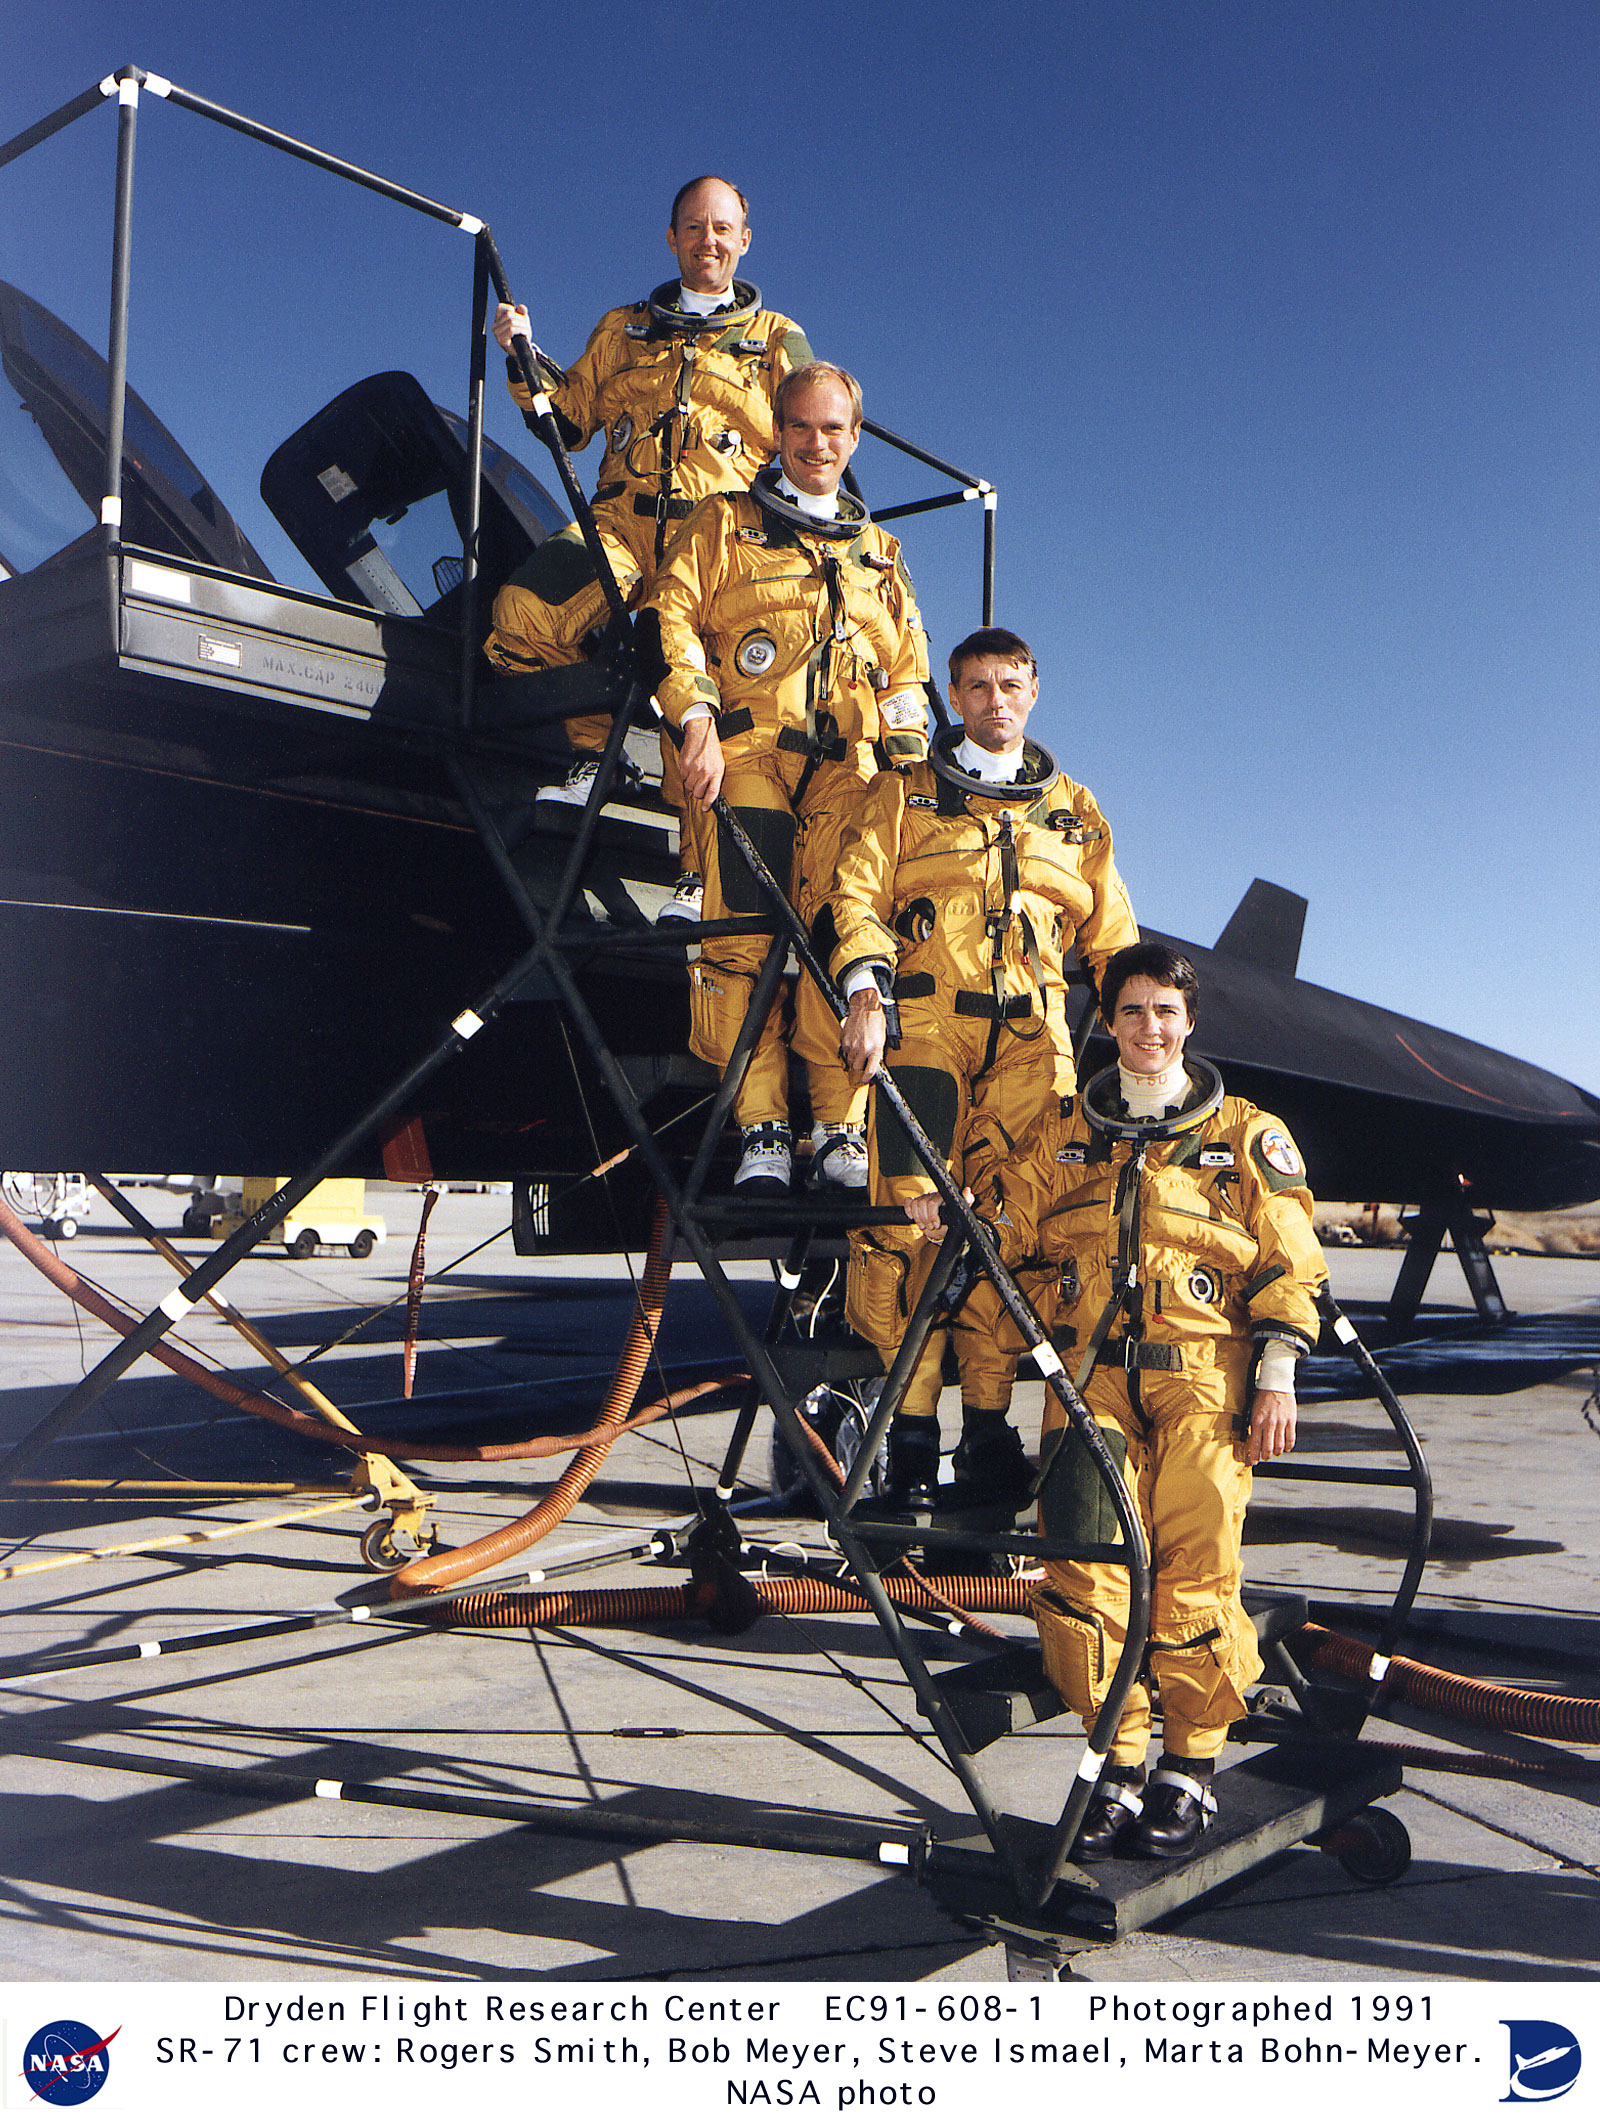
EC91-608-1 | SR-71 pilots and crew (Smith, Meyer, Bohn-Meyer, Ishmael) with SR-71B #831(956) | alternate |
alternate |
alternate |
 |
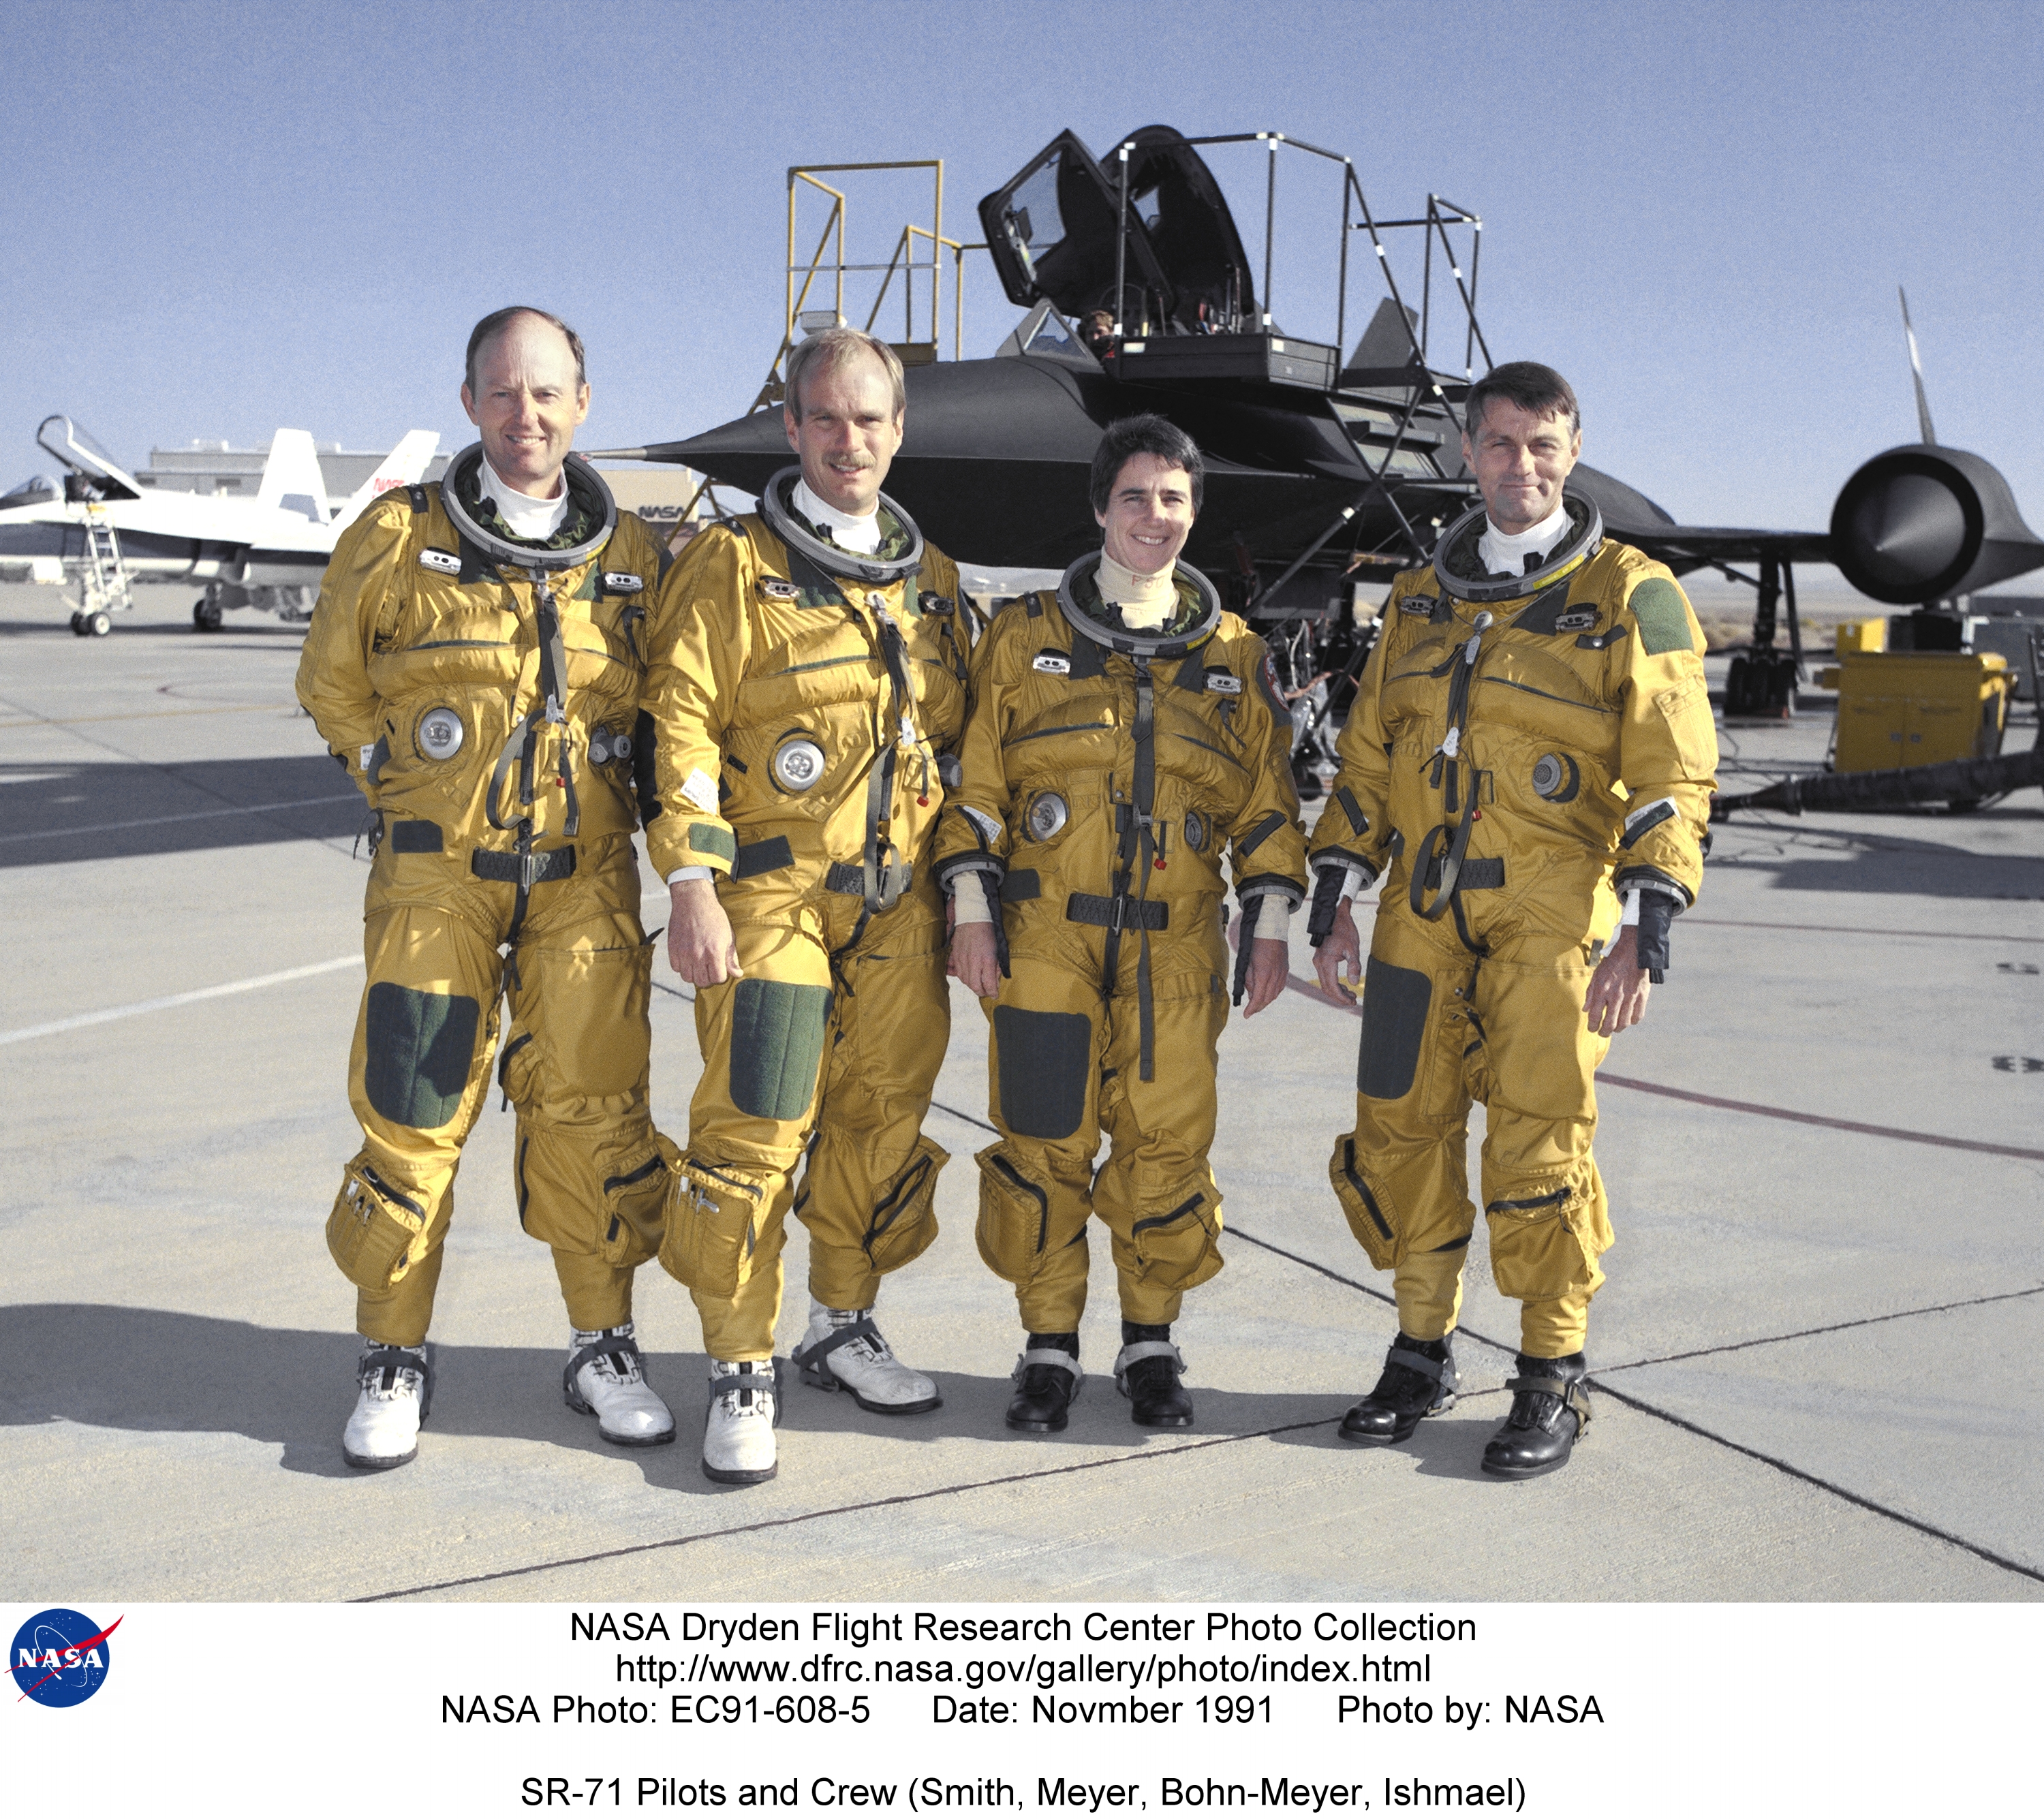
EC91-608-5 | SR-71 #831(956) with pilots and crew (Smith, Meyer, Bohn-Meyer, Ishmael) | alternate |
alternate |
alternate |
 |
EC01-0100-2 | Research Engineer Marta Bohn-Meyer with SR-71 #831(956) - photo by Carla Thomas | alternate |
alternate |
alternate |
 |
EC92-2273-1 | SR-71 #831(956) with Research Engineer Marta Bohn-Meyer - photo by Jim Ross | alternate |
alternate |
alternate |
 |
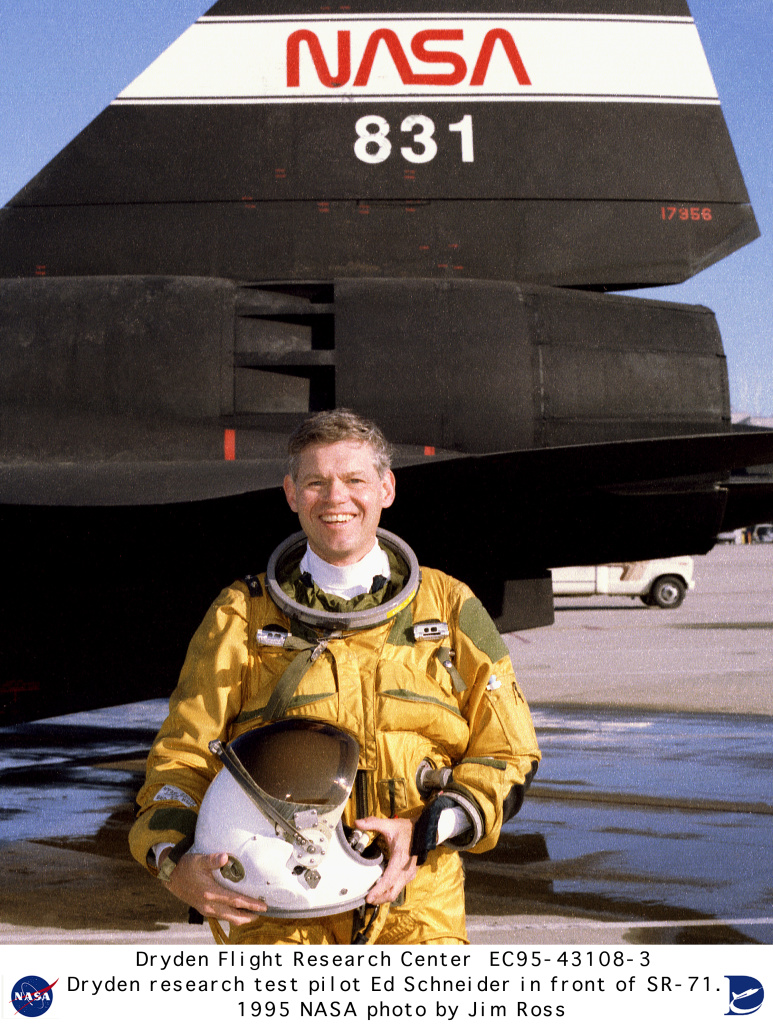
EC95-43108-3 | Edward (Ed) T. Schneider in front of SR-71 Blackbird #831(956) - photo by Jim Ross | alternate |
alternate |
alternate |
 |
EC91-0608-6 | Bob Meyer and Marta Bohn-Meyer in front of SR-71 Blackbird #831(956) - photo by Ken Wiersema | alternate |
alternate |
alternate |
 |
EC96-43473-1 | Travelmate Bear with SR-71 Researcher Marta Bohn-Meyer and Pilot Ed Schneider in front of SR-71 Blackbird #831(956) | alternate |
alternate |
alternate |
 |
EC94-42444-32 | Maj. General (ret.) Jack Dailey being assisted after an SR-71 familiarization flight (in #956/831). Photographed Feb. 25, 1994. | alternate |
||
 |
EC96-43399-9 | General Richard Engel being integrated into the SR-71 cockpit for a familiarization flight (in #956/831) on Dec. 14, 1995 - photo by Tony Landis | alternate |
||
 |
EC96-43525-7 | SR-71 #956/831 with flight crews and life support crews - photo by Tony Landis | alternate |
||
 |
EC90-280-1 | Dryden Research Aircraft Fleet (including SR-71 #980) on ramp and center - 1990 - photo by Larry Sammons | alternate |
alternate |
alternate |
 |
EC93-41012-3 | Dryden Research Aircraft Fleet on ramp - 1993: X-15 (mockup), F-18, SR-71 (#832(971)), X-31, X-29 - photo by Dutch Slager | alternate |
alternate |
alternate |
 |
EC97-44165-149 | Dryden 1997 Research Aircraft: X-31, F-15 ACTIVE, SR-71 #831(956), F-106, F-16XL Ship #2, X-38, and X-36 - photo by Tony Landis | alternate |
alternate |
alternate |
 |
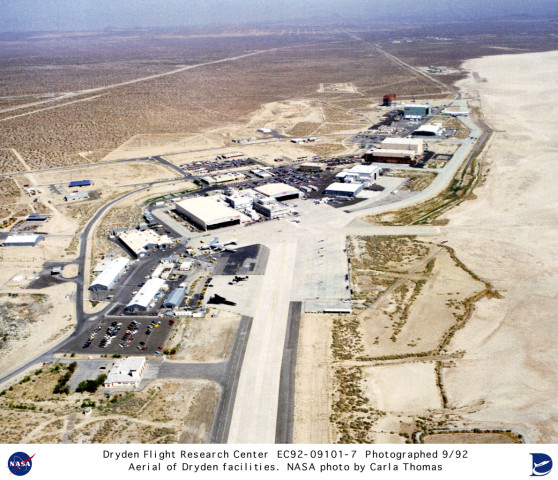
EC92-09101-7 | Aerial photo of NASA Dryden Flight Research Facility (SR-71 #844(980) on tarmac in foreground) - photo by Carla Thomas | alternate |
alternate |
alternate |
 |
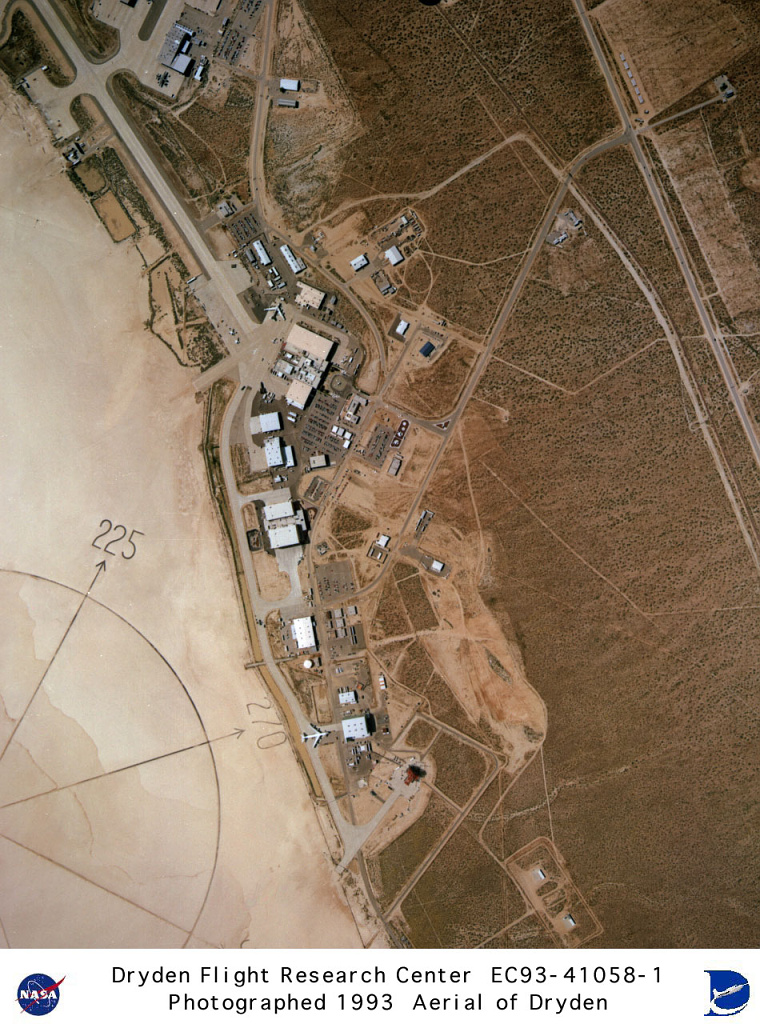
EC93-41058-1 | Aerial photo of NASA Dryden Flight Research Facility (SR-71 #844(980) on tarmac near center of photo, where taxiway meets runway) | alternate |
alternate |
|
 |
EC97-44165-01 | Dryden Research Aircraft Fleet (including SR-71B #831/956) on ramp - 1997 - photo by Carla Thomas | alternate |
alternate |
alternate |
 |
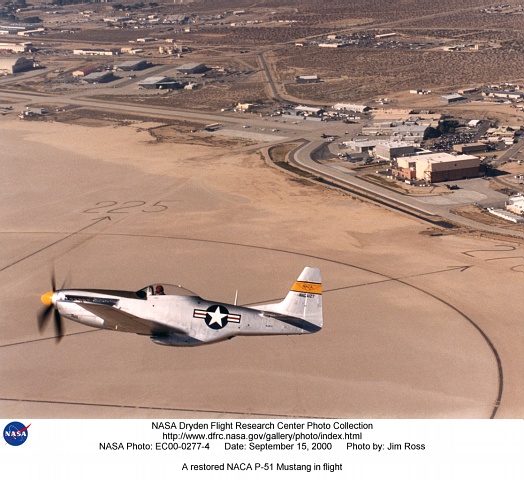
EC00-0277-4 | A restored NACA P-51 Mustang in flight (see if you can spot all four NASA SR-71s in the background) - photo by Jim Ross | alternate |
alternate |
alternate |
 |
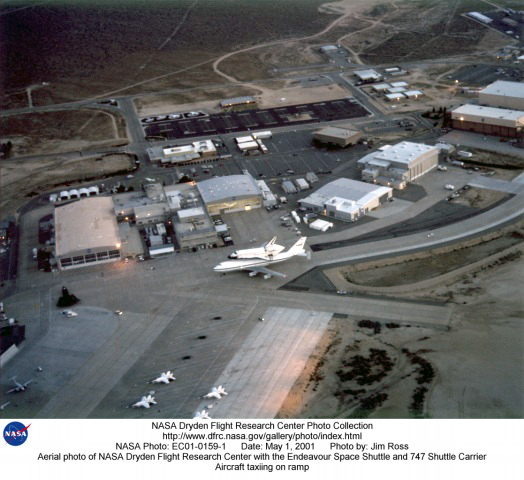
EC01-0159-1 | Aerial photo of NASA Dryden Flight Research Center with the Endeavour Space Shuttle and 747 Shuttle Carrier Aircraft taxiing on ramp (SR-71 #831(956) on ramp on left side of photo) - photo by Jim Ross | alternate |
alternate |
alternate |
 |
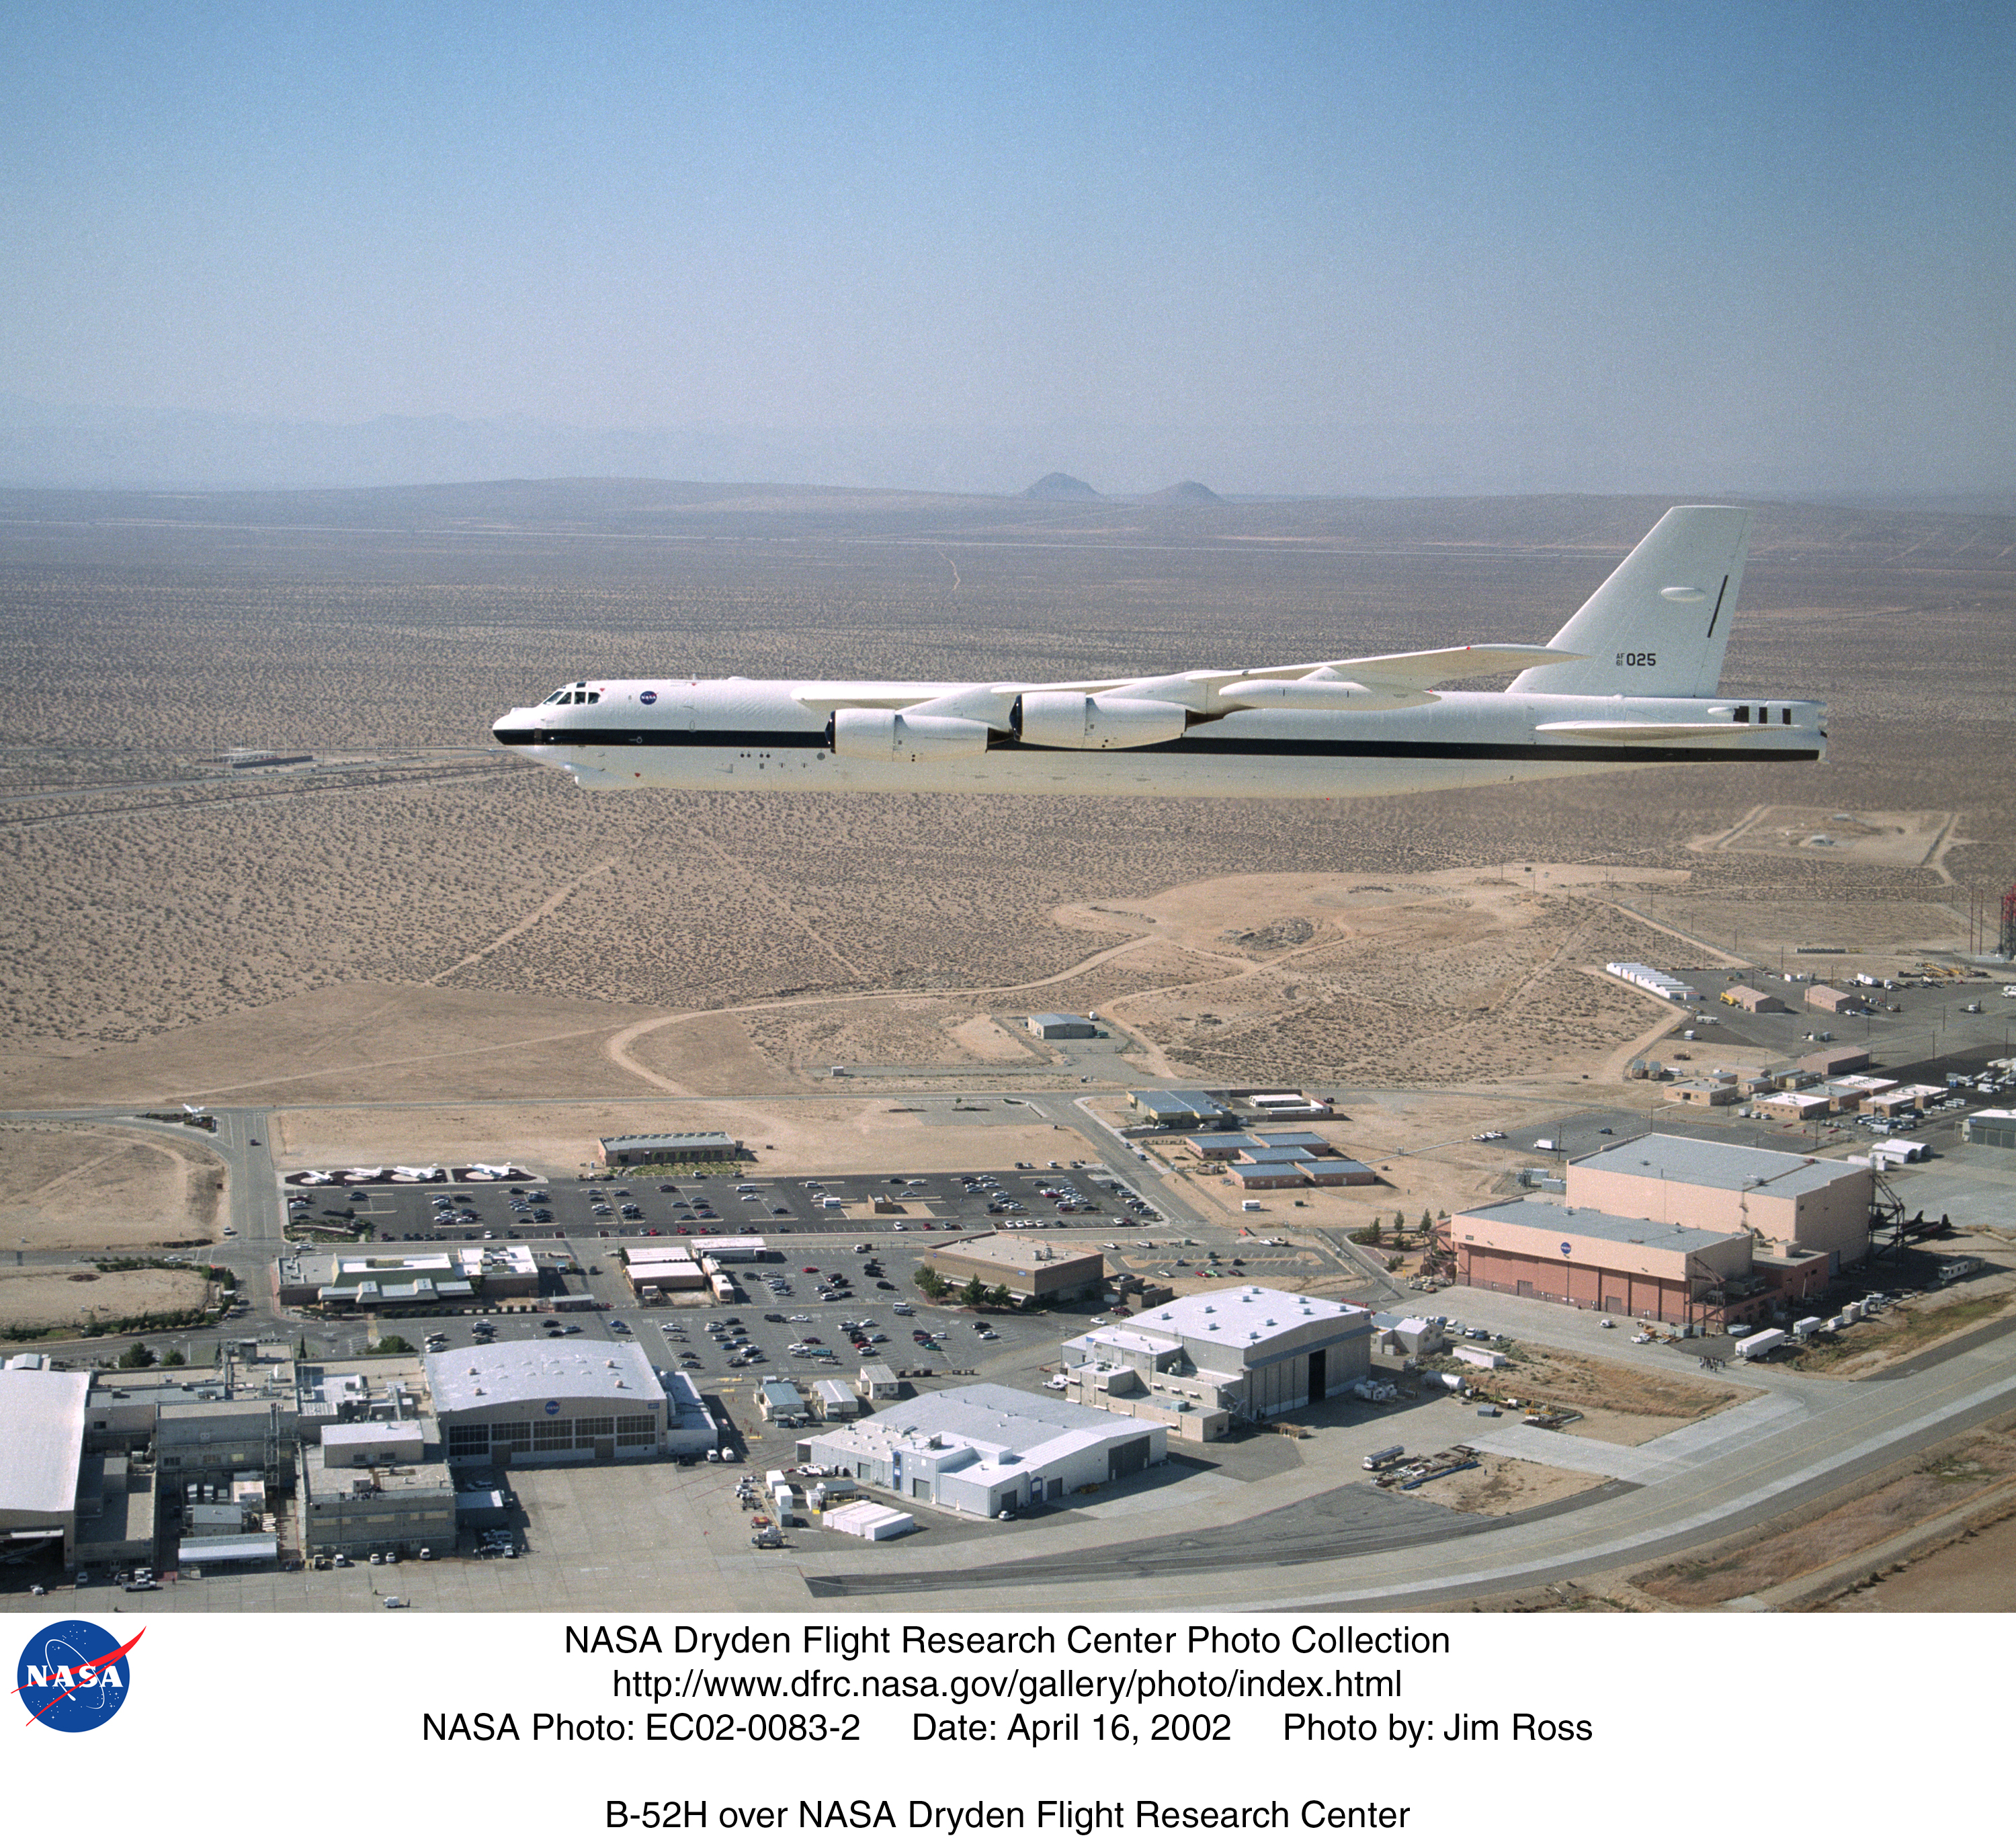
EC02-0083-2 | B-52H over NASA Dryden Flight Research Center (SR-71s #831(956) and 971 visible behind building in lower right corner of photo) - photo by Jim Ross | alternate |
alternate |
alternate |
 |
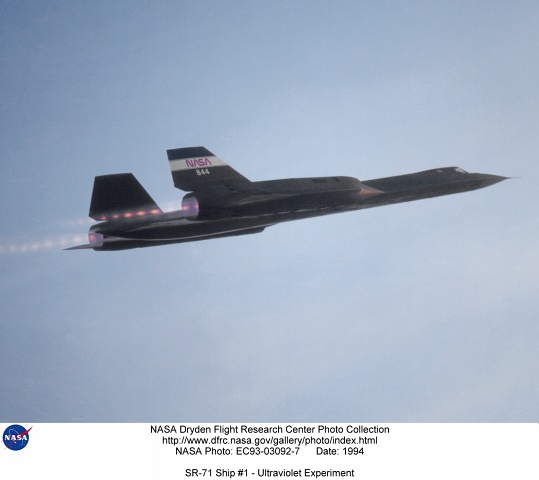
EC93-03092-7 | SR-71 Ship #1 #844(980) - Ultraviolet Experiment - photo by Jim Ross | alternate |
alternate |
alternate |
 |
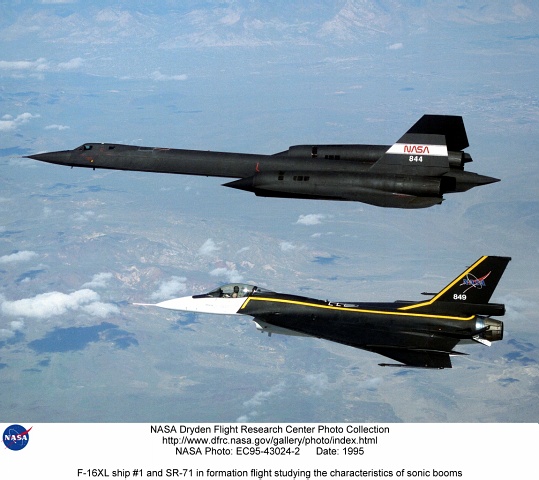
EC95-43024-2 | F-16XL ship #1 and SR-71 #844(980) in formation flight studying the characteristics of sonic booms - photo by Jim Ross | alternate |
alternate |
alternate |
 |
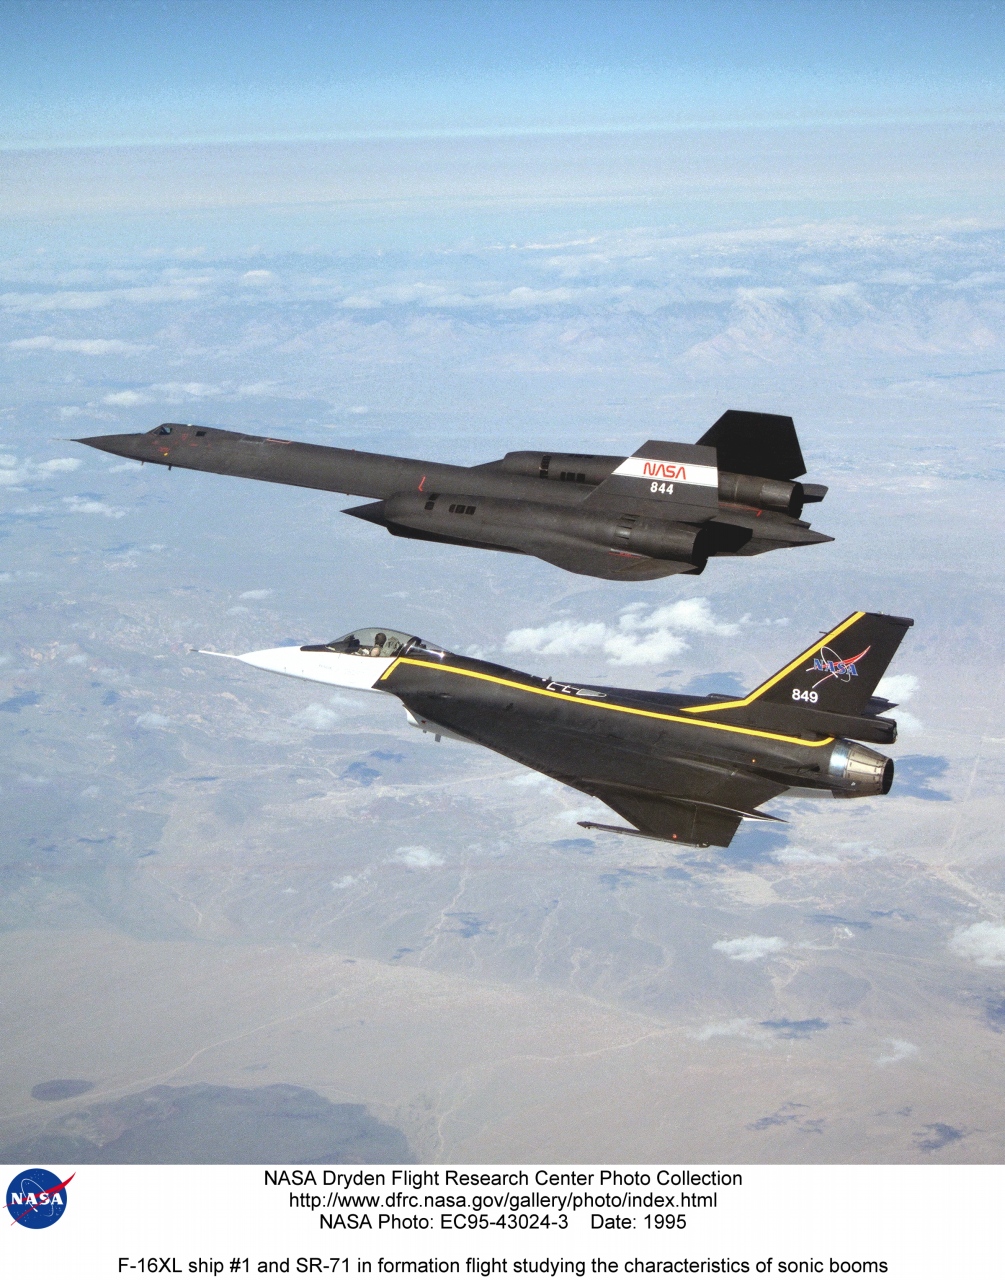
EC95-43024-3 | F-16XL ship #1 and SR-71 #844(980) in formation flight studying the characteristics of sonic booms - photo by Jim Ross | alternate |
alternate |
alternate |
 |
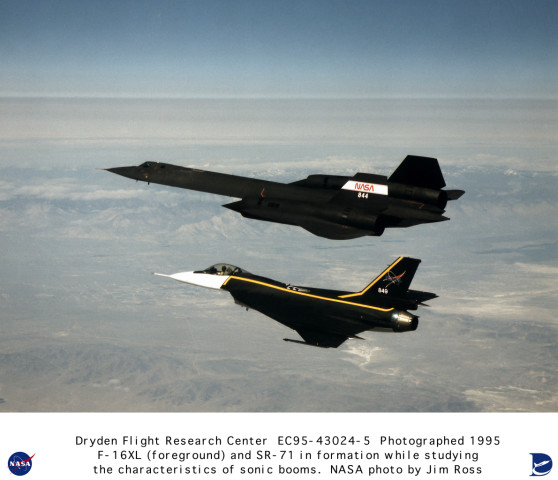
EC95-43024-5 | F-16XL ship #1 and SR-71 #844(980) in formation flight studying the characteristics of sonic booms - photo by Jim Ross | alternate |
alternate |
alternate |
 |
EC95-43024-7 | F-16XL ship #1 and SR-71 #844(980) in formation flight studying the characteristics of sonic booms - photo by Jim Ross | alternate |
alternate |
alternate |
 |
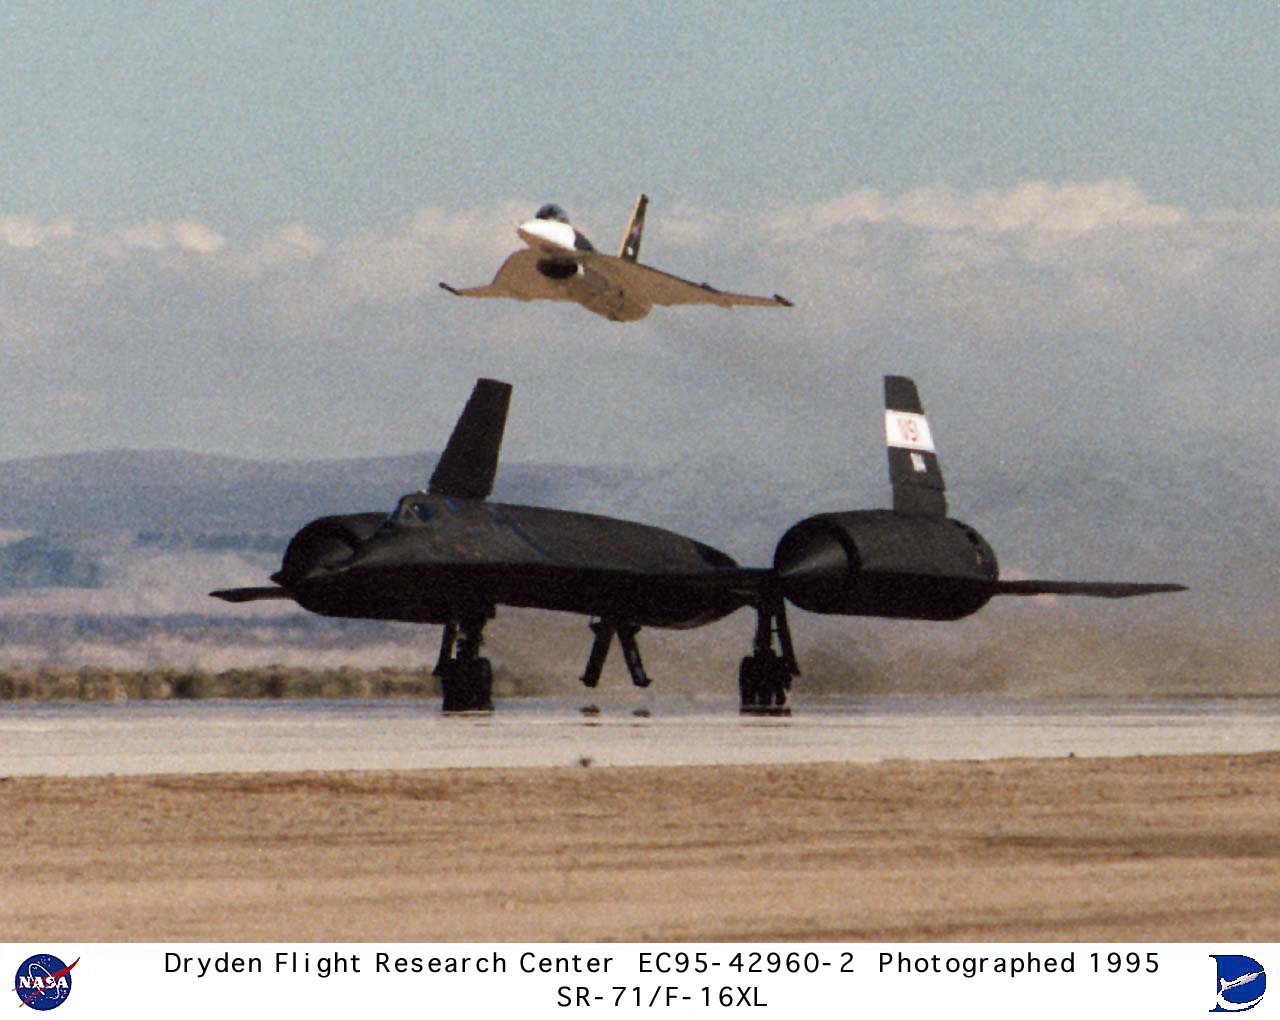
EC95-42960-2 | F-16XL #1 and SR-71 #844(980) takeoff - photo by Tony Landis | alternate |
alternate |
|
 |
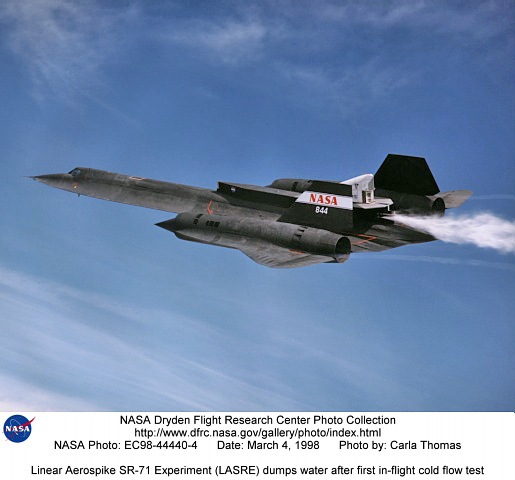
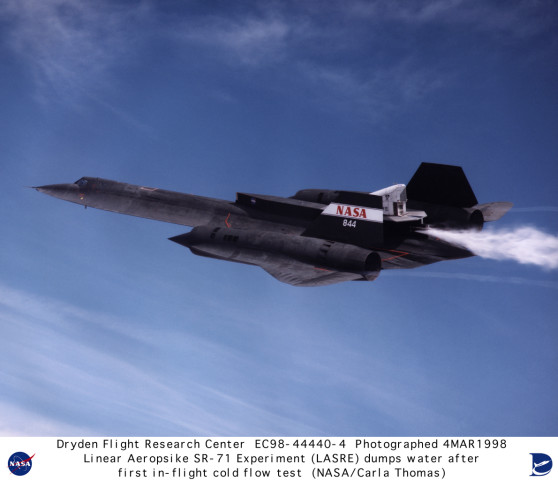
EC98-44440-4 | Linear Aerospike SR-71 Experiment (LASRE) dumps water after first in-flight cold flow test (#844(980)) - photo by Carla Thomas | alternate |
alternate |
alternate |
 |
EC98-44440-13 | Linear Aerospike SR-71 Experiment (LASRE) during first in-flight cold flow test (#844(980)) - photo by Tony Landis | alternate |
alternate |
alternate |
 |
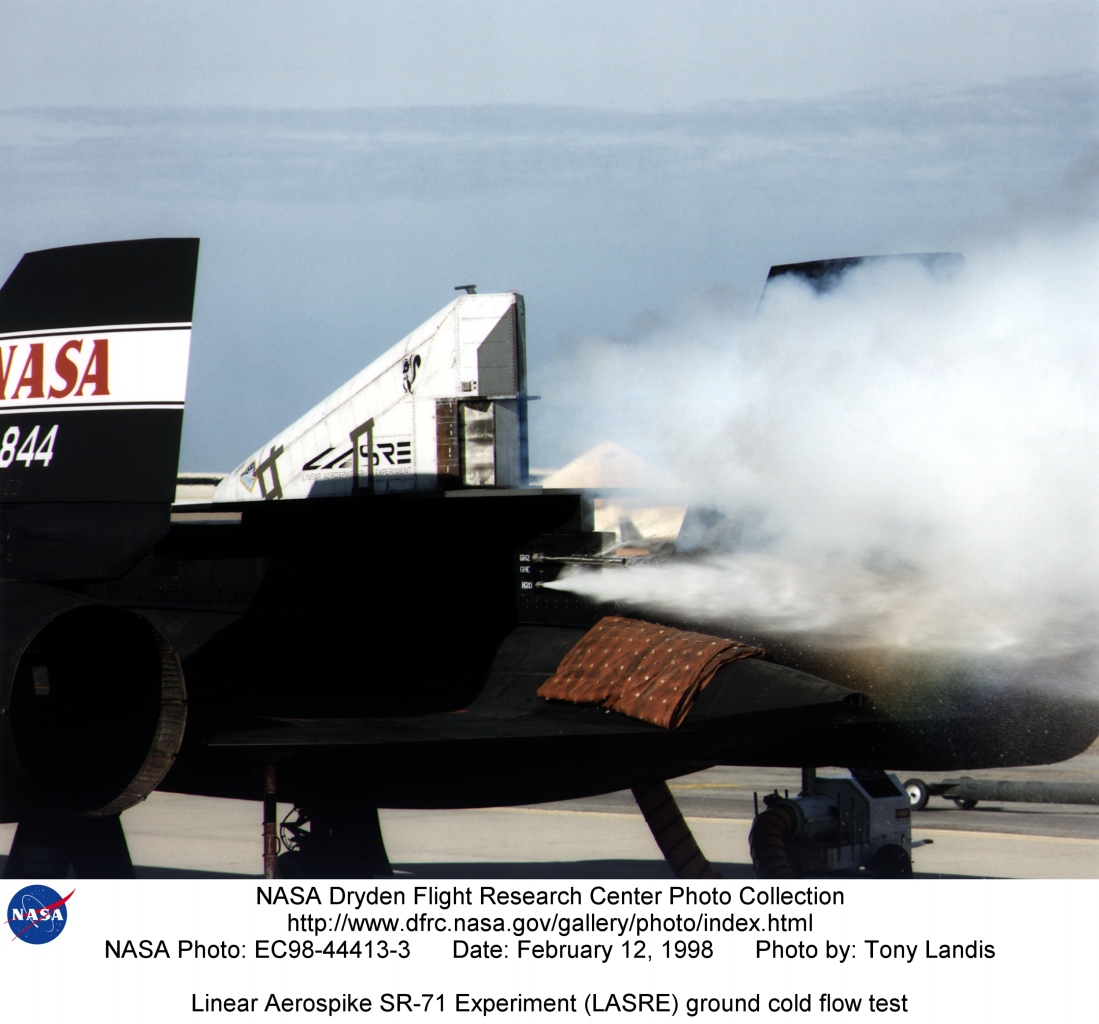
EC98-44413-3 | Linear Aerospike SR-71 Experiment (LASRE) ground cold flow test (#844(980)) - photo by Tony Landis | alternate |
alternate |
alternate |
 |
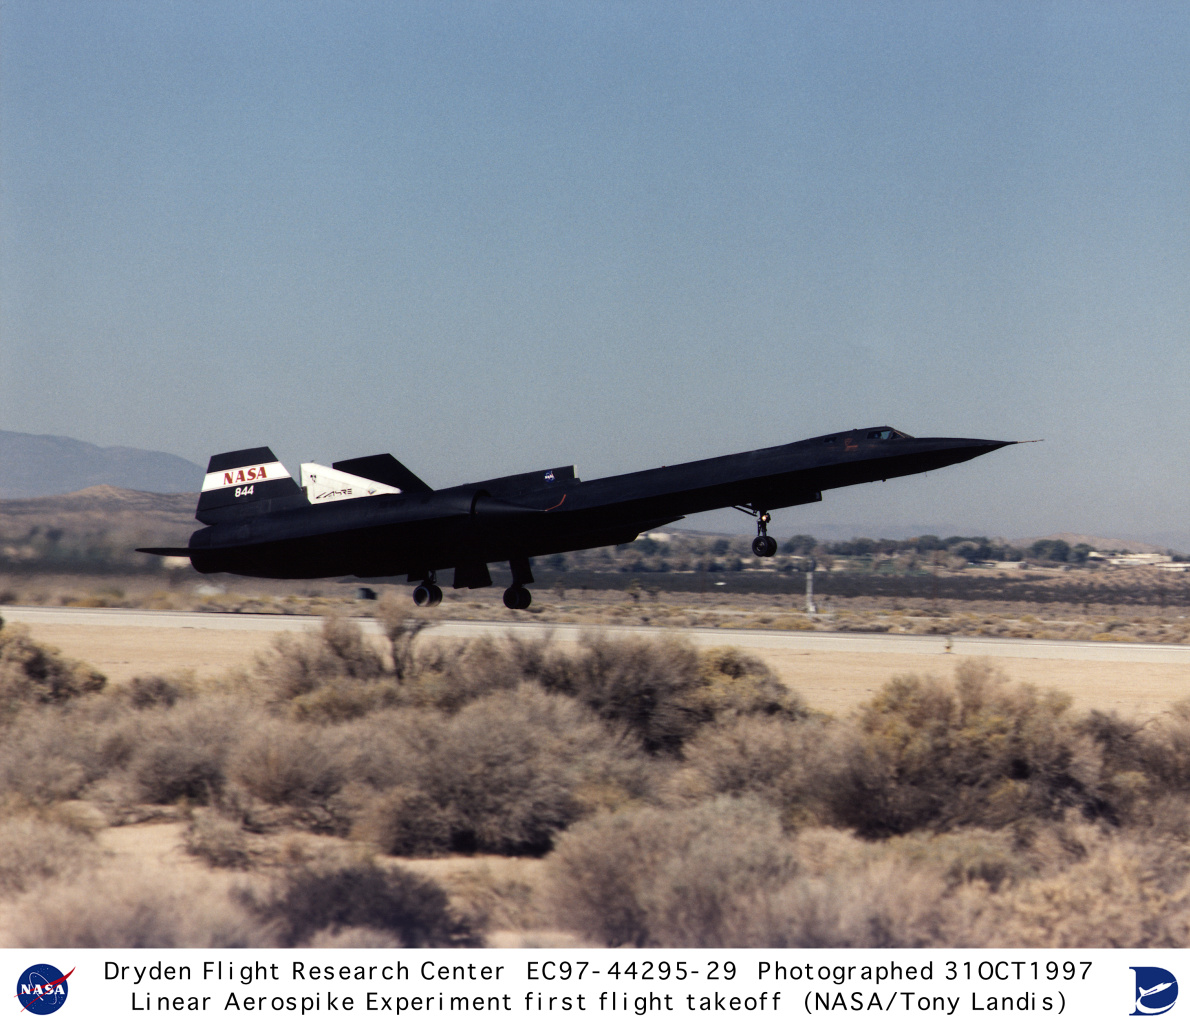
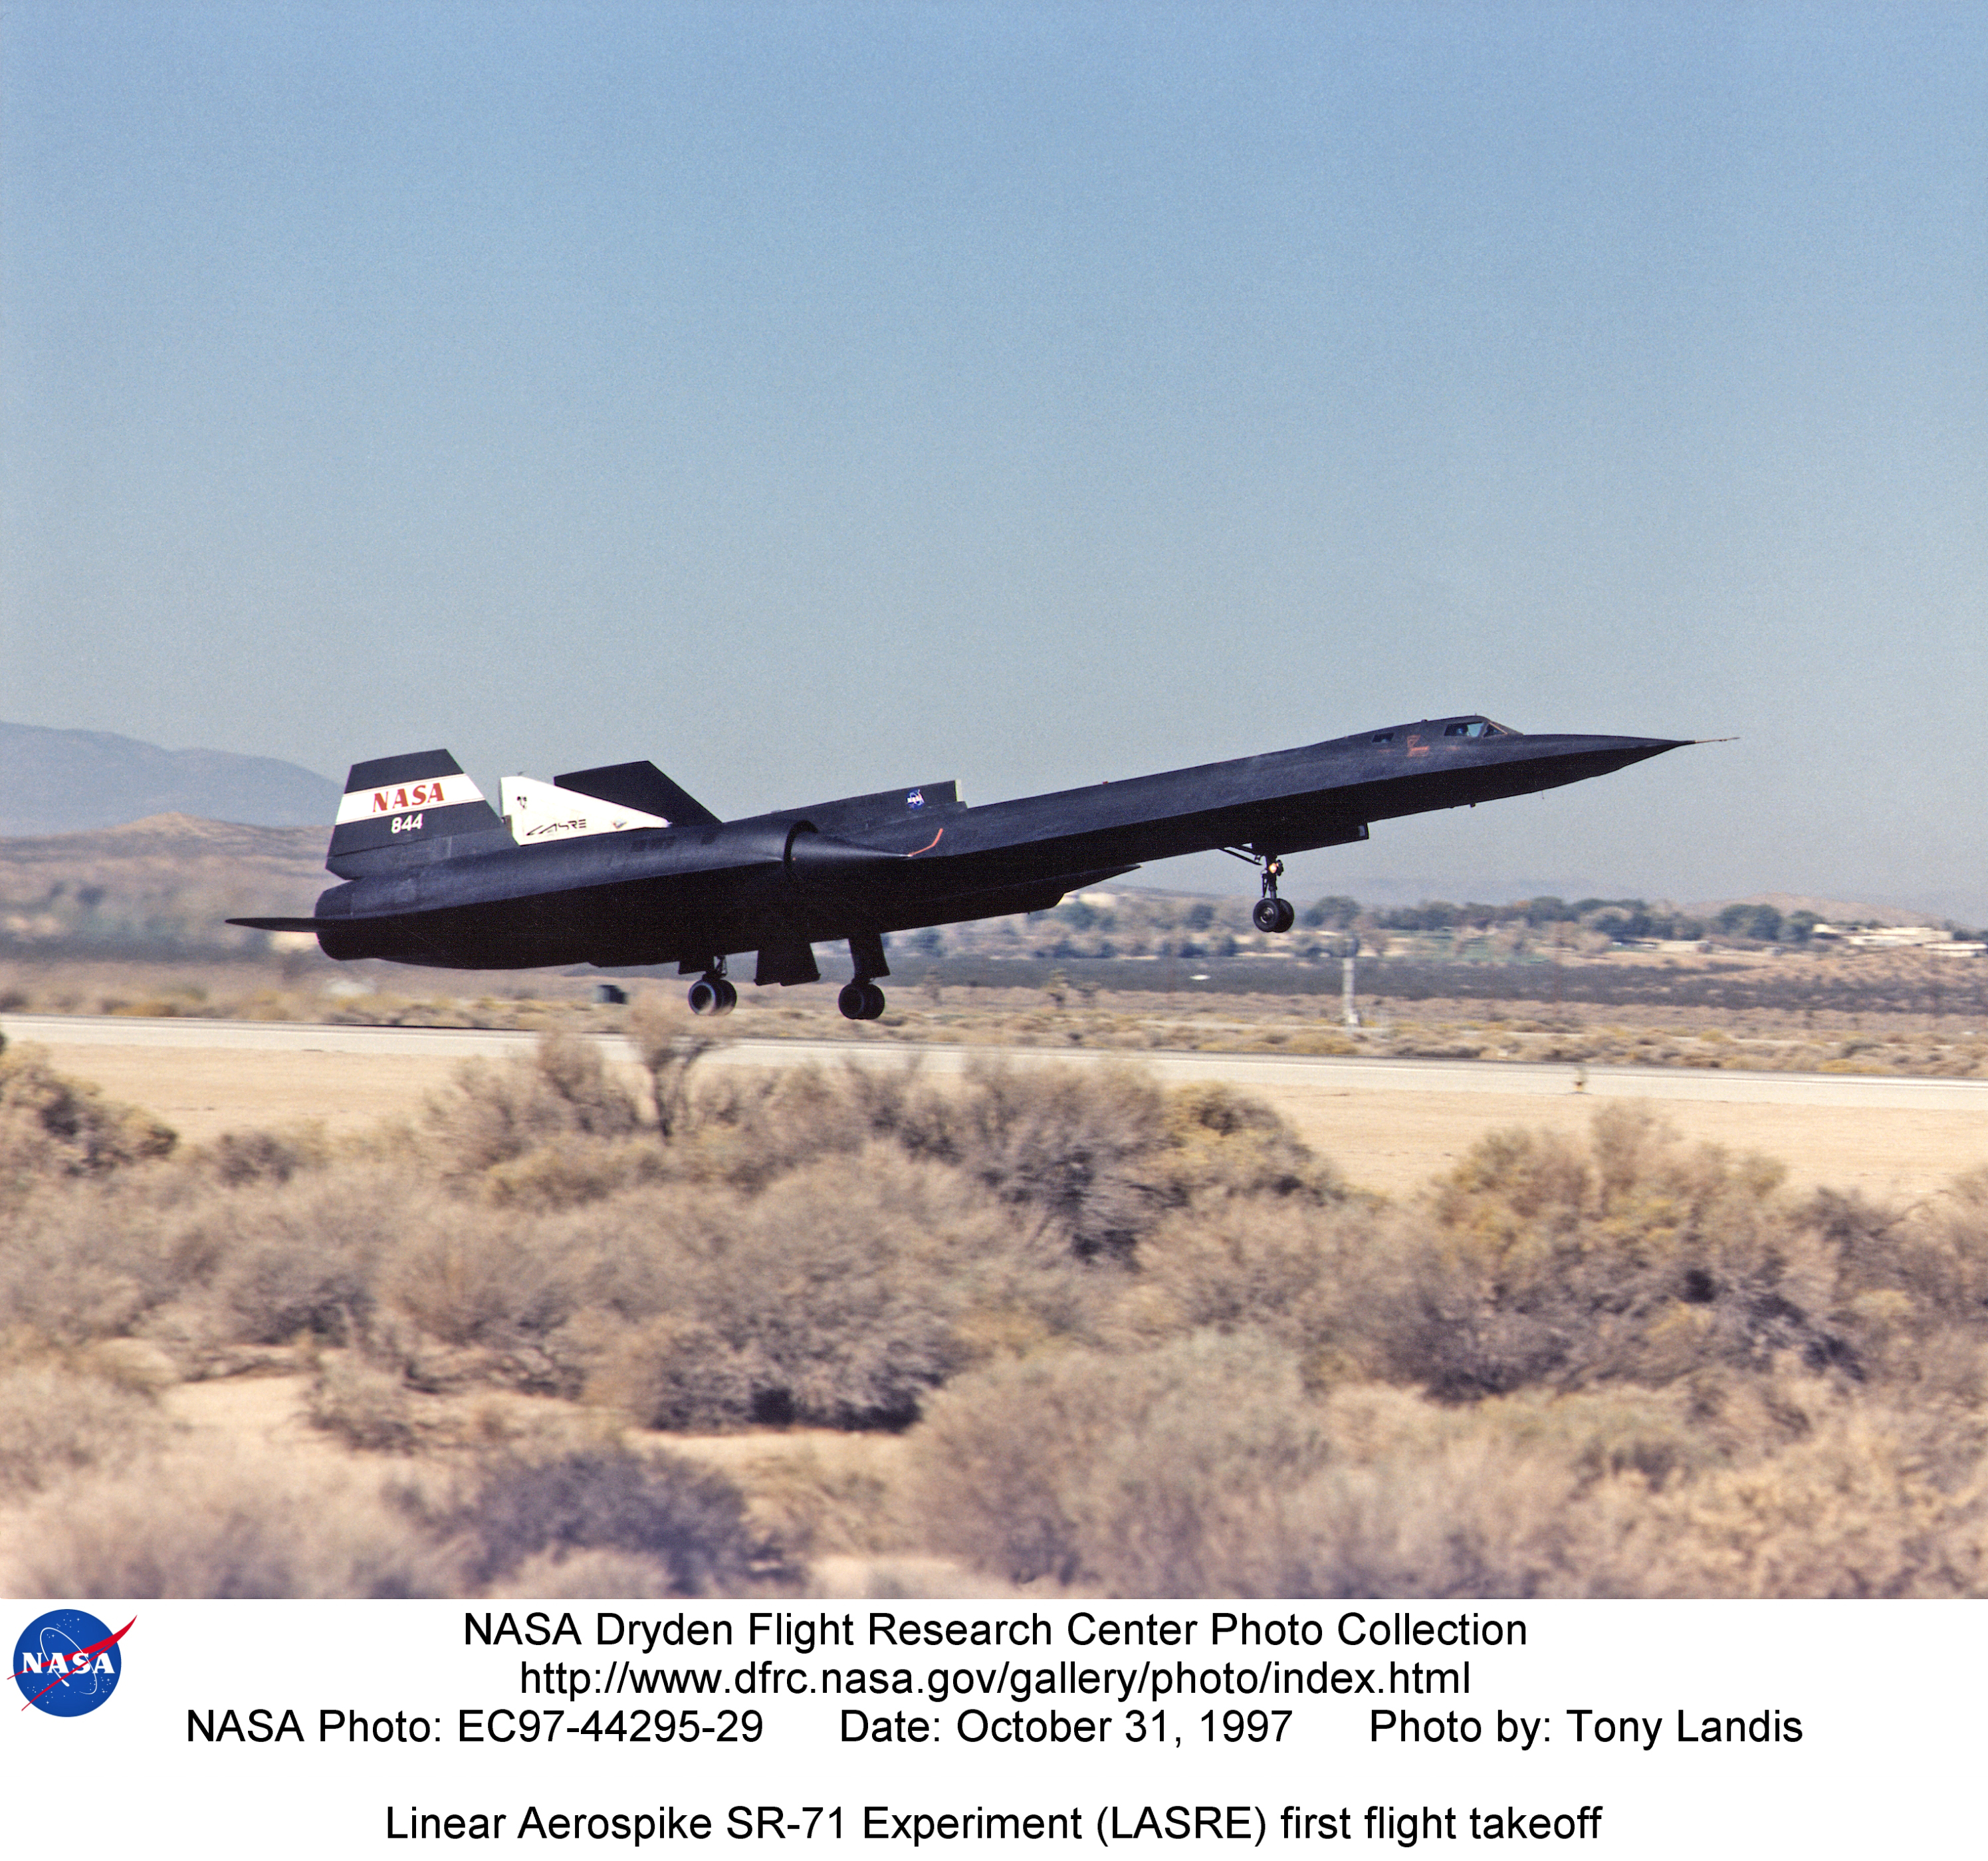
EC97-44295-29 | Linear Aerospike SR-71 Experiment (LASRE) first flight takeoff (#844(980)) - photo by Tony Landis | alternate |
alternate |
alternate |
 |
EC97-44295-51 | Linear Aerospike SR-71 Experiment (LASRE) first flight view from above (#844(980)) - photo by Carla Thomas | alternate |
alternate |
alternate |
 |
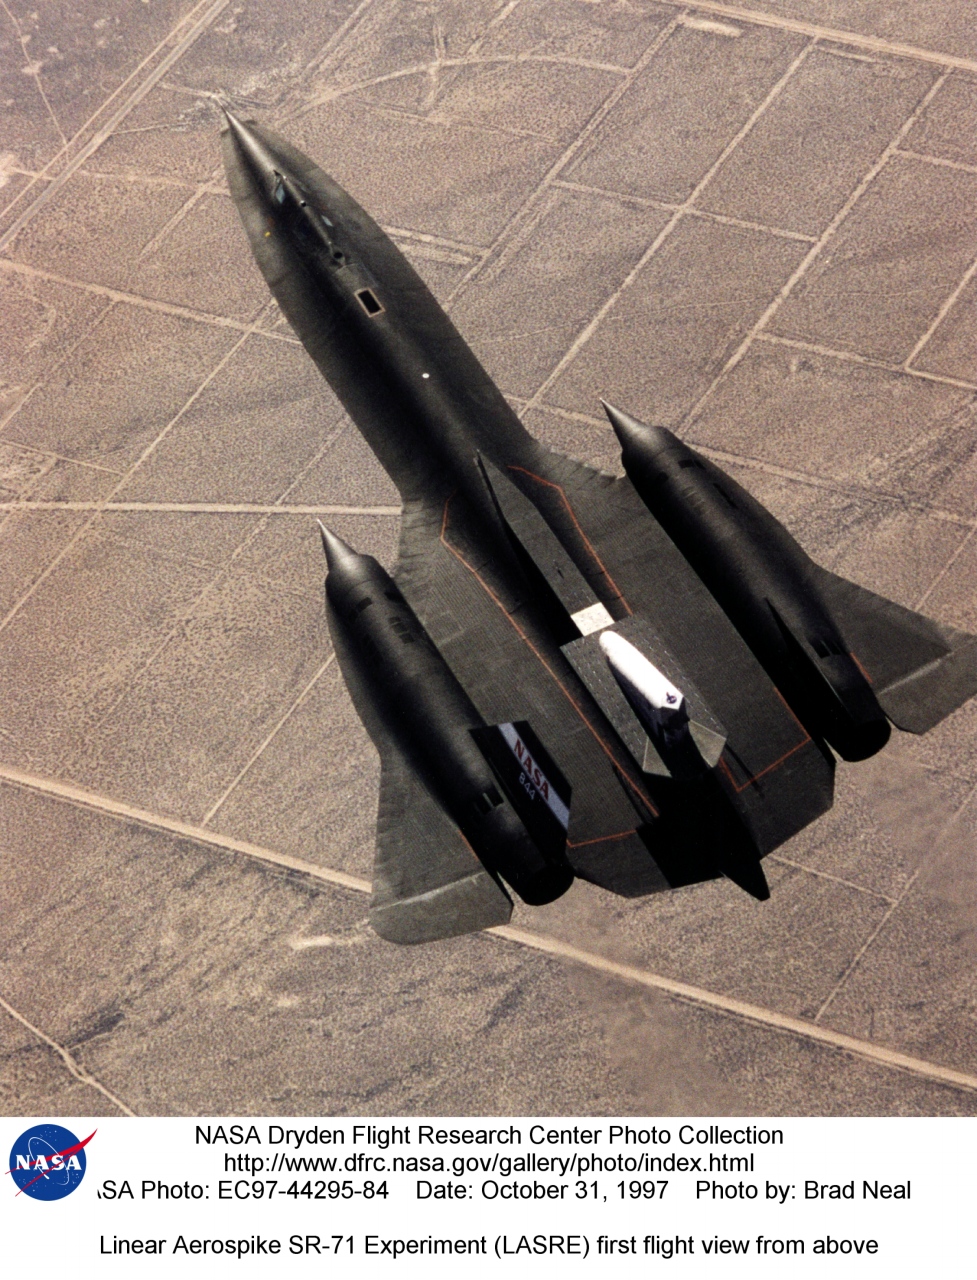
EC97-44295-84 | Linear Aerospike SR-71 Experiment (LASRE) first flight view from above (#844(980)) - photo by Brad Neal | alternate |
alternate |
alternate |
 |
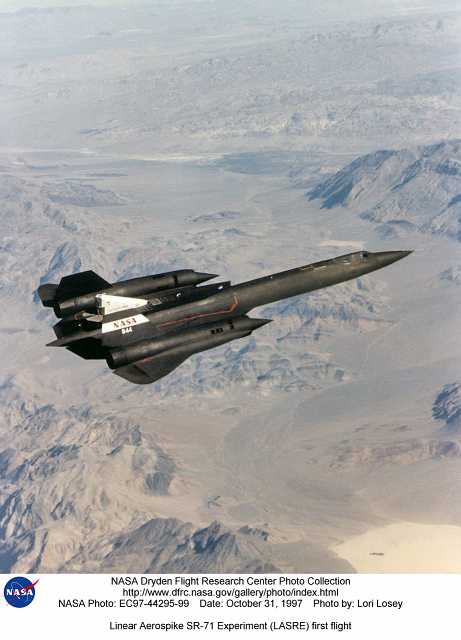
EC97-44295-99 | Linear Aerospike SR-71 Experiment (LASRE) first flight (#844(980)) - photo by Lori Losey | alternate |
alternate |
alternate |
 |
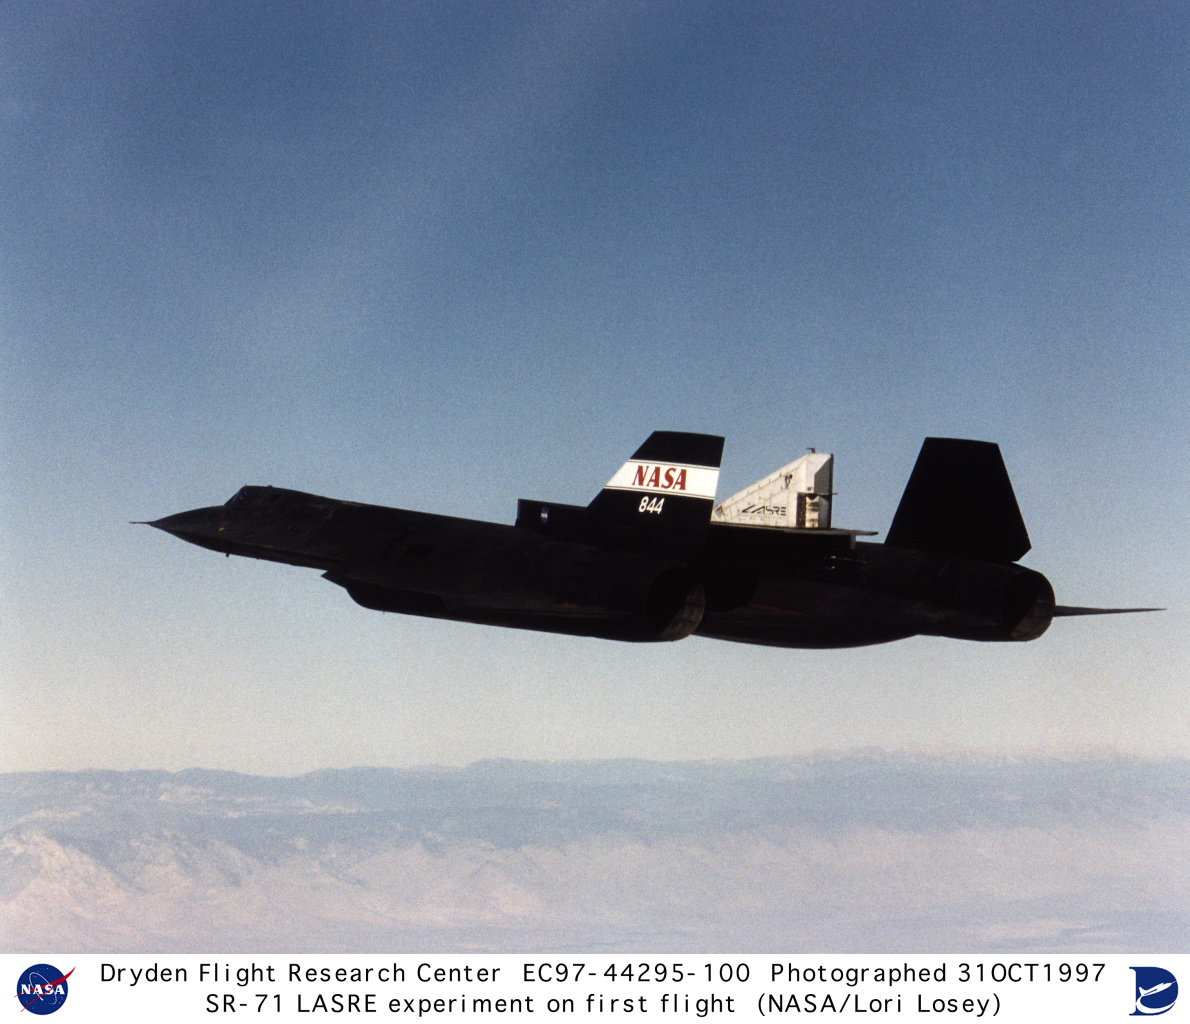
EC97-44295-100 | Linear Aerospike SR-71 Experiment (LASRE) first flight (#844(980)) - photo by Lori Losey | alternate |
alternate |
alternate |
 |
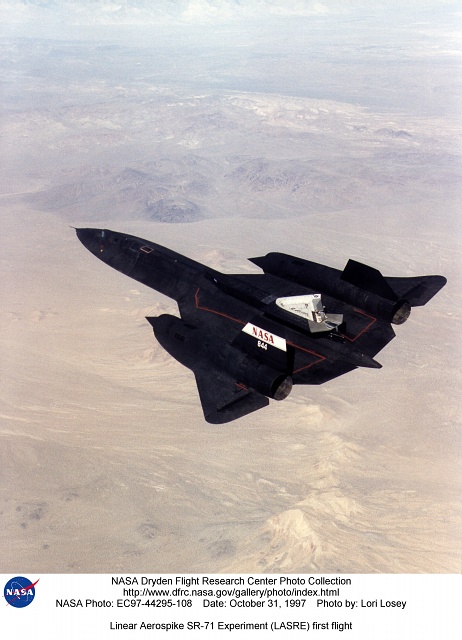
EC97-44295-108 | Linear Aerospike SR-71 Experiment (LASRE) first flight (#844(980)) - photo by Lori Losey | alternate |
alternate |
alternate |
 |
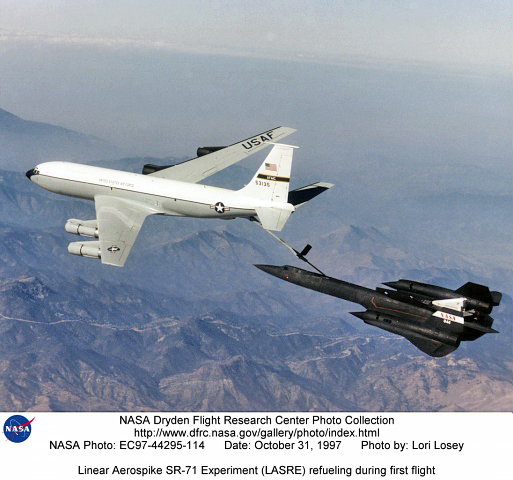
EC97-44295-114 | Linear Aerospike SR-71 Experiment (LASRE) refueling during first flight (#844(980)) - photo by Lori Losey | alternate |
alternate |
alternate |
 |
EC97-44205-5 | LASRE pod being mated to SR-71 #844(980) - photo by Tony Landis | alternate |
alternate |
alternate |
 |
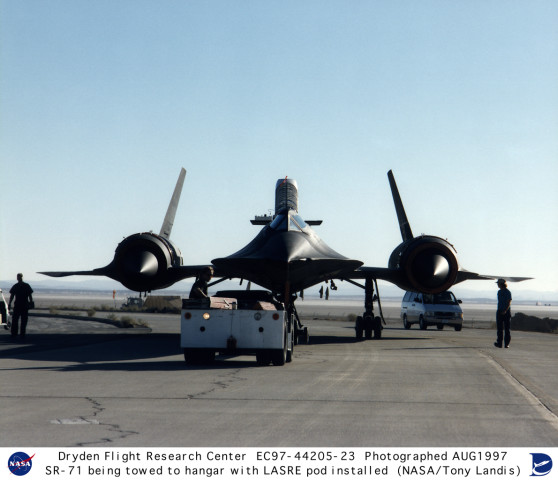
EC97-44205-23 | SR-71 #844(980) being towed to hangar with LASRE pod installed - photo by Tony Landis | alternate |
alternate |
alternate |
 |
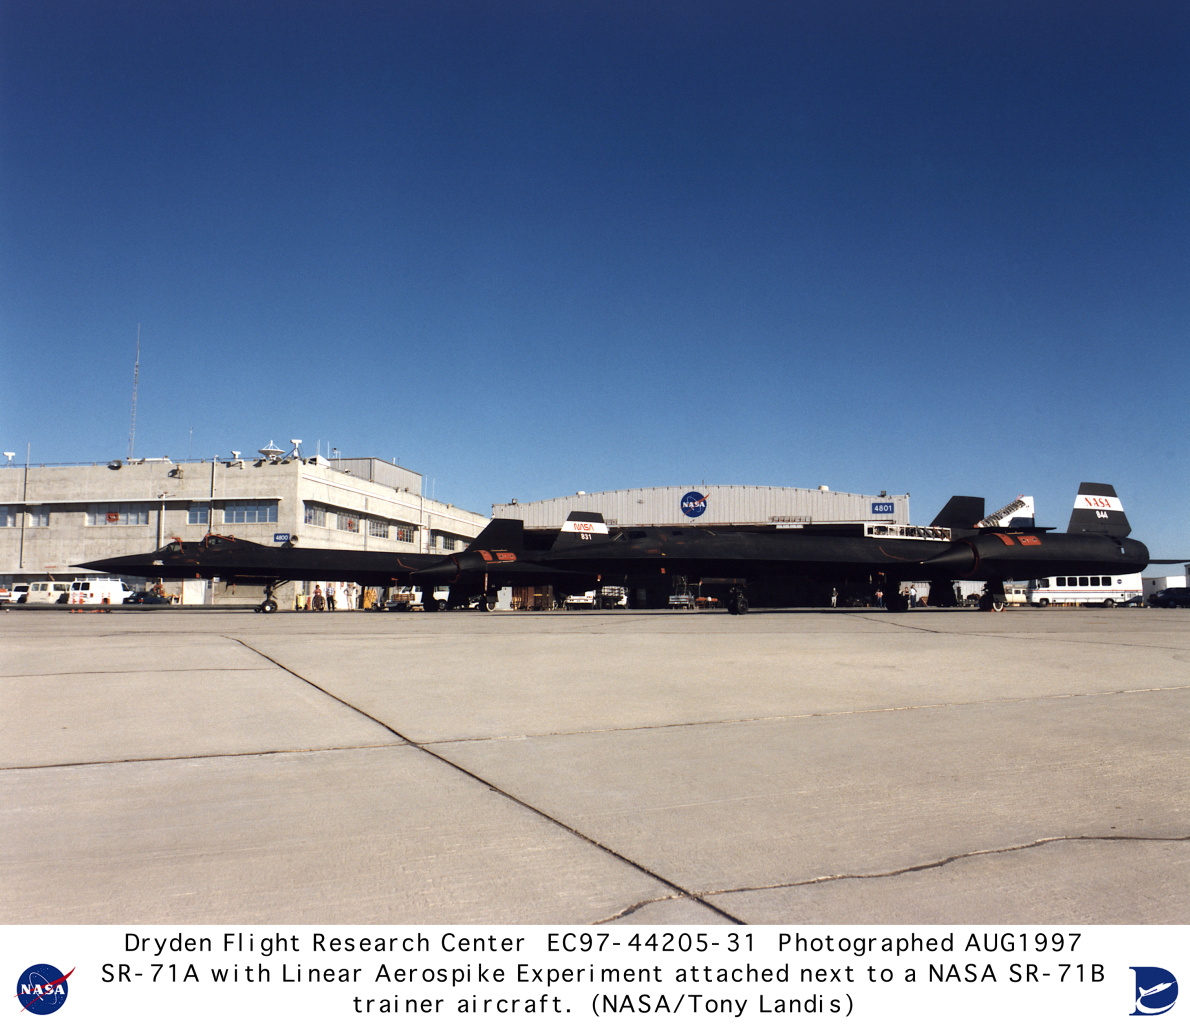
EC97-44205-31 | SR-71 #844(980) with LASRE pod parked on ramp next to SR-71B #831/956 trainer aircraft - photo by Tony Landis | alternate |
alternate |
alternate |
 |
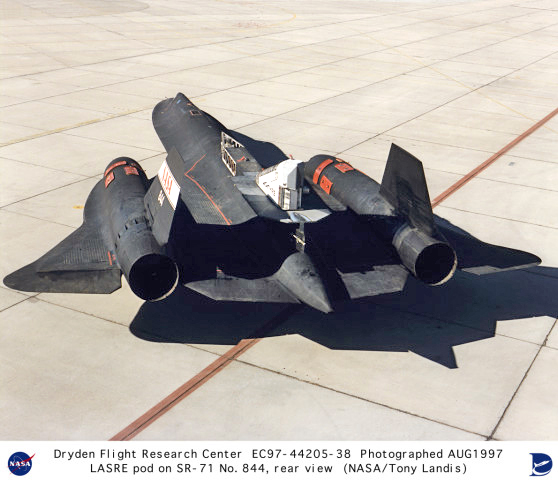
EC97-44205-38 | SR-71 #844 with LASRE pod parked on ramp, rear view - photo by Tony Landis | alternate |
alternate |
alternate |
 |
EC96-43419-12 | LASRE pod being mated to SR-71 #844 - photo by Tony Landis | alternate |
alternate |
alternate |
 |
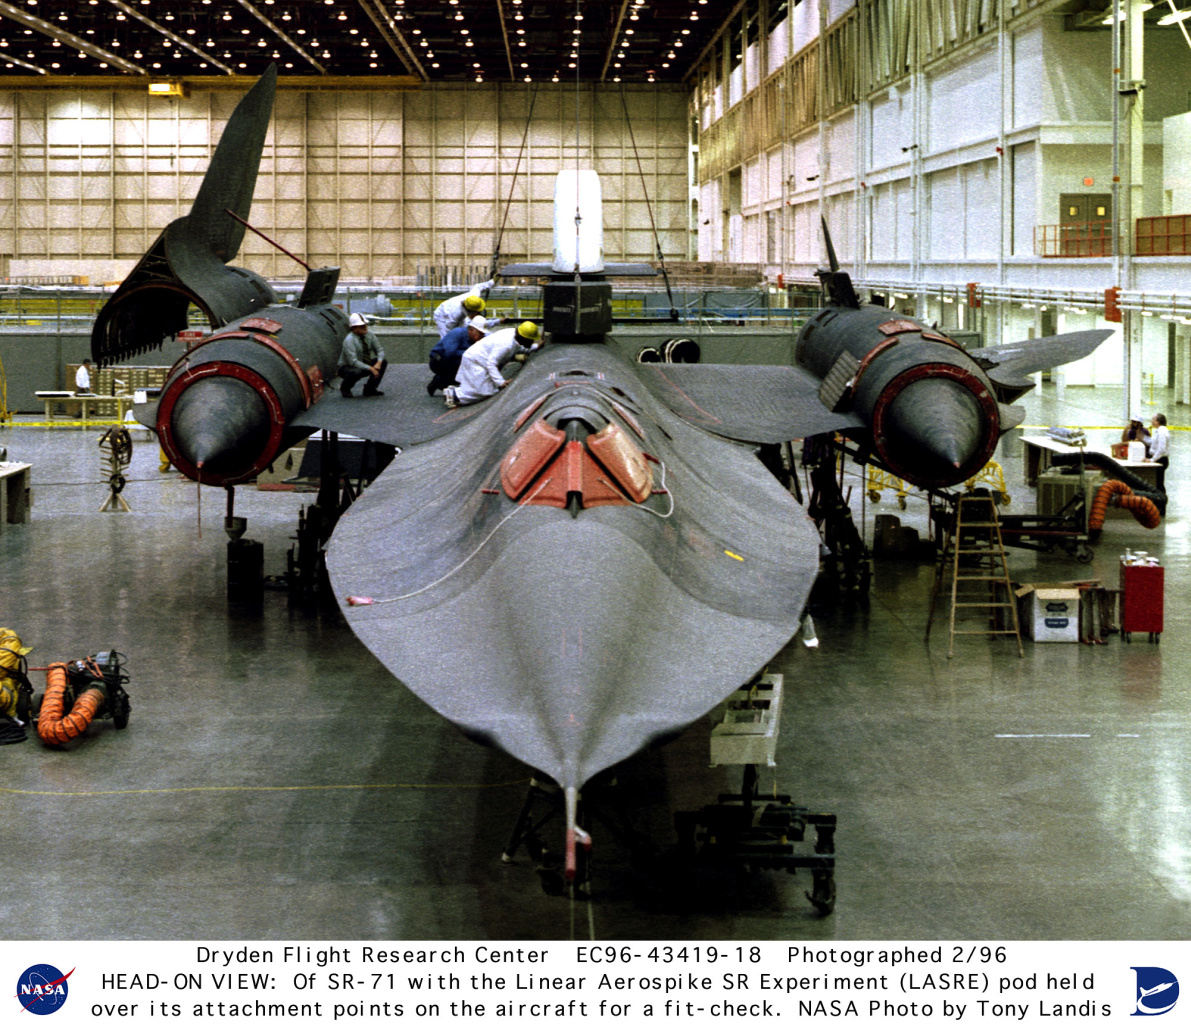
EC96-43419-18 | LASRE pod being mated to SR-71 #844 - photo by Tony Landis | alternate |
alternate |
alternate |
 |
EC96-43419-19 | LASRE pod being mated to SR-71 #844 - photo by Tony Landis | alternate |
alternate |
alternate |
 |
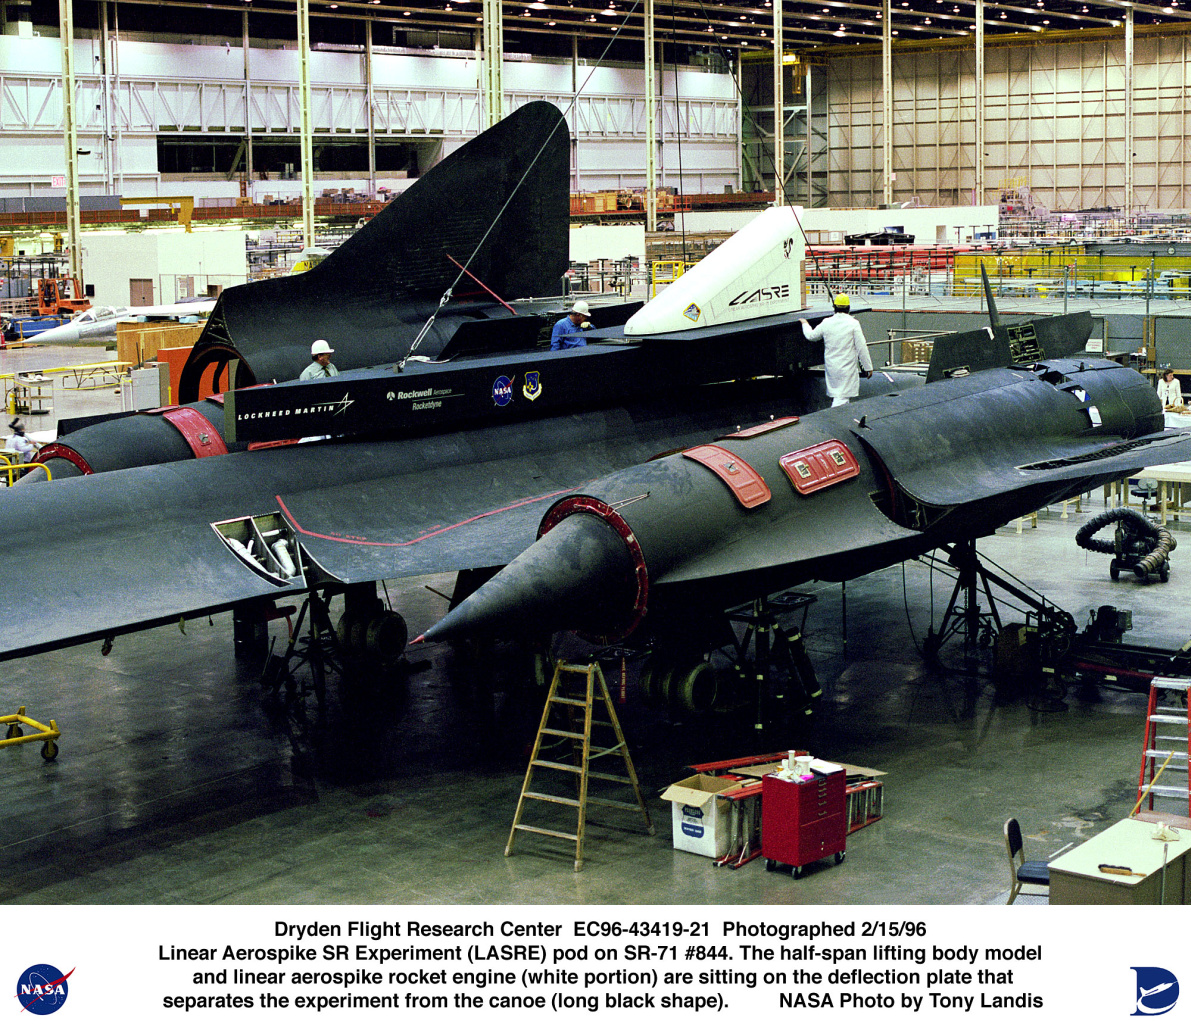
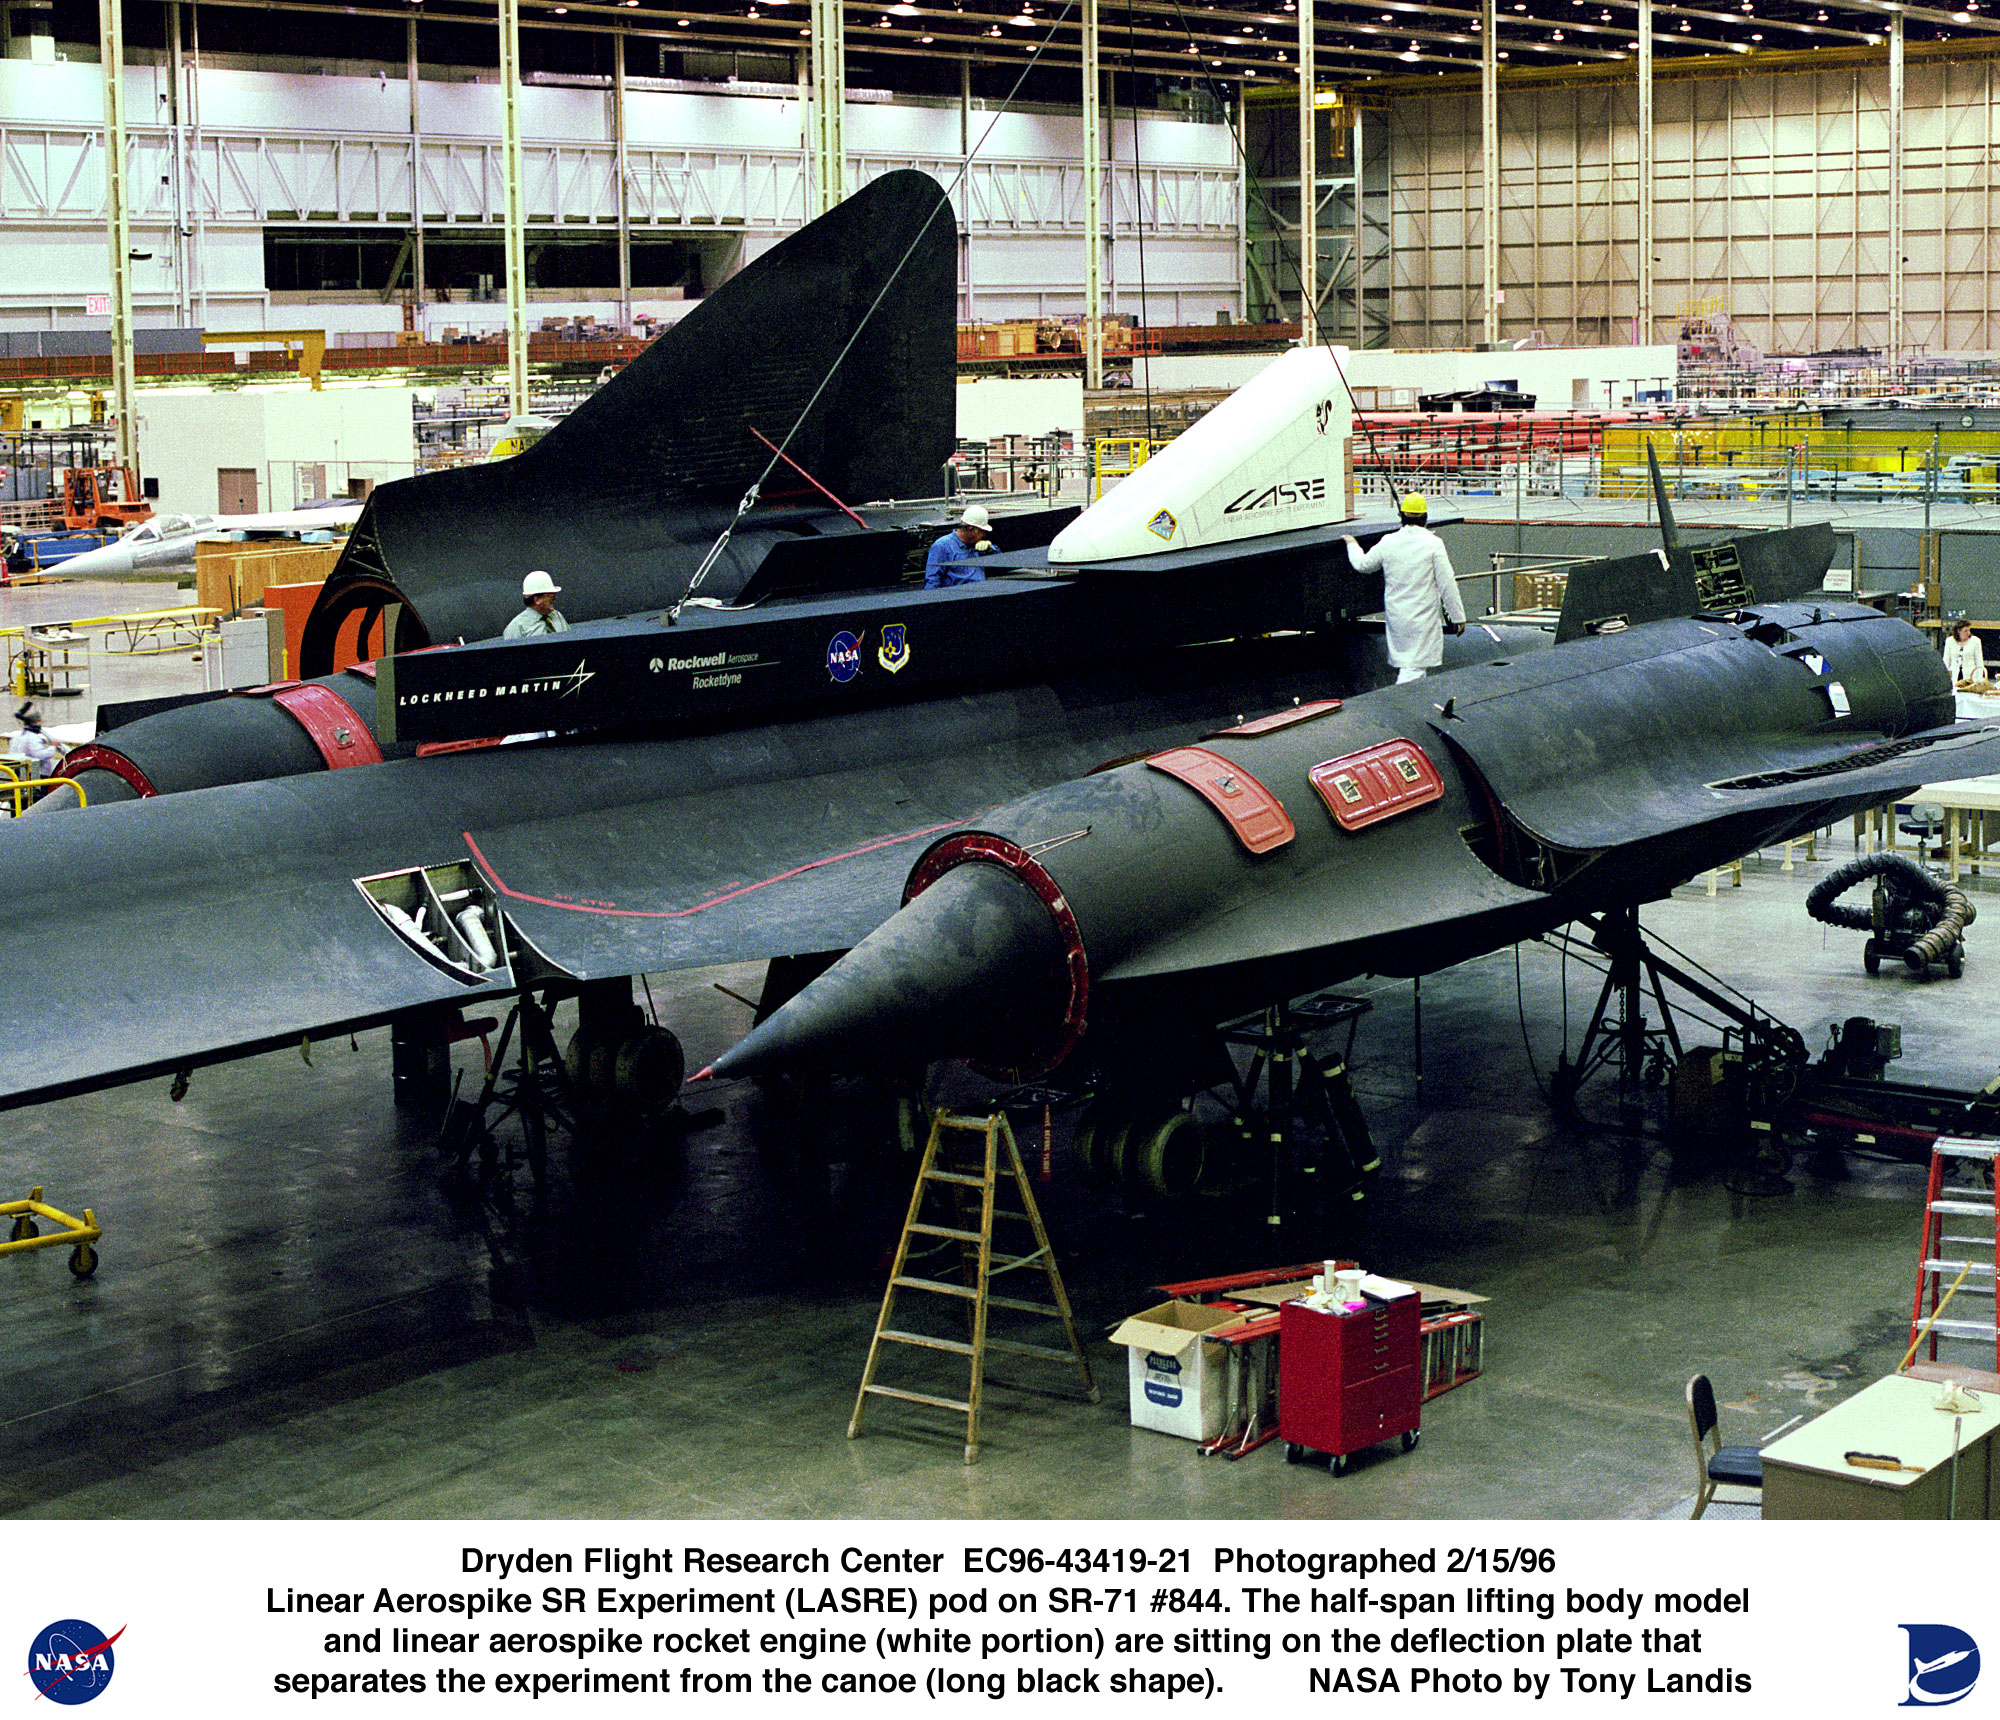
EC96-43419-21 | LASRE pod being mated to SR-71 #844 - photo by Tony Landis | alternate |
alternate |
alternate |
 |
EC96-43419-25 | LASRE pod being mated to SR-71 #844, side view - photo by Tony Landis | alternate |
alternate |
alternate |
 |
EC96-43419-36 | Closeup of rear of LASRE pod - photo by Tony Landis | alternate |
alternate |
alternate |
 |
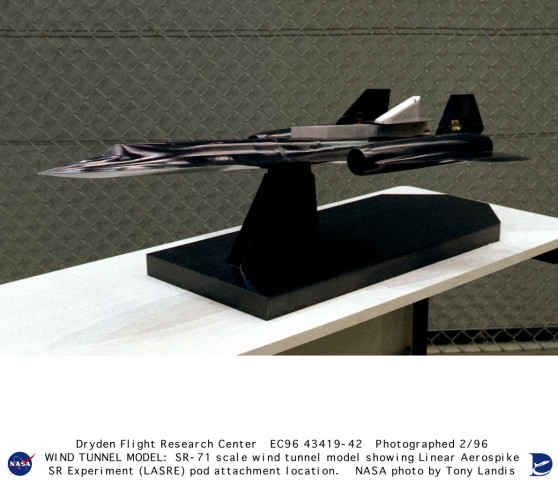
EC96-43419-42 | SR-71 water tunnel scale model with LASRE pod - photo by Tony Landis | alternate |
alternate |
alternate |
 |
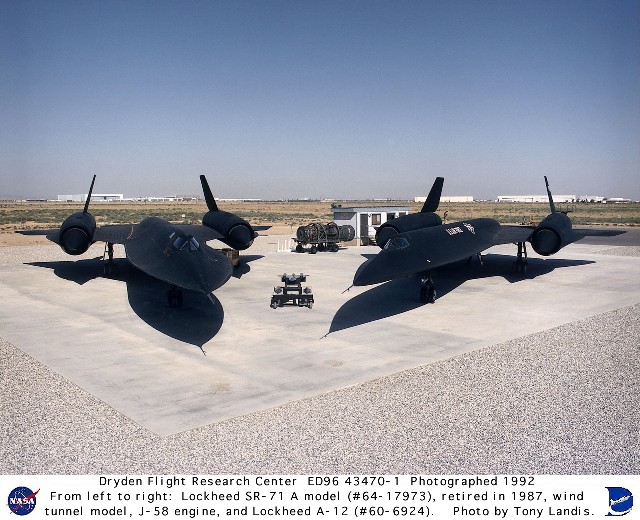
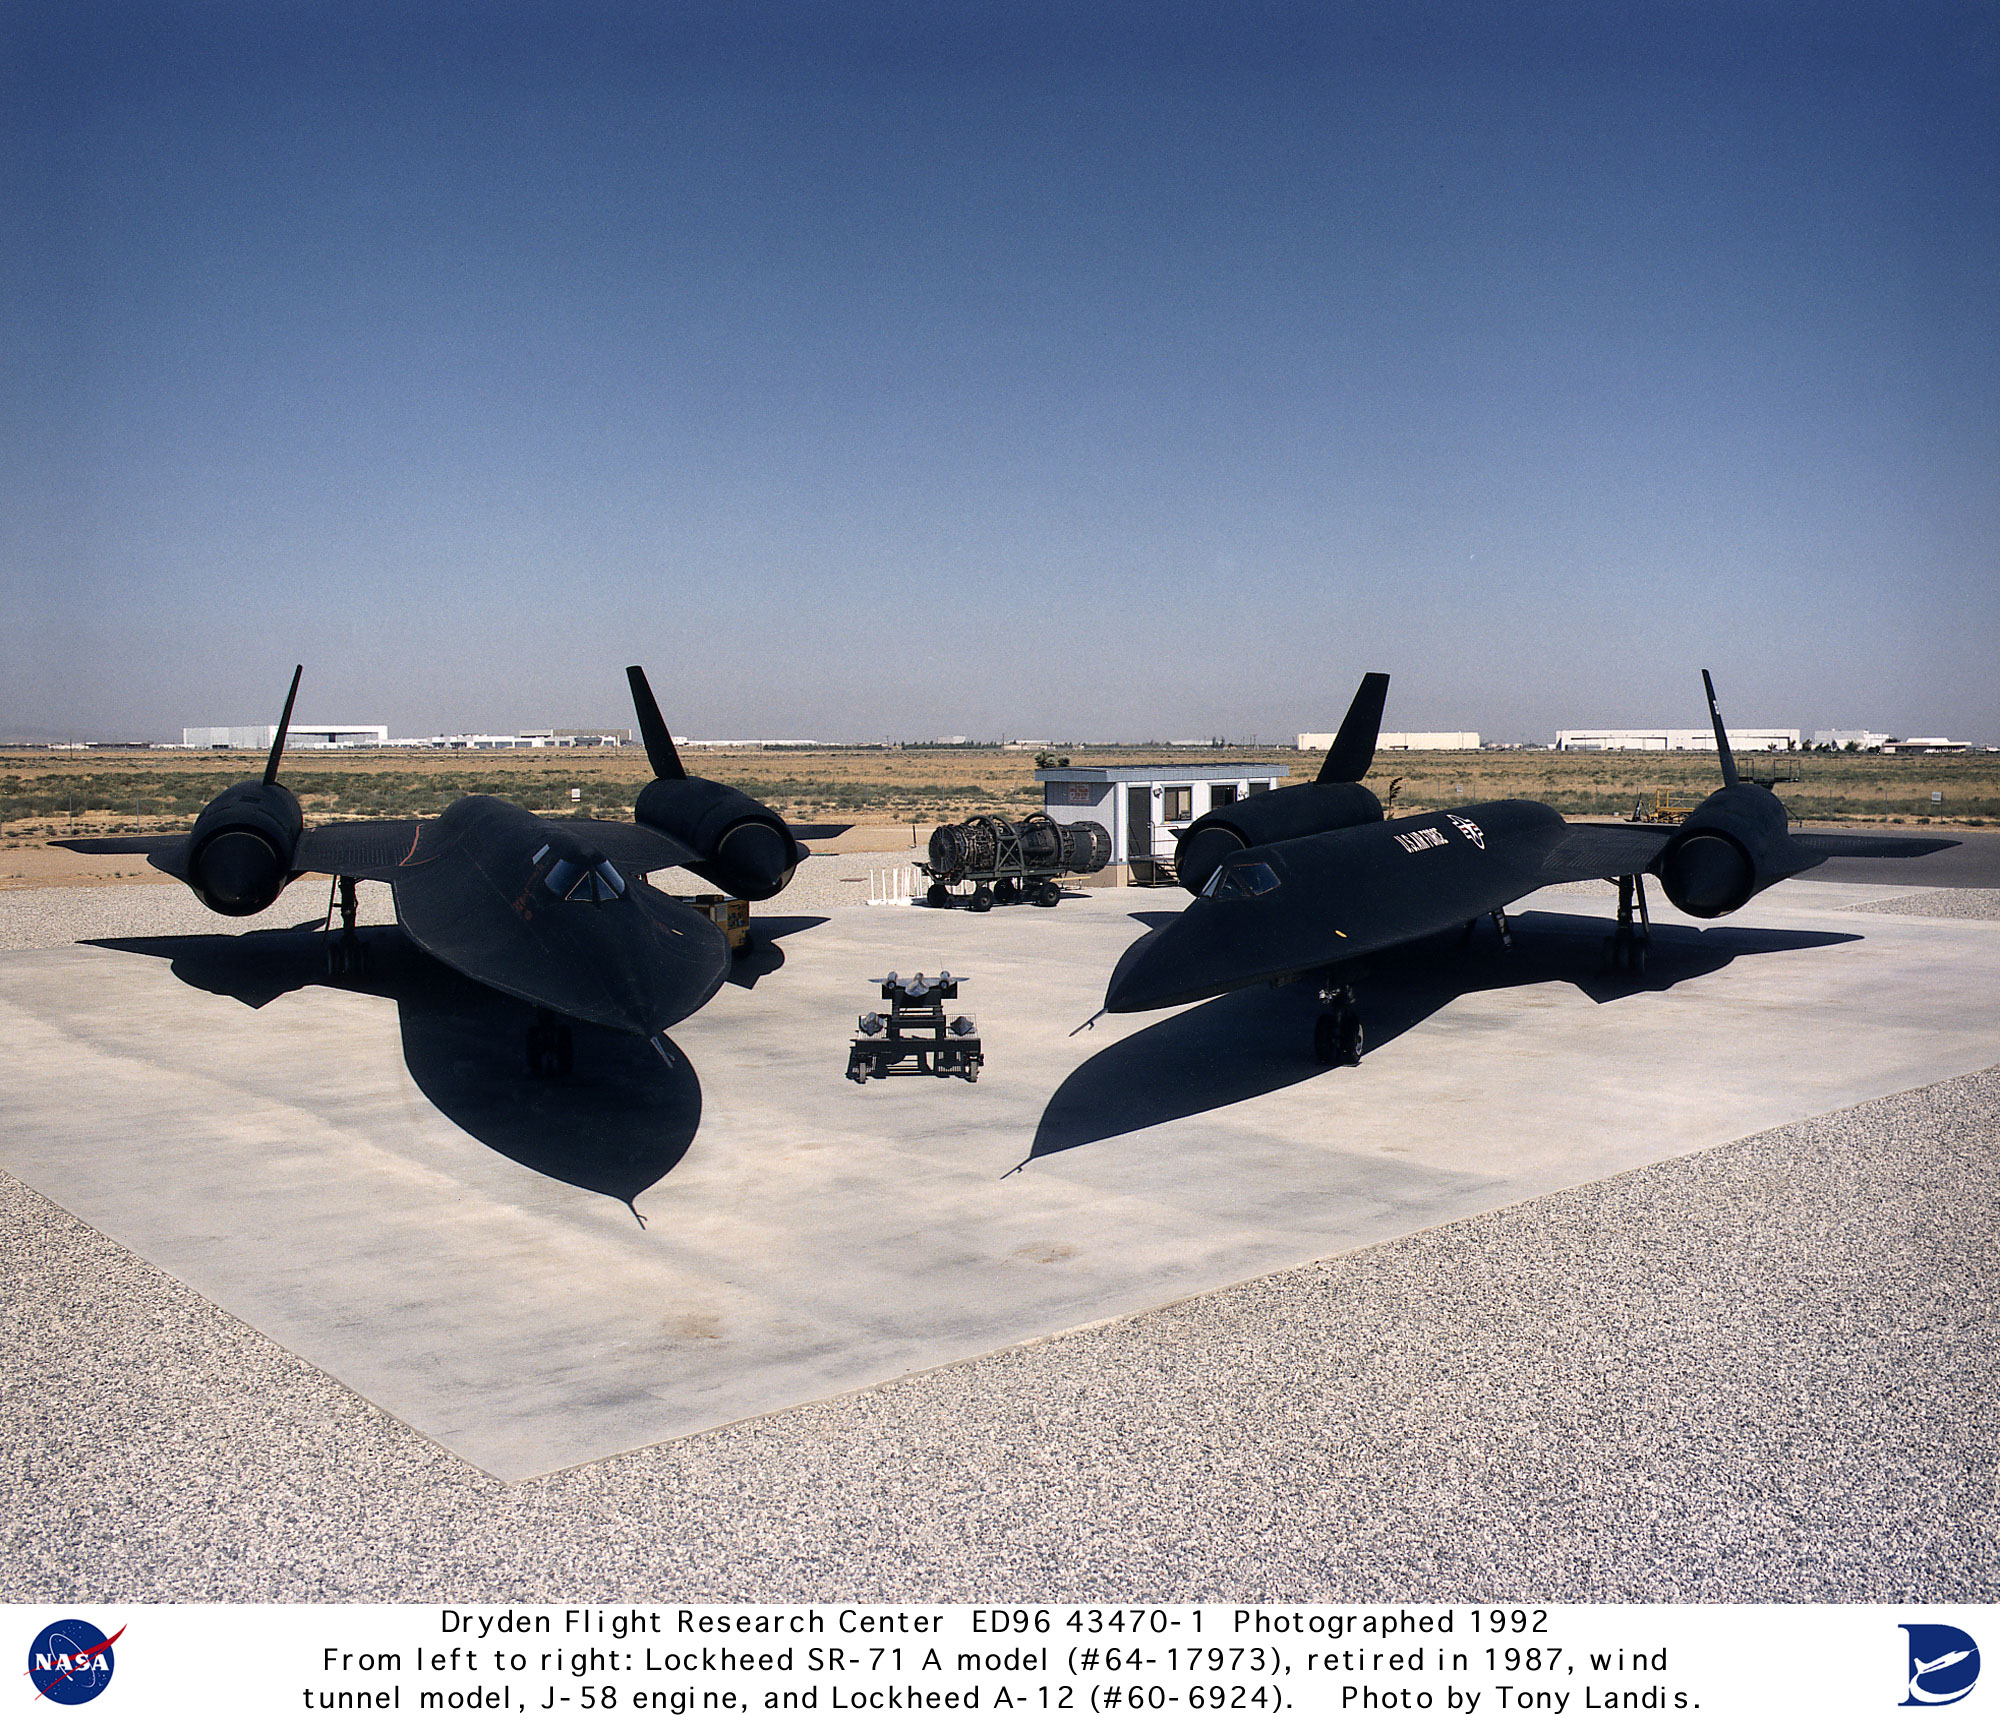
ED96-43470-1 | Blackbird Airpark - photo by Tony Landis | alternate |
alternate |
alternate |
 |
EC72-3150 | YF-12 #935 in flight | alternate |
alternate |
alternate |
 |
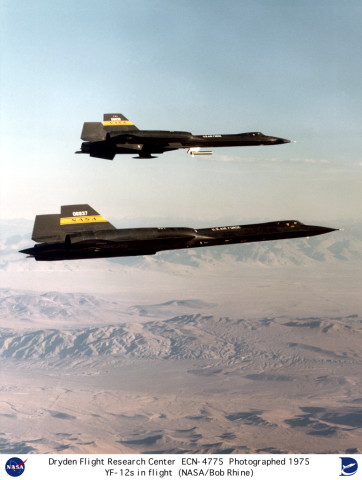
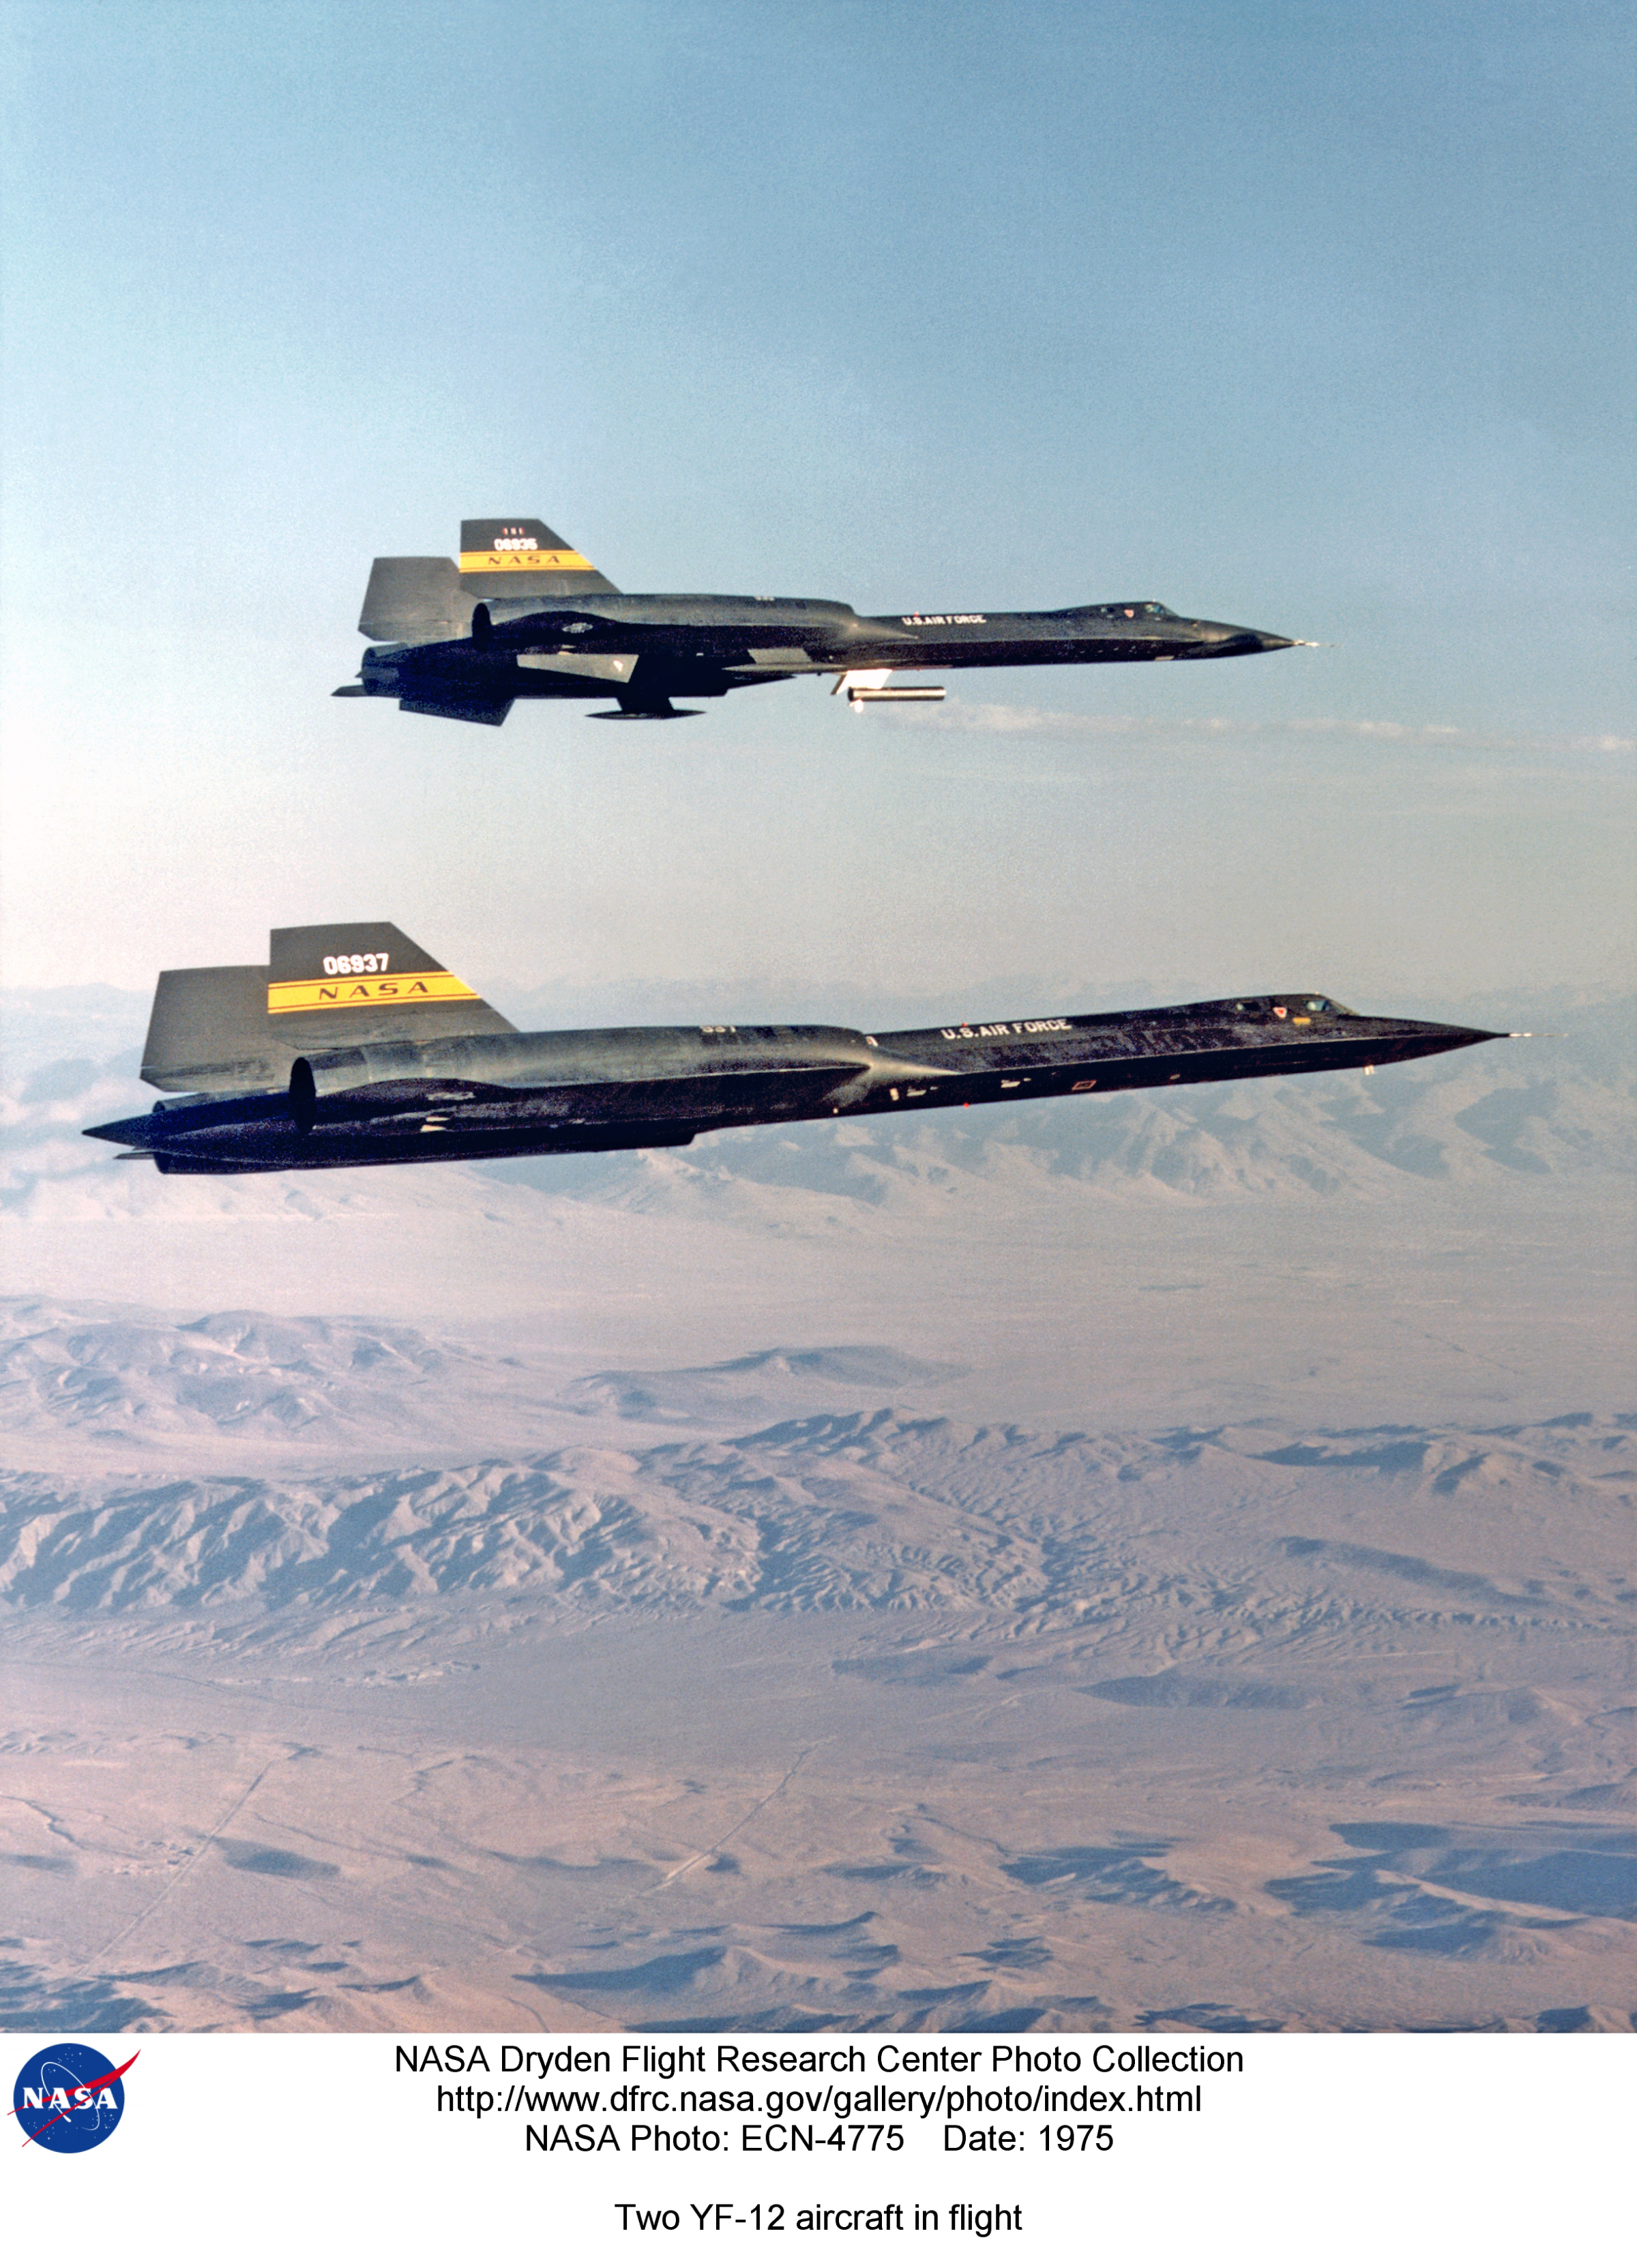
ECN-4775 | Two YF-12 aircraft (935 and 937/951) in flight - photo by Bob Rhine | alternate |
alternate |
alternate |
 |
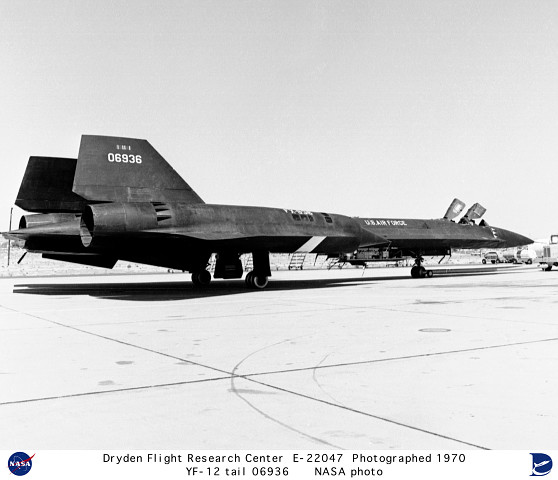
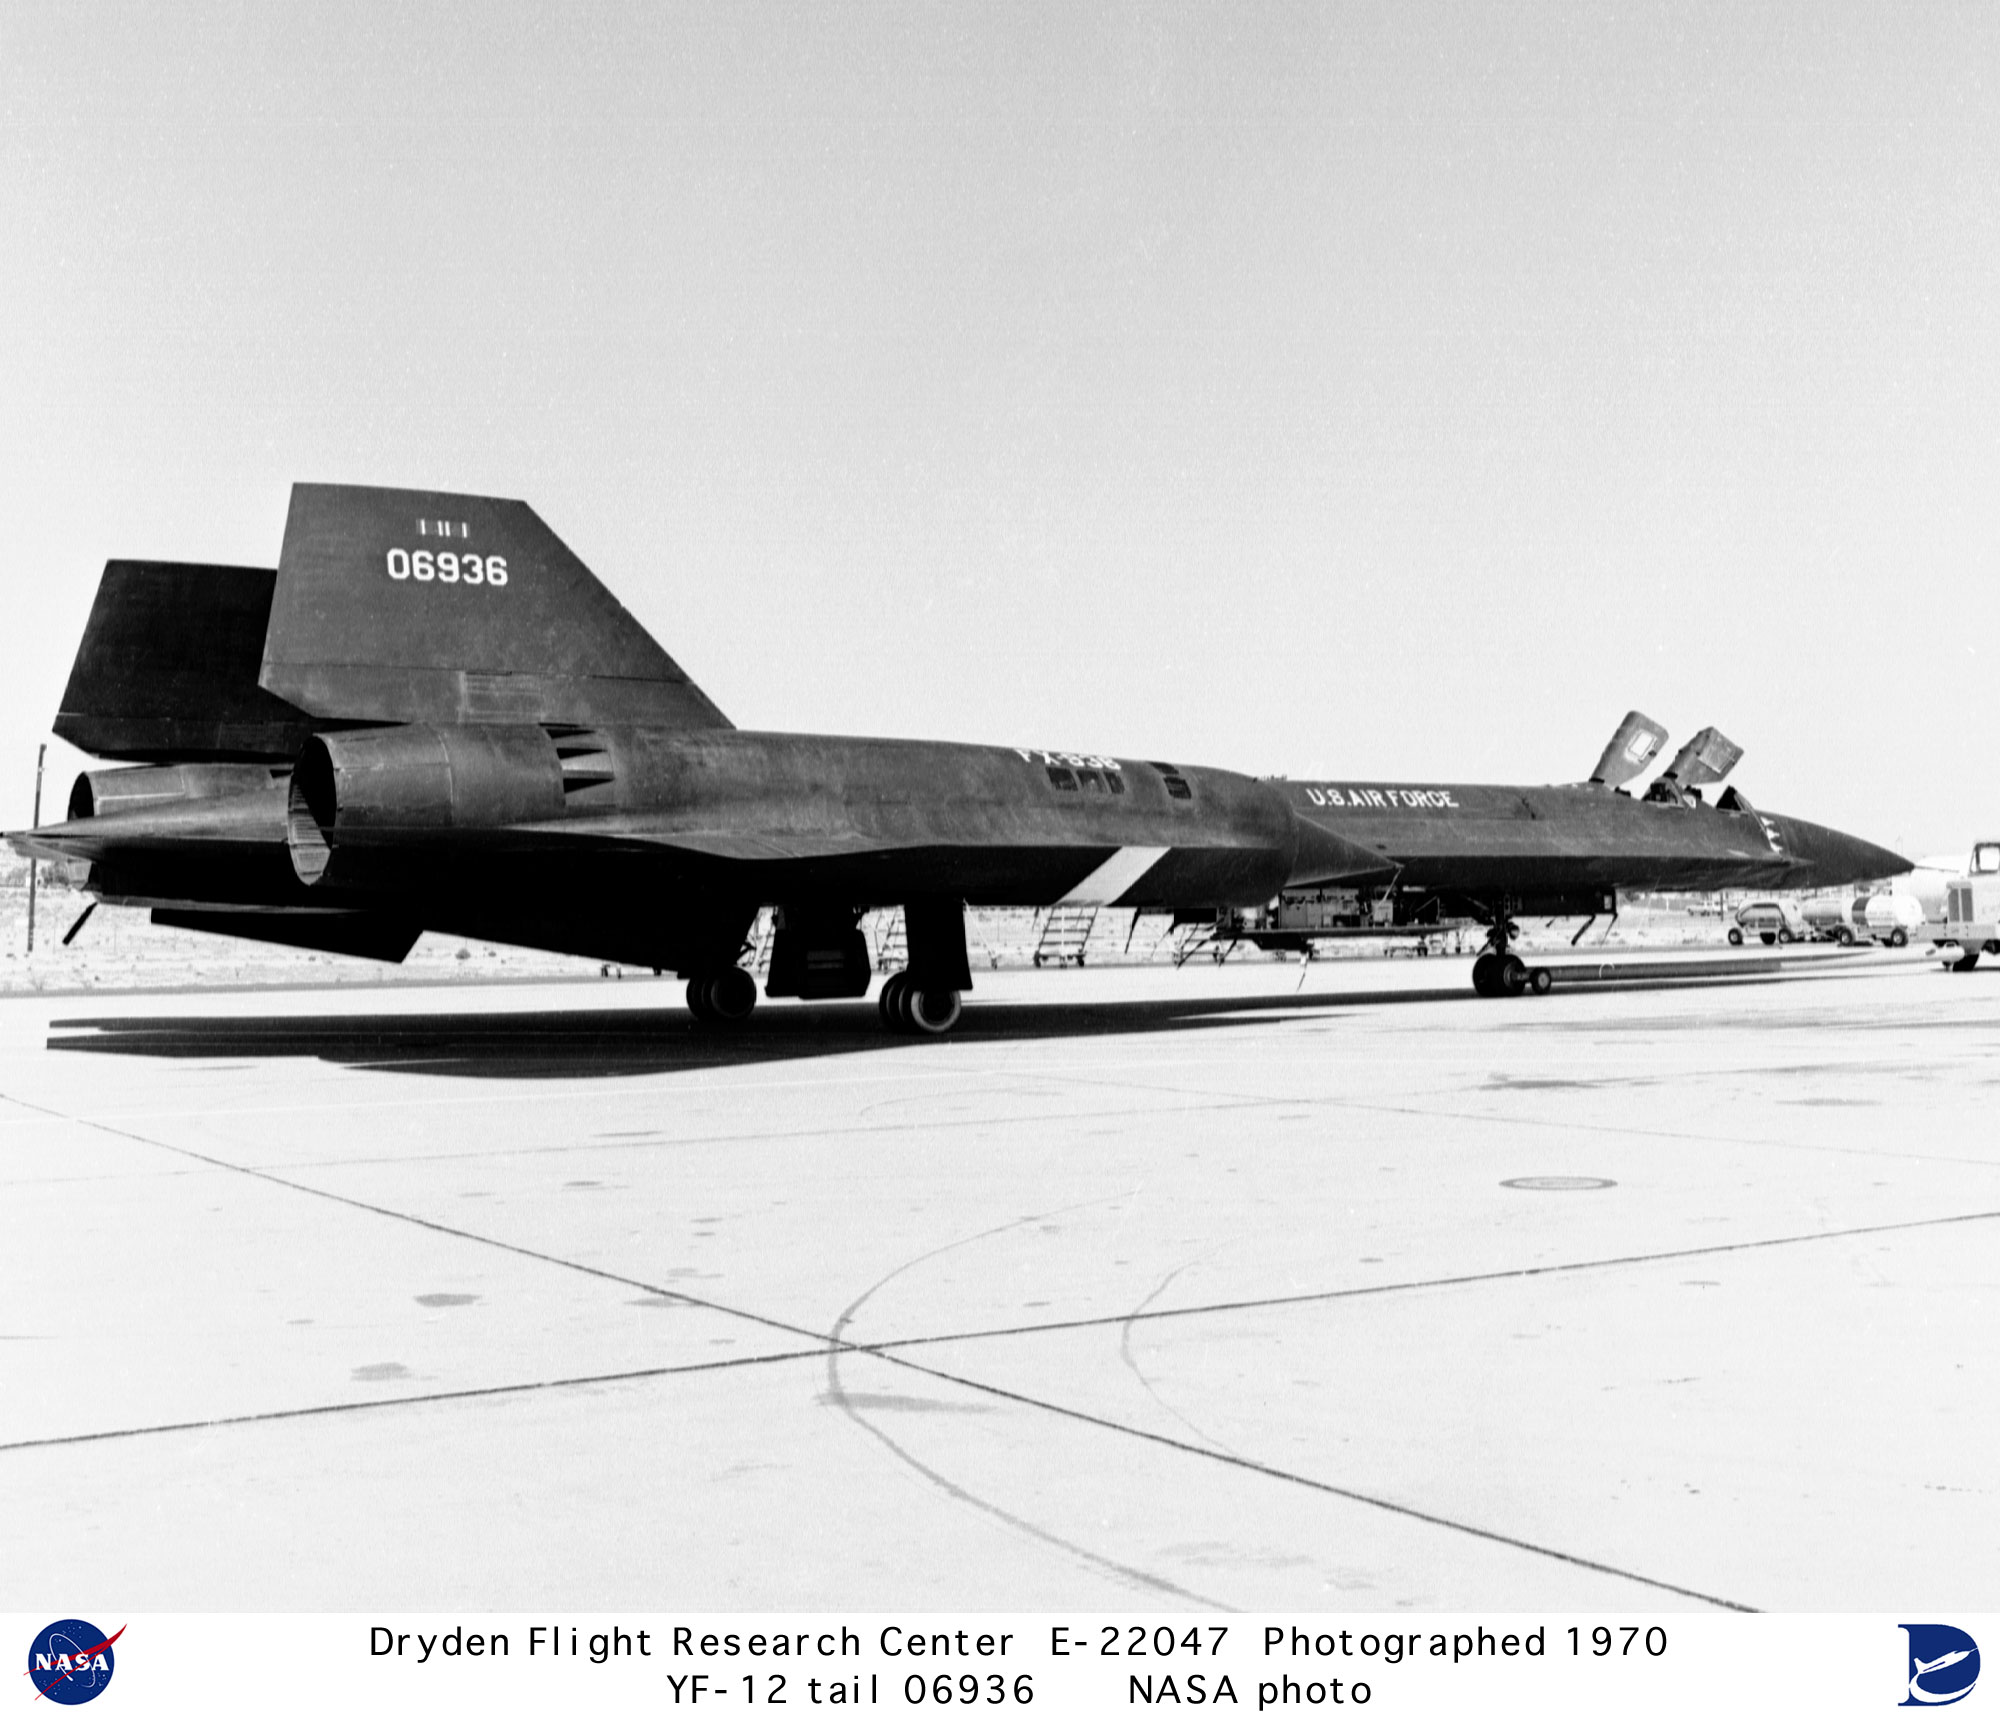
E-22047 | YF-12 tail #06936 on ramp | alternate |
alternate |
alternate |
 |
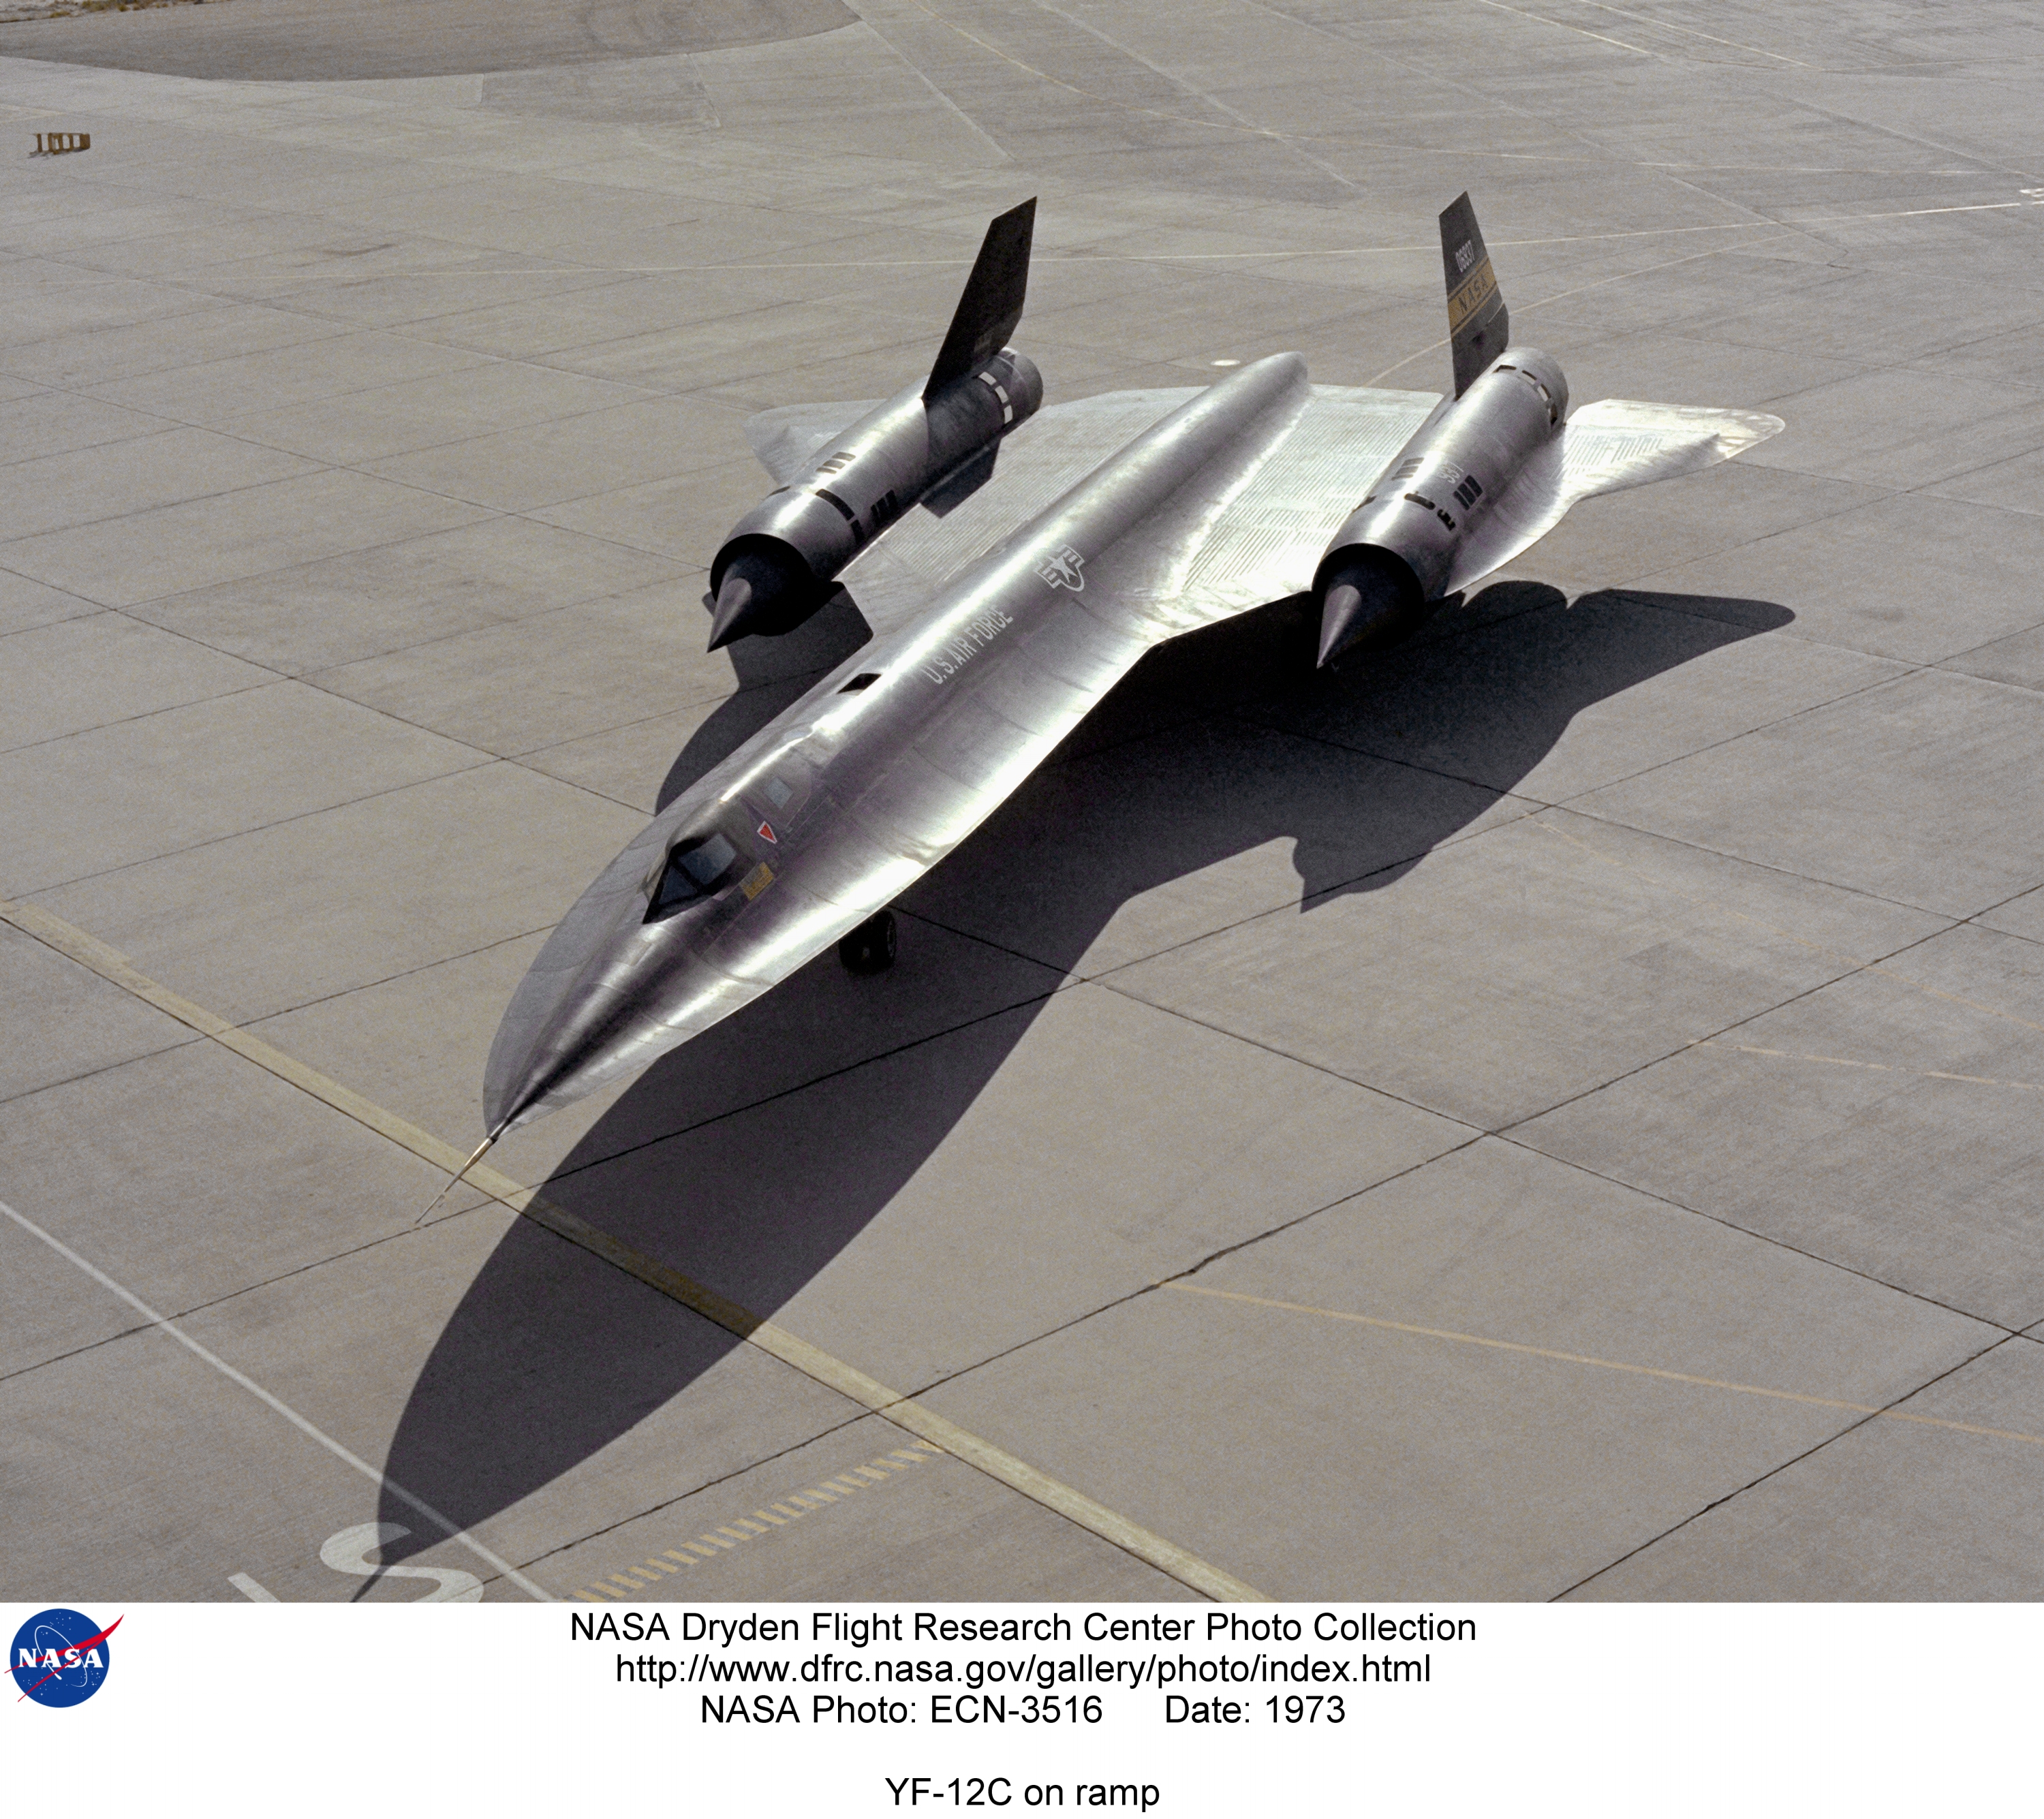
ECN-3516 | YF-12C (937/951) on ramp | alternate |
alternate |
alternate |
 |
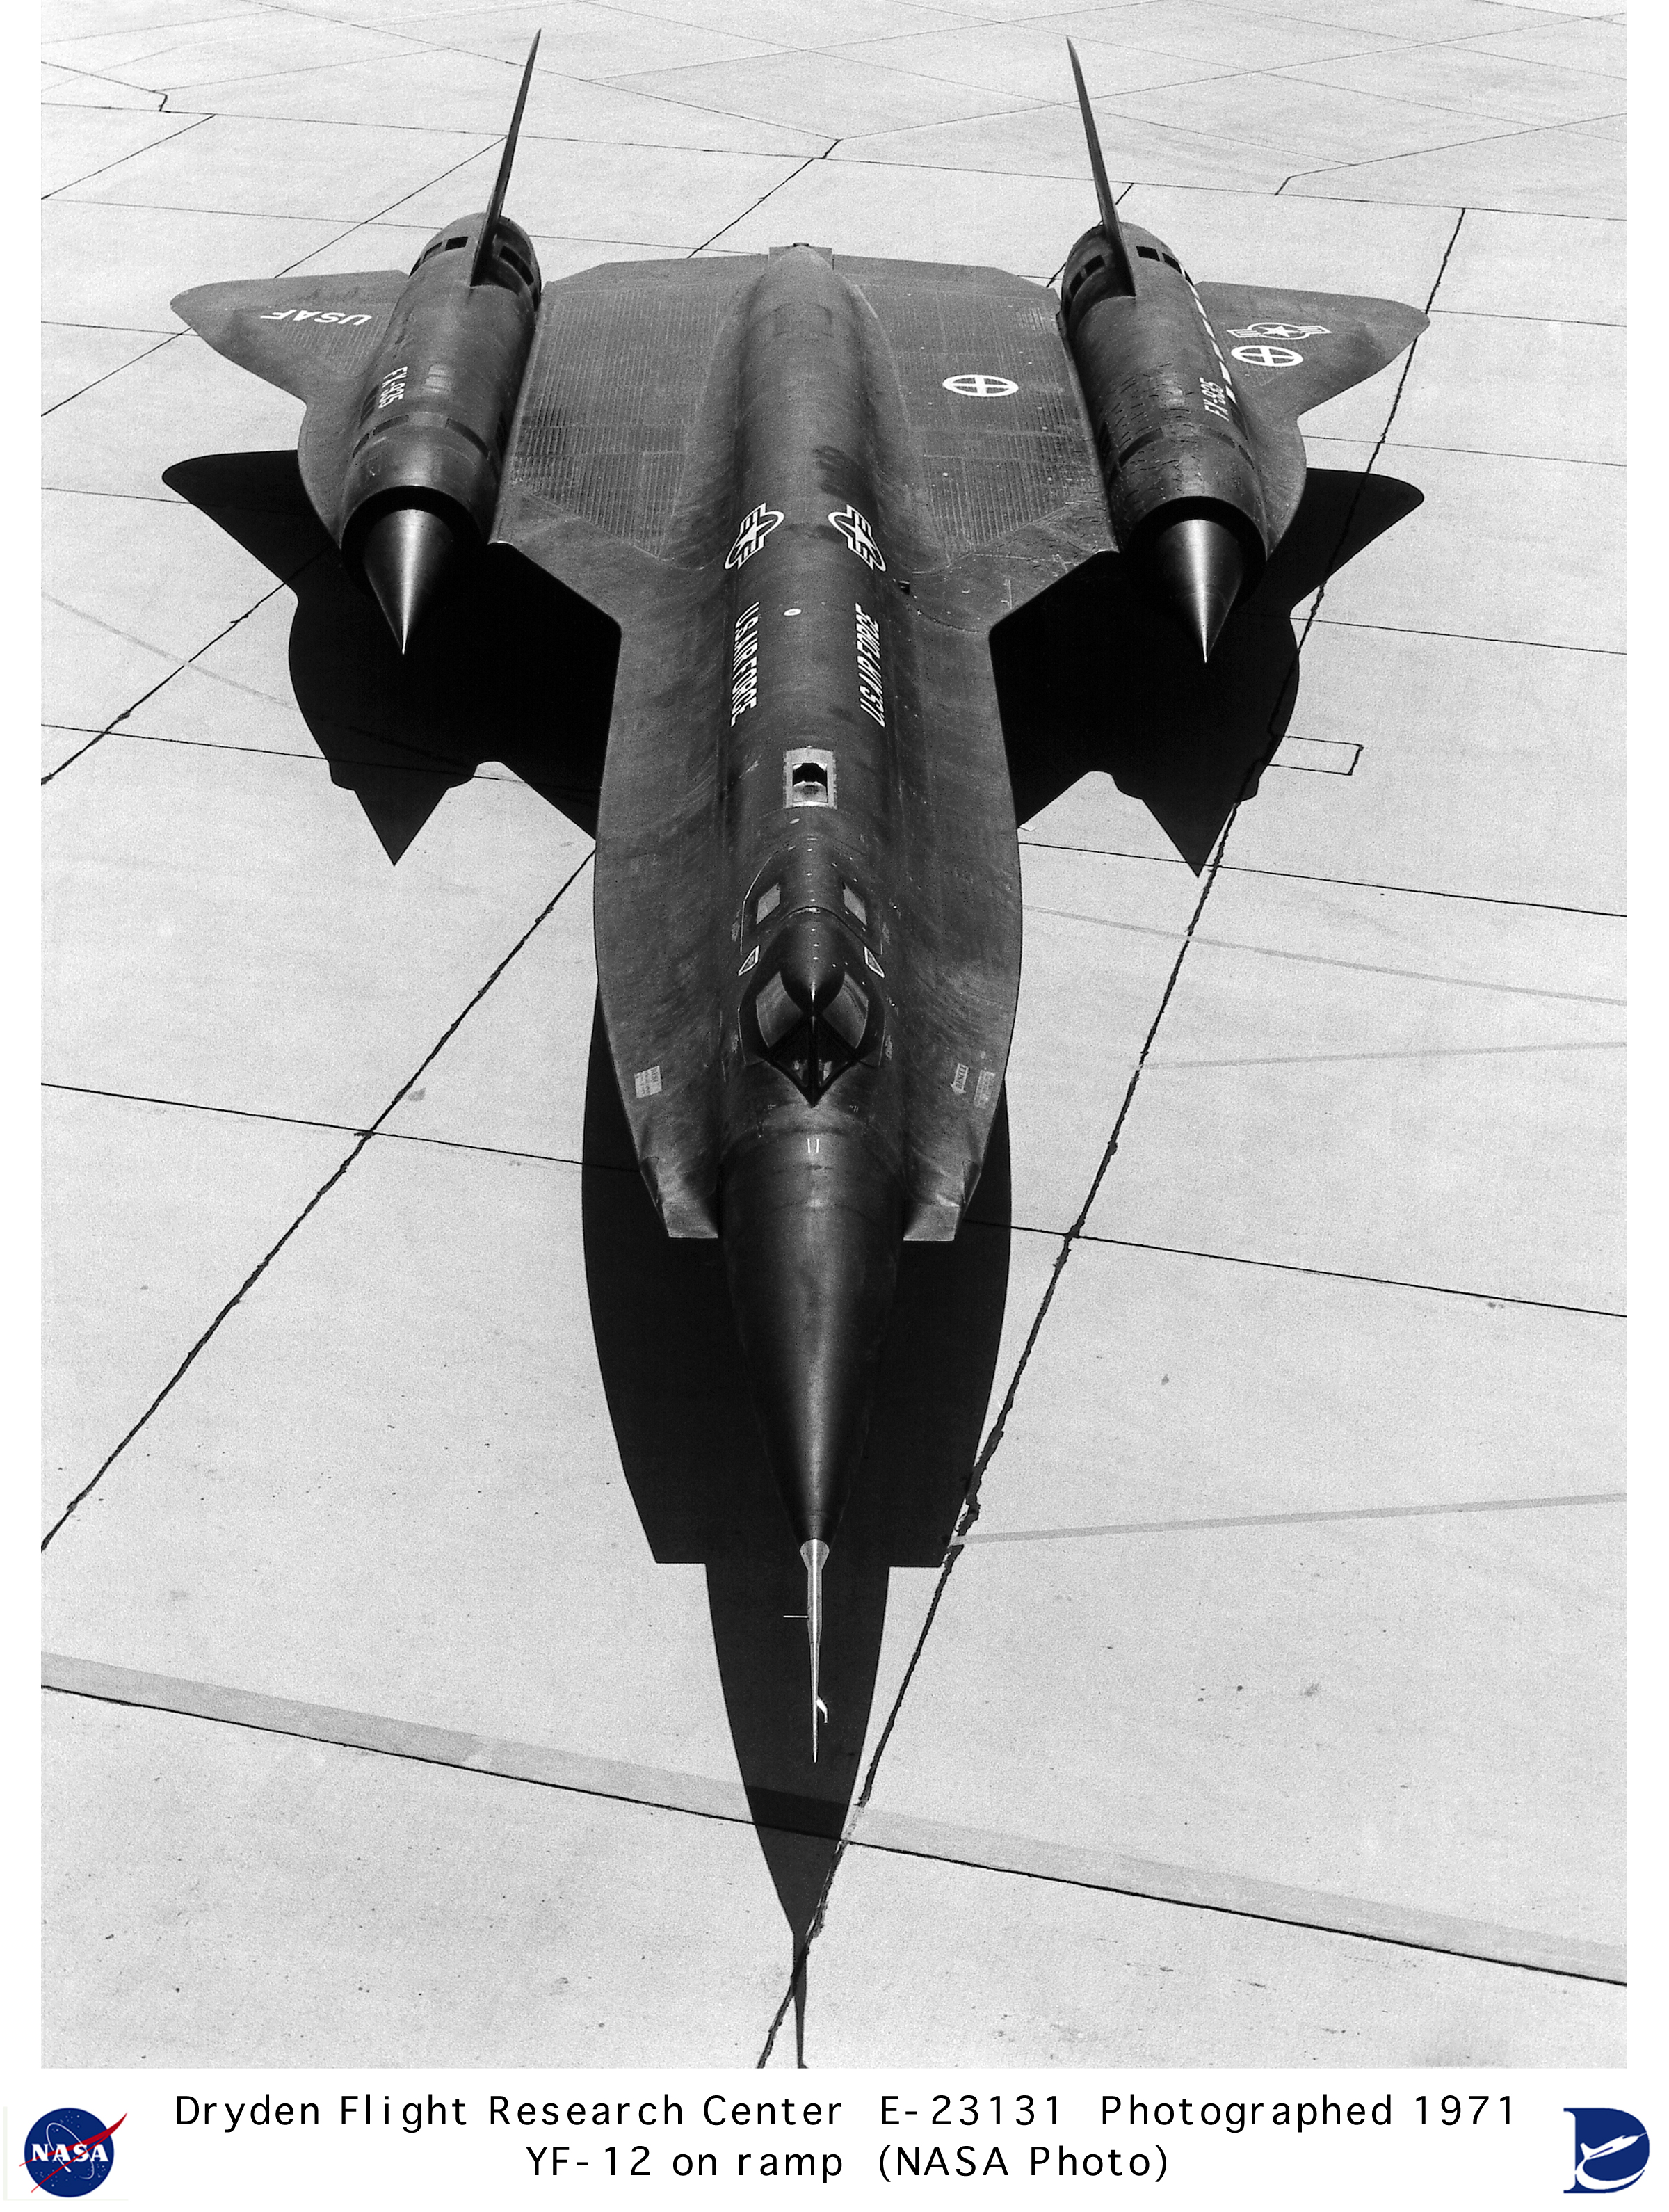
E-23131 | YF-12A #935 on ramp | alternate |
alternate |
alternate |
 |
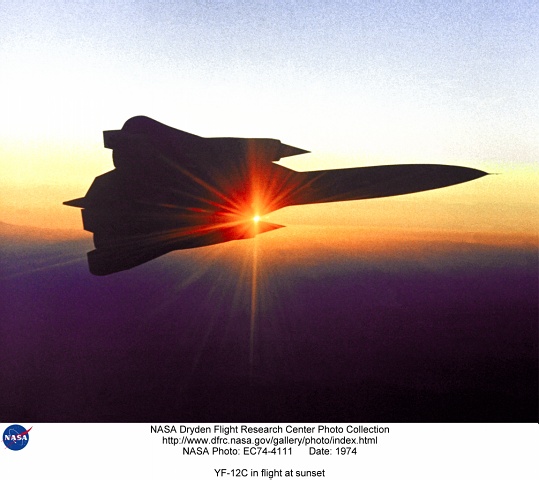
EC74-4111 | SR-71 in flight at sunset (this is actually a Lockheed photo of 962, and is NOT the YF-12C) | alternate |
alternate |
alternate |
 |
ECN-4767 | YF-12A #935 and YF-12C #937(951) in flight formation at dawn | alternate |
alternate |
alternate |
 |
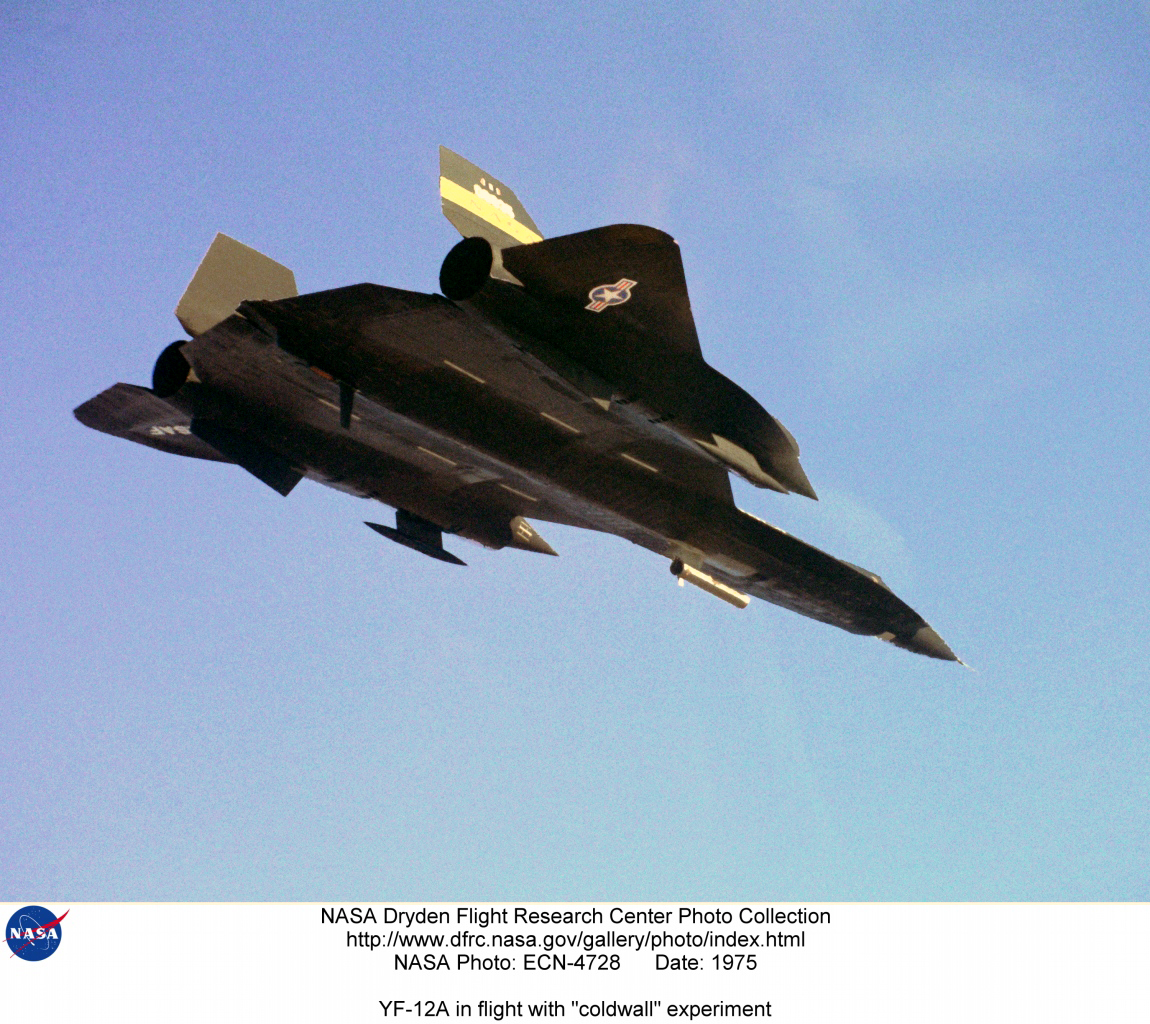
ECN-4777 | YF-12A #935 in flight with "coldwall" experiment | alternate |
alternate |
alternate |
 |
ECN-4728 | YF-12A #935 in flight with "coldwall" experiment | alternate |
alternate |
alternate |
 |
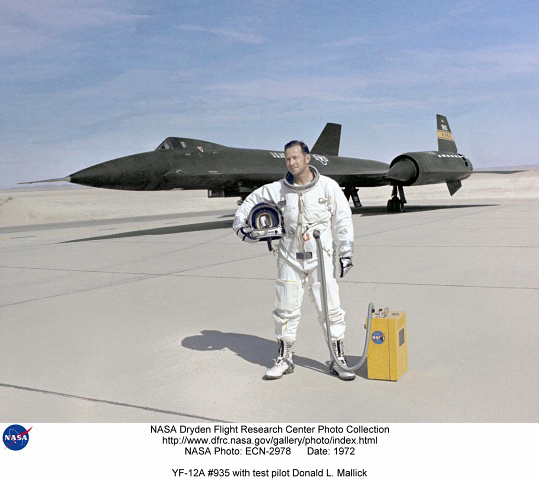
ECN-2978 | YF-12A #935 with test pilot Donald L. Mallick | alternate |
alternate |
alternate |
 |
E-22226 | Load cells, hydraulic actuators, and position transducers testing deflections on YF-12 aircraft #935 | alternate |
alternate |
alternate |
 |
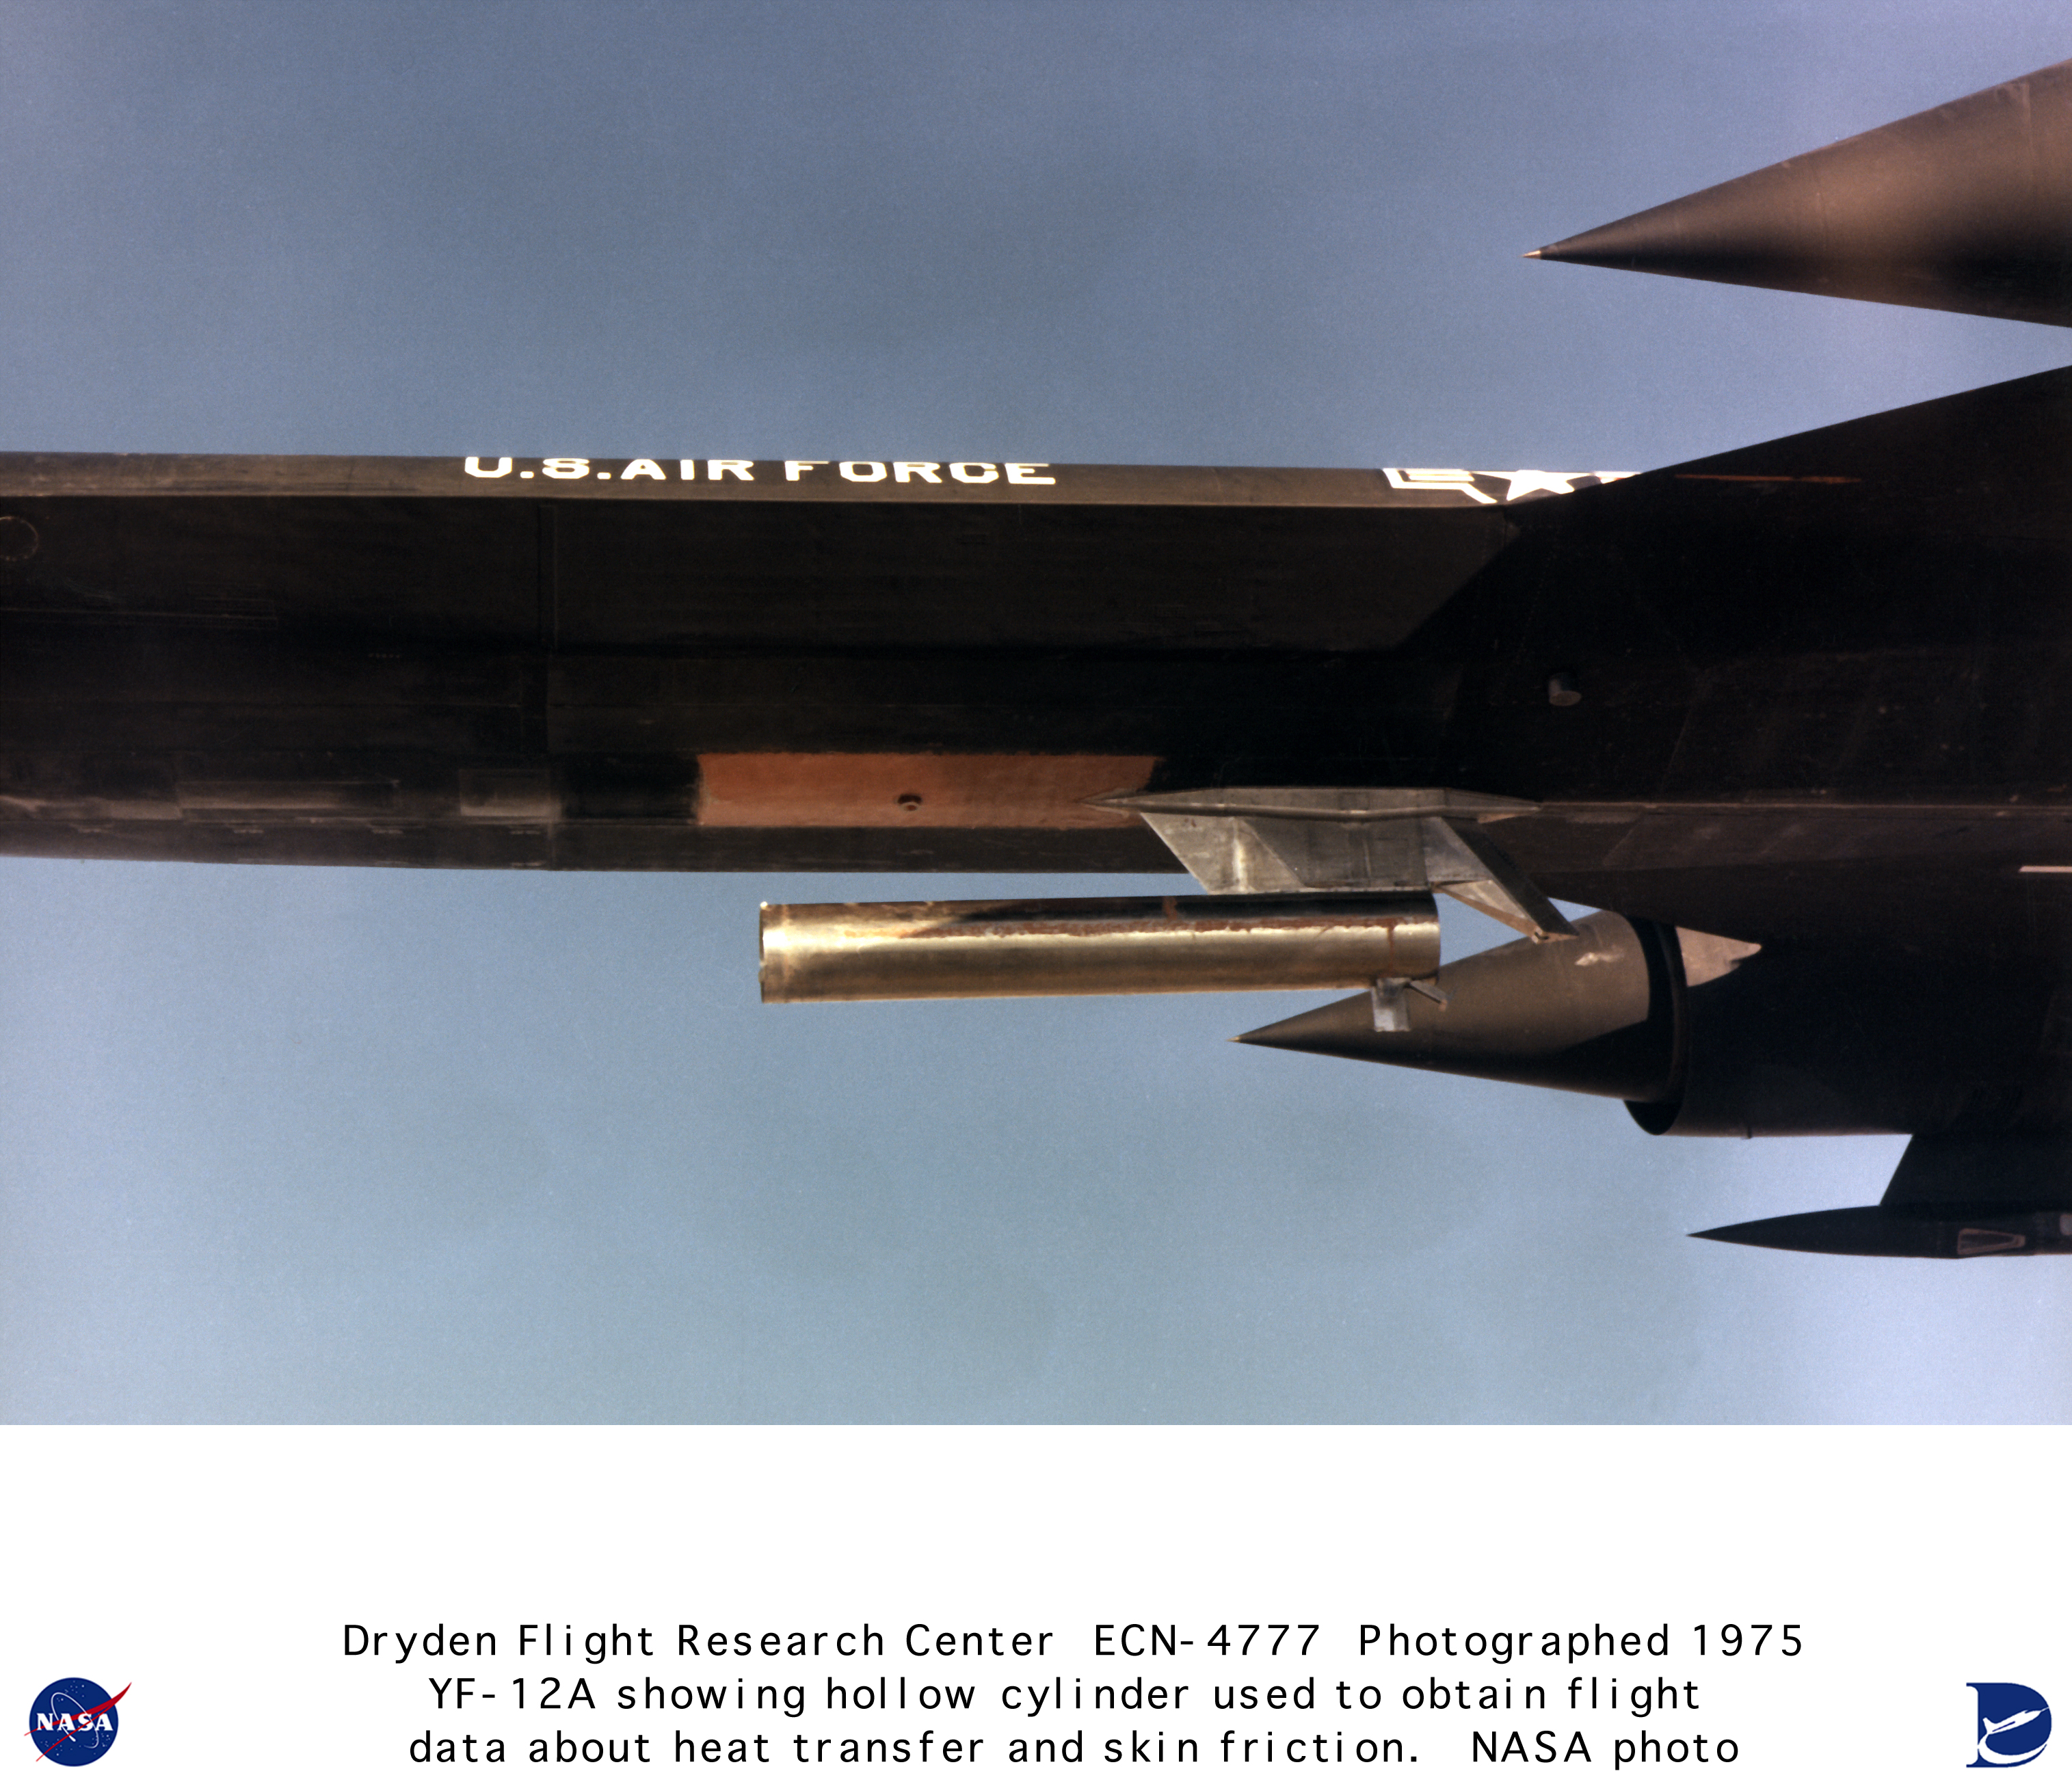
ECN-2788 | Custom-contoured radiant heater system for the YF-12 forebody | alternate |
alternate |
alternate |
 |
EC95-43365-1 | SR-71 Survival Kit with Components - photo by Dennis Taylor | alternate |
||
 |
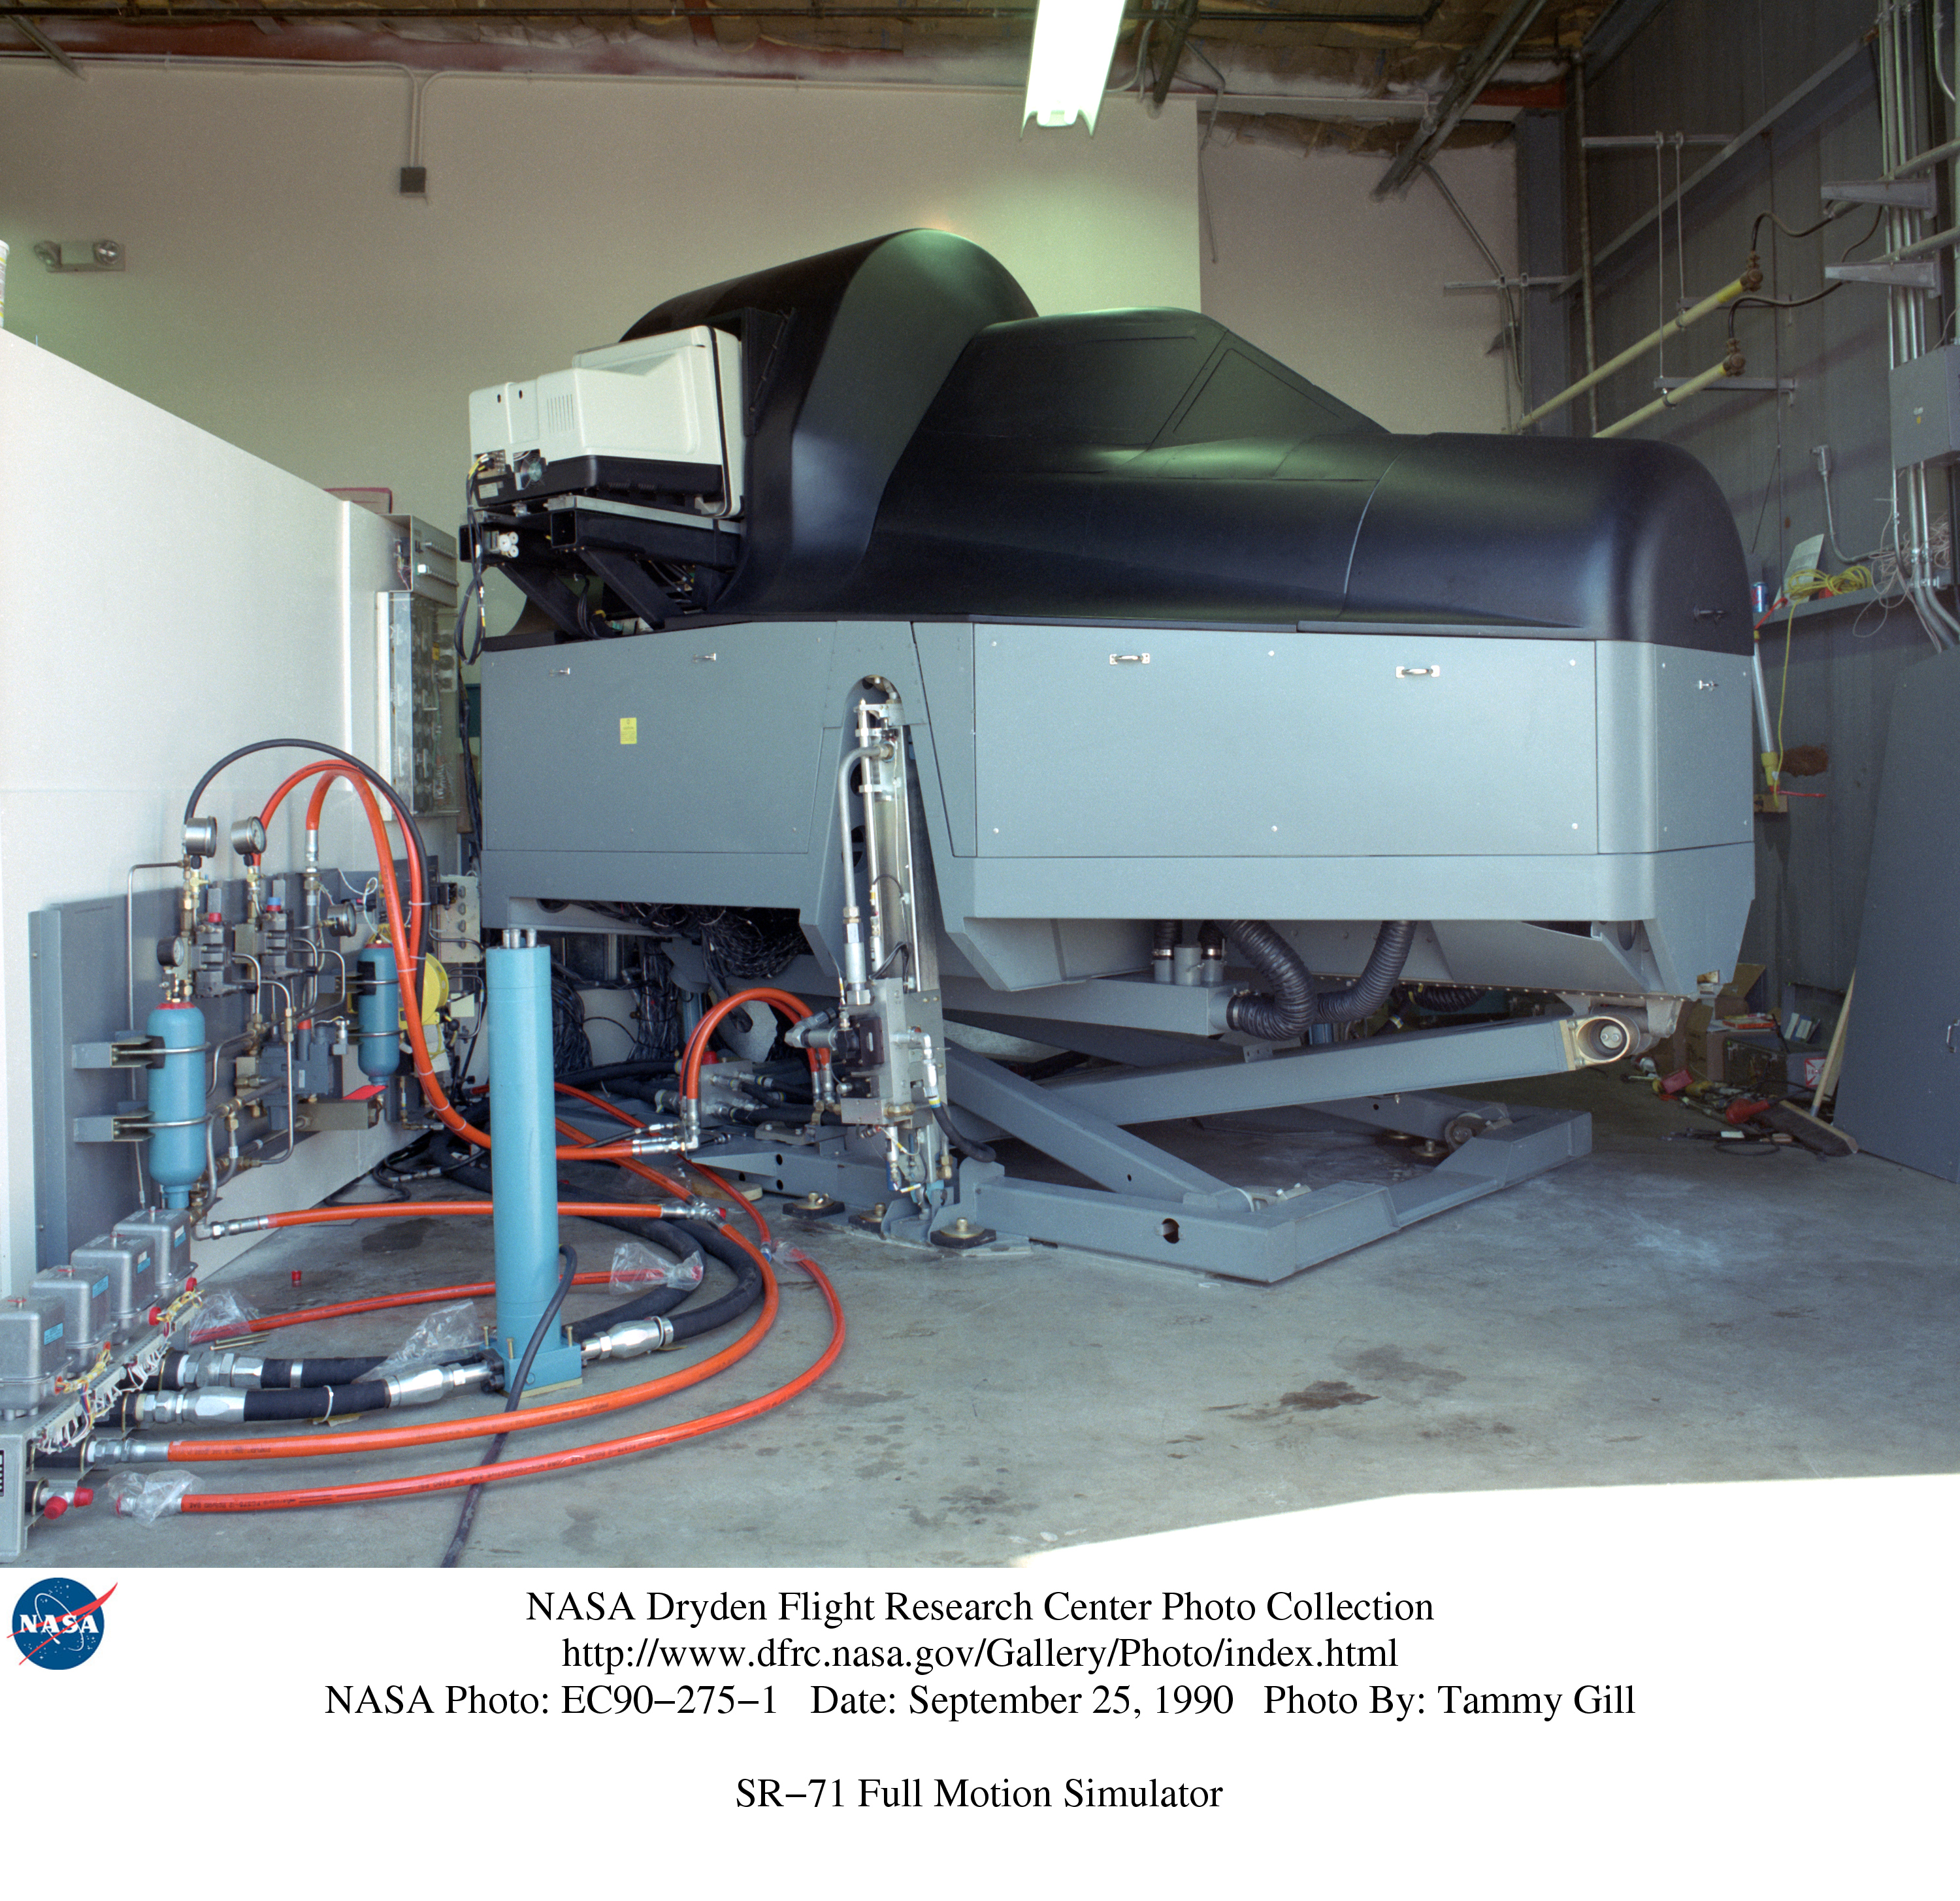
EC90-275-1 | SR-71 full motion simulator - photo by Tammy Gill | alternate |
alternate |
alternate |
 |
EC99-44962-4 | Electronics technician Joe Ciganek with SR-71 full motion simulator - photo by Tom Tschica | alternate |
alternate |
alternate |
 |
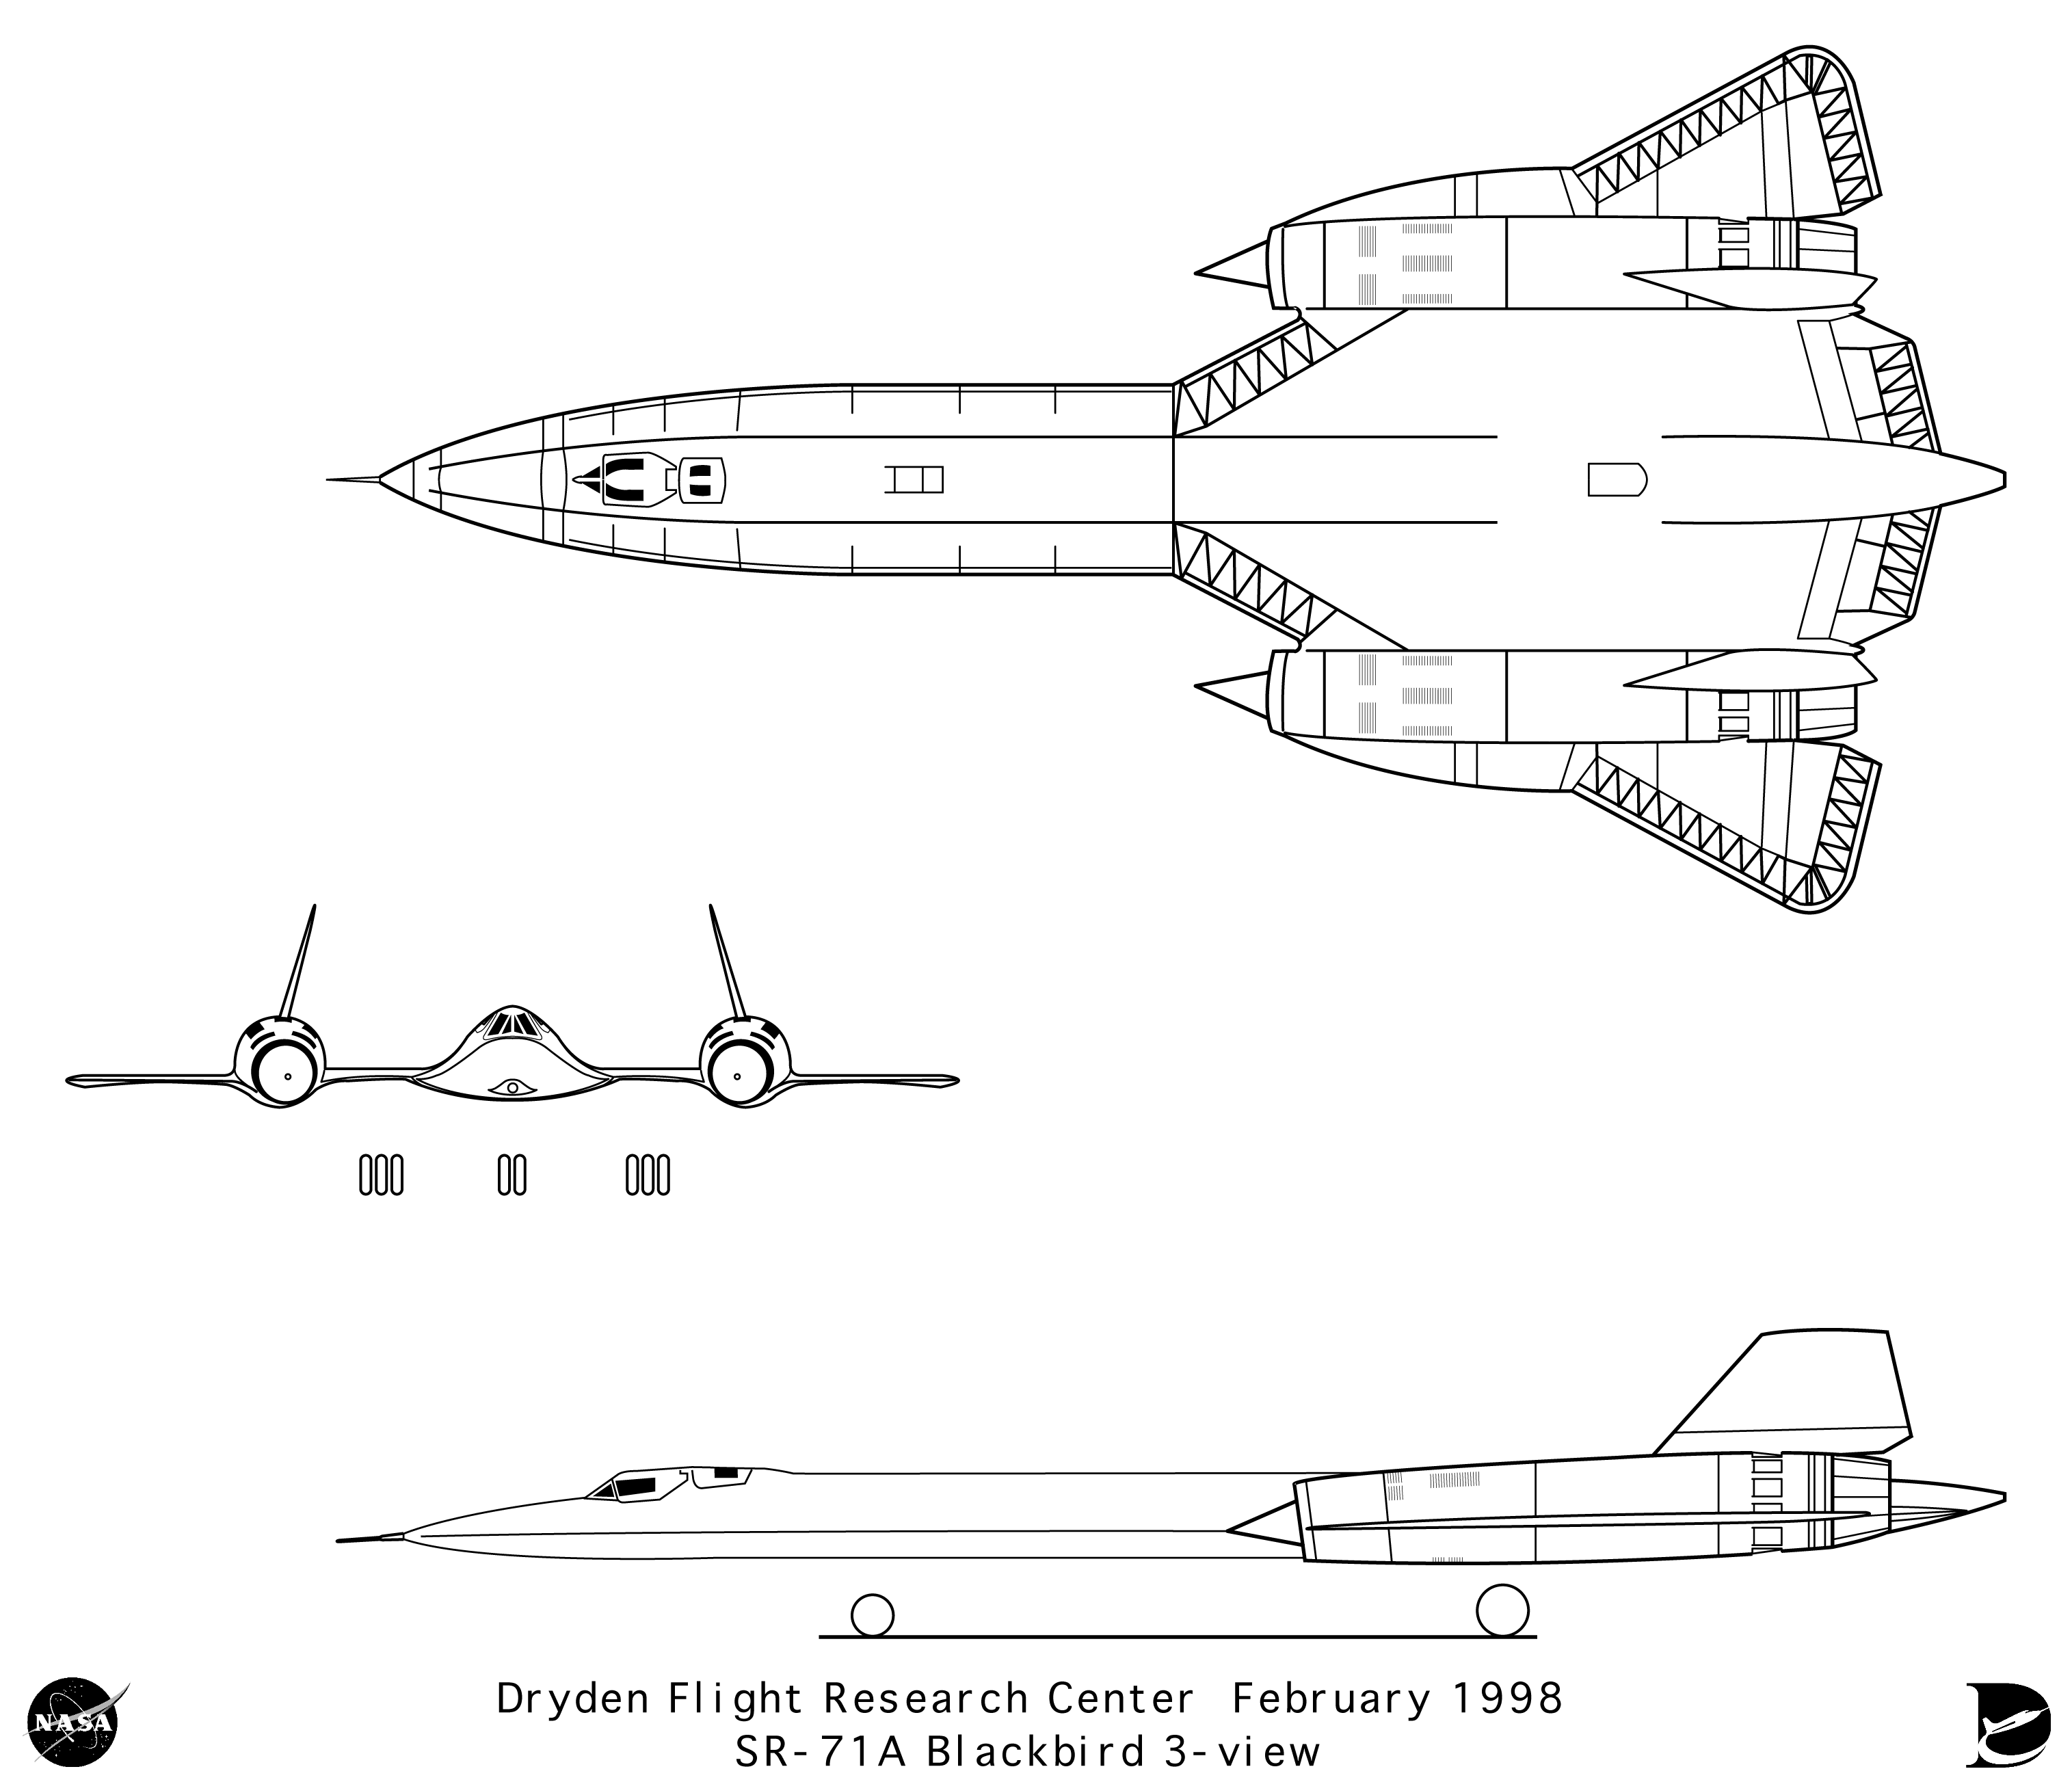
SR-71A_3view | SR-71A 3-View line art | alternate |
alternate |
alternate |
 |
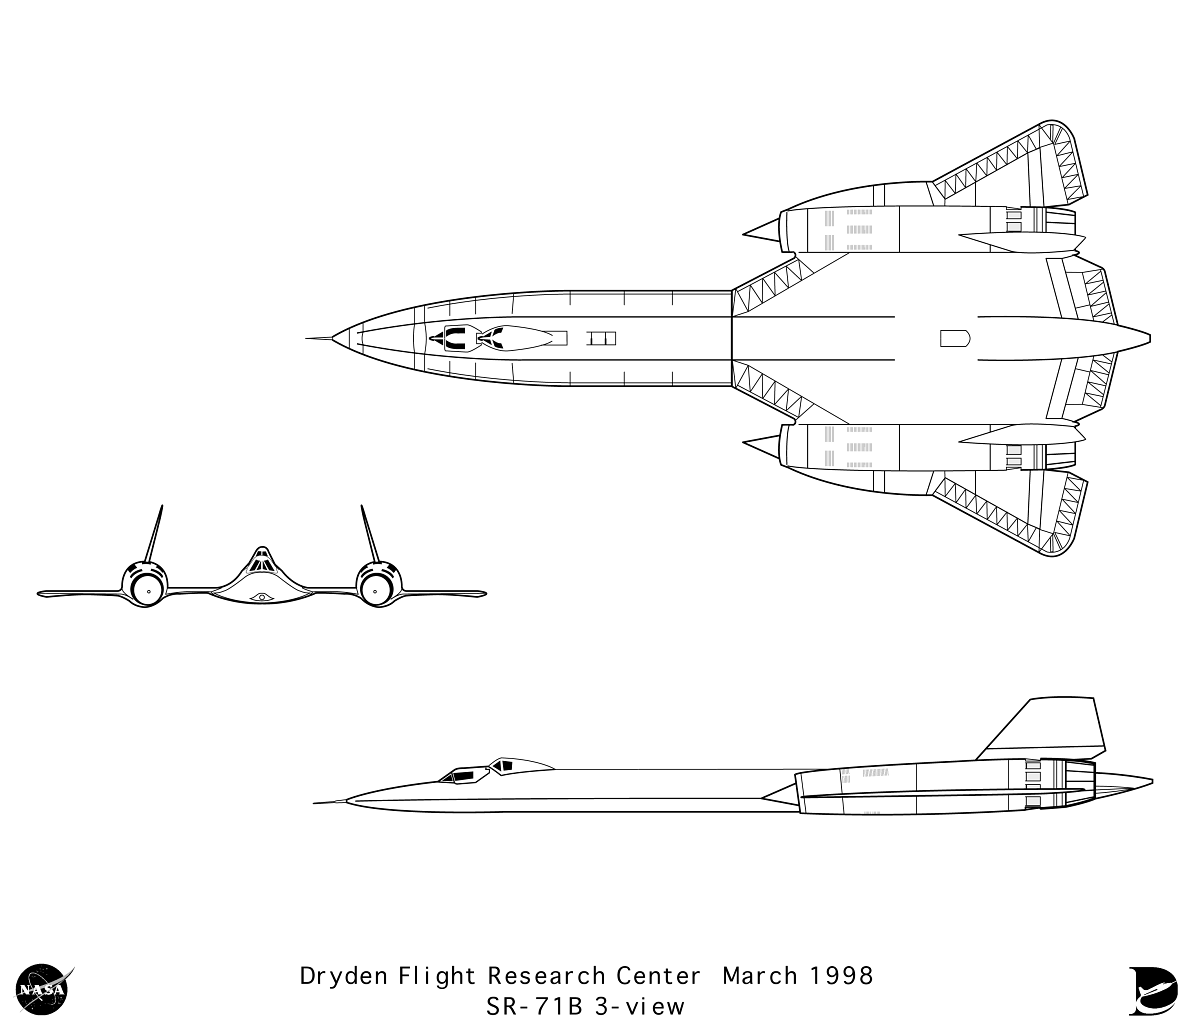
SR-71B_3view | SR-71B 3-View line art | alternate |
alternate |
alternate |
 |
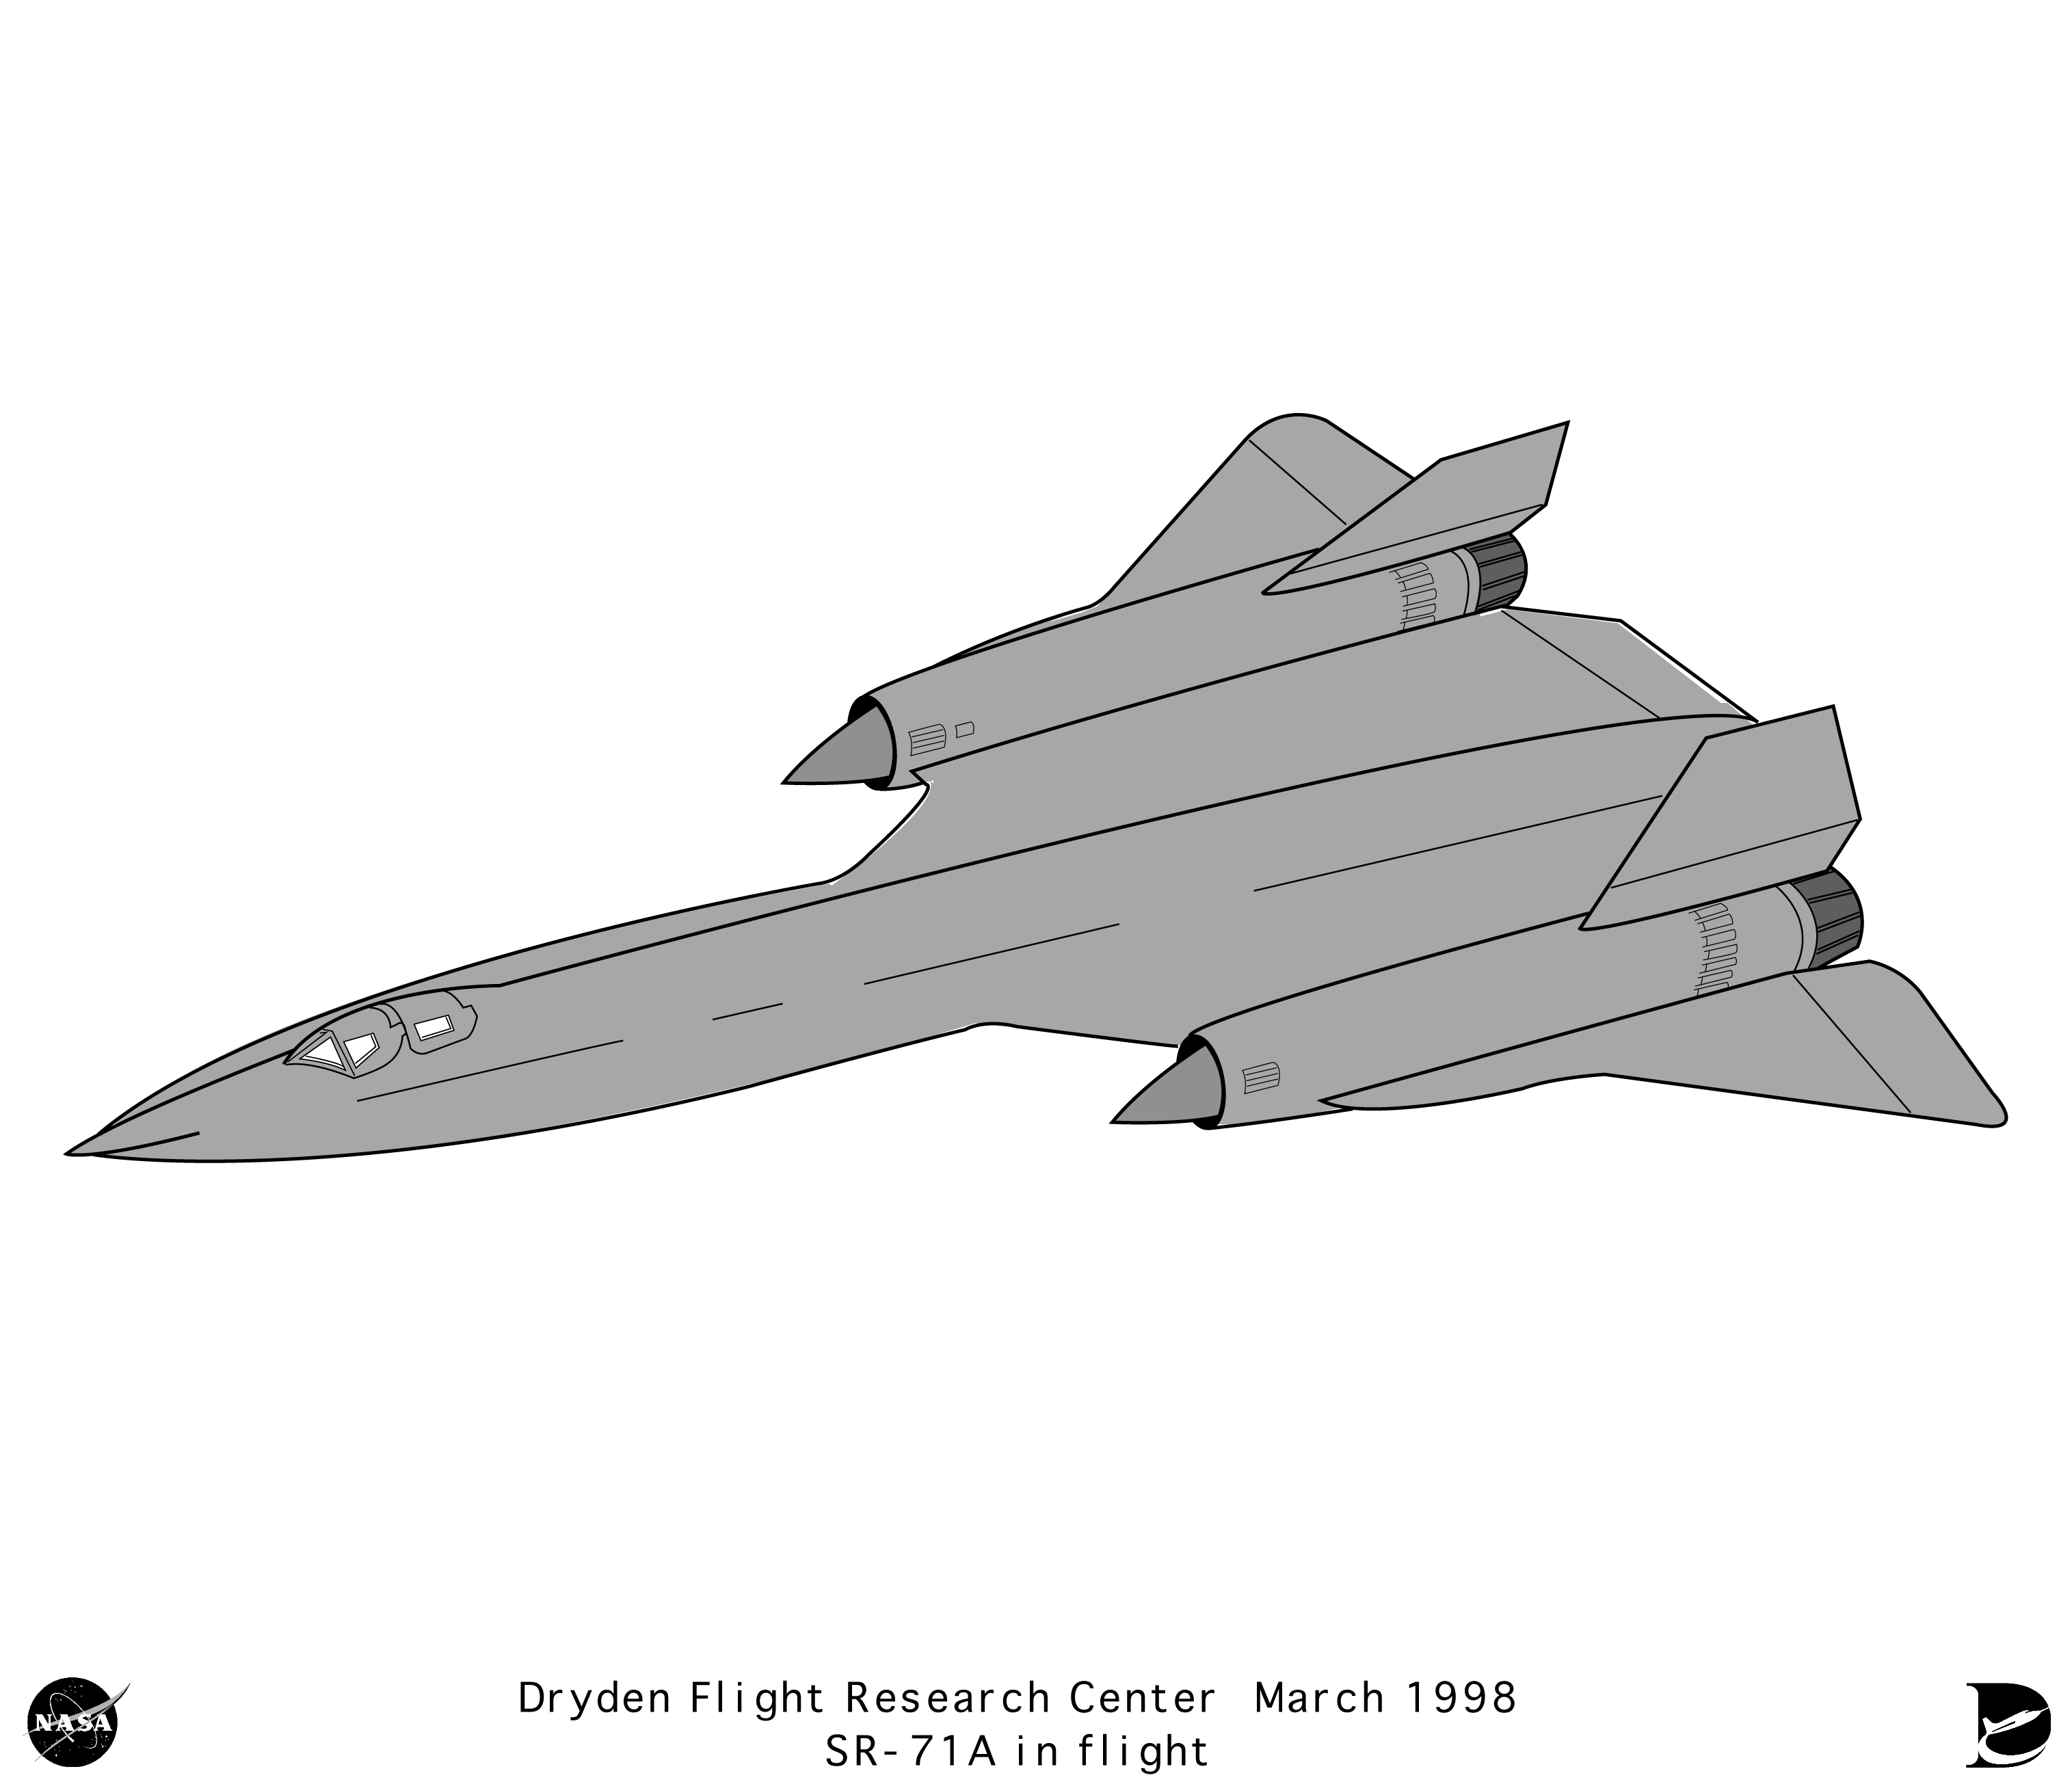
SR-71A_in_flight | SR-71A in flight line art | alternate |
alternate |
alternate |
 |
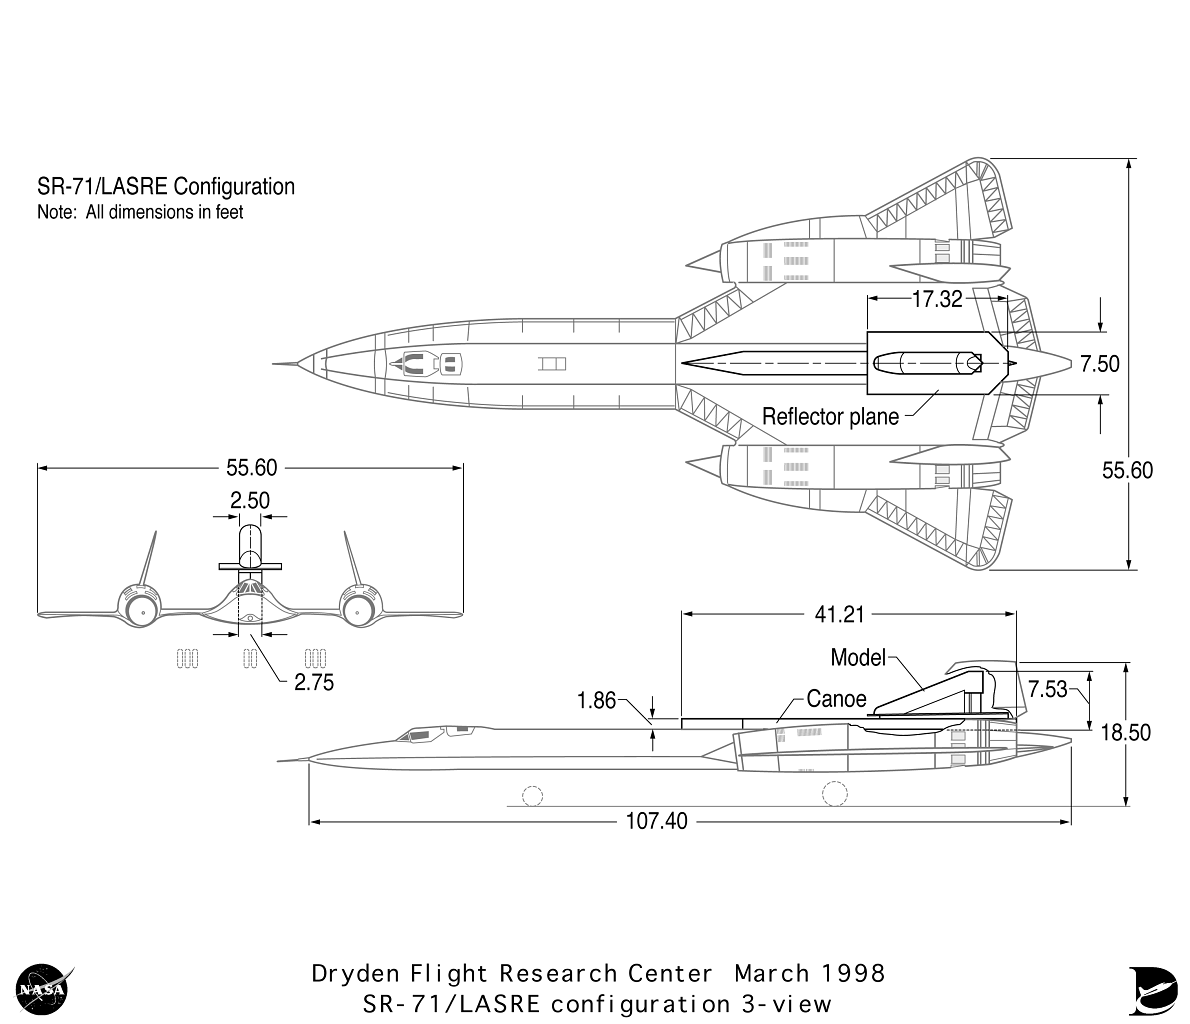
SR-71LASRE_3view | SR-71 LASRE Configuration 3-View line art | alternate |
alternate |
alternate |
 |
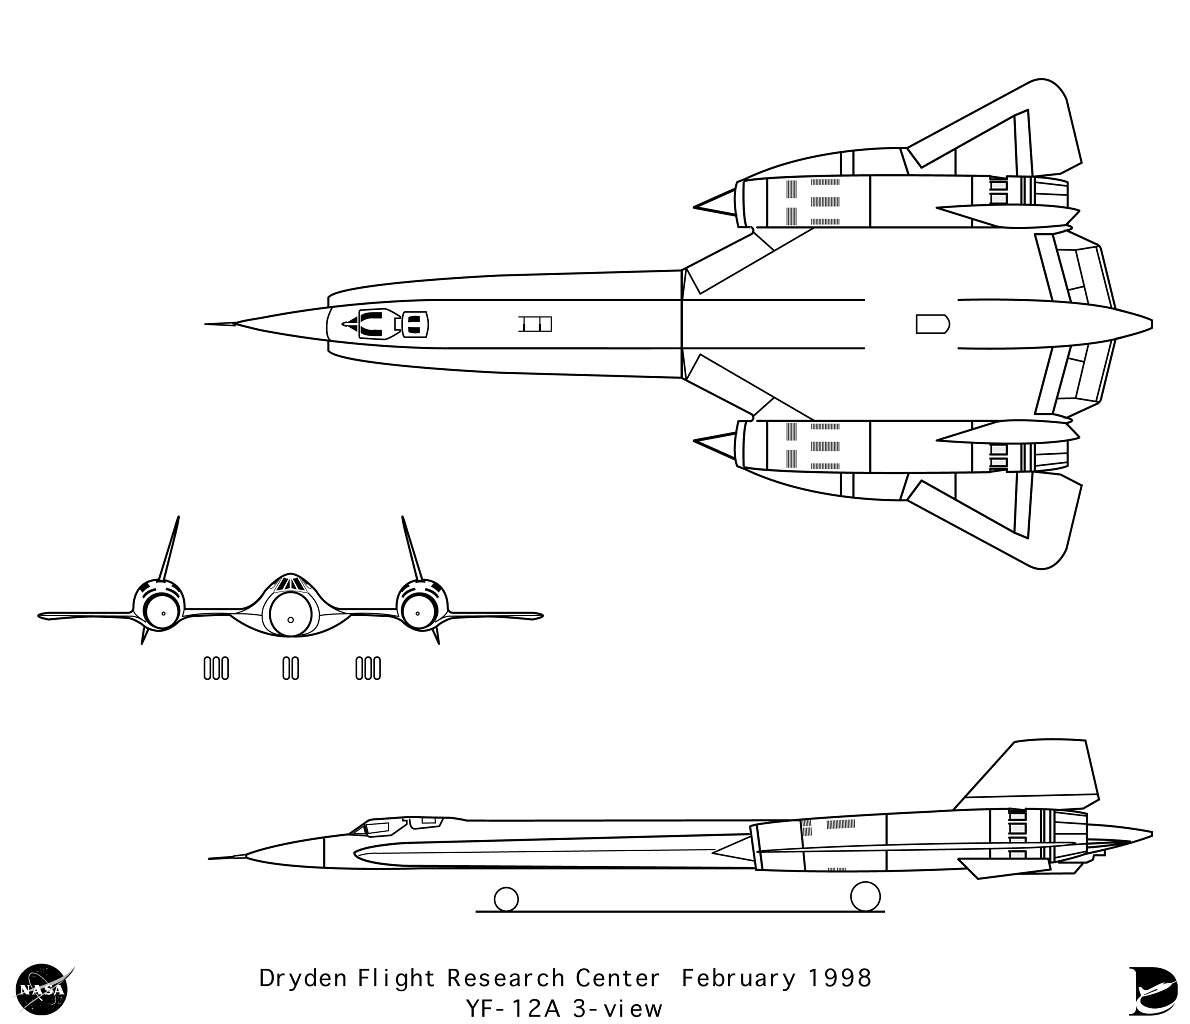
YF-12A_3view | YF-12A 3-View line art | alternate |
alternate |
alternate |
![[Logo: NASA Meatball]](meatball40.gif) |
Responsible NASA Official: | Marty Curry | ![[Logo: Dryden Flying D]](flyingD.gif) |
|
| NASA Page Curator: | Robert Binkley | |||
| Habu.Org mirror page modified: | March 31, 2015 | |||